The success message only proves the form responded on the page. It does not prove the email action ran correctly, WordPress sent the message, the SMTP mailer accepted it, or the mailbox delivered it to the right folder. Use the checks below to find where the path is breaking. You can also paste your form URL into our free form checker first to see how the form is structured before you start digging.
First, run a real Ninja Forms test
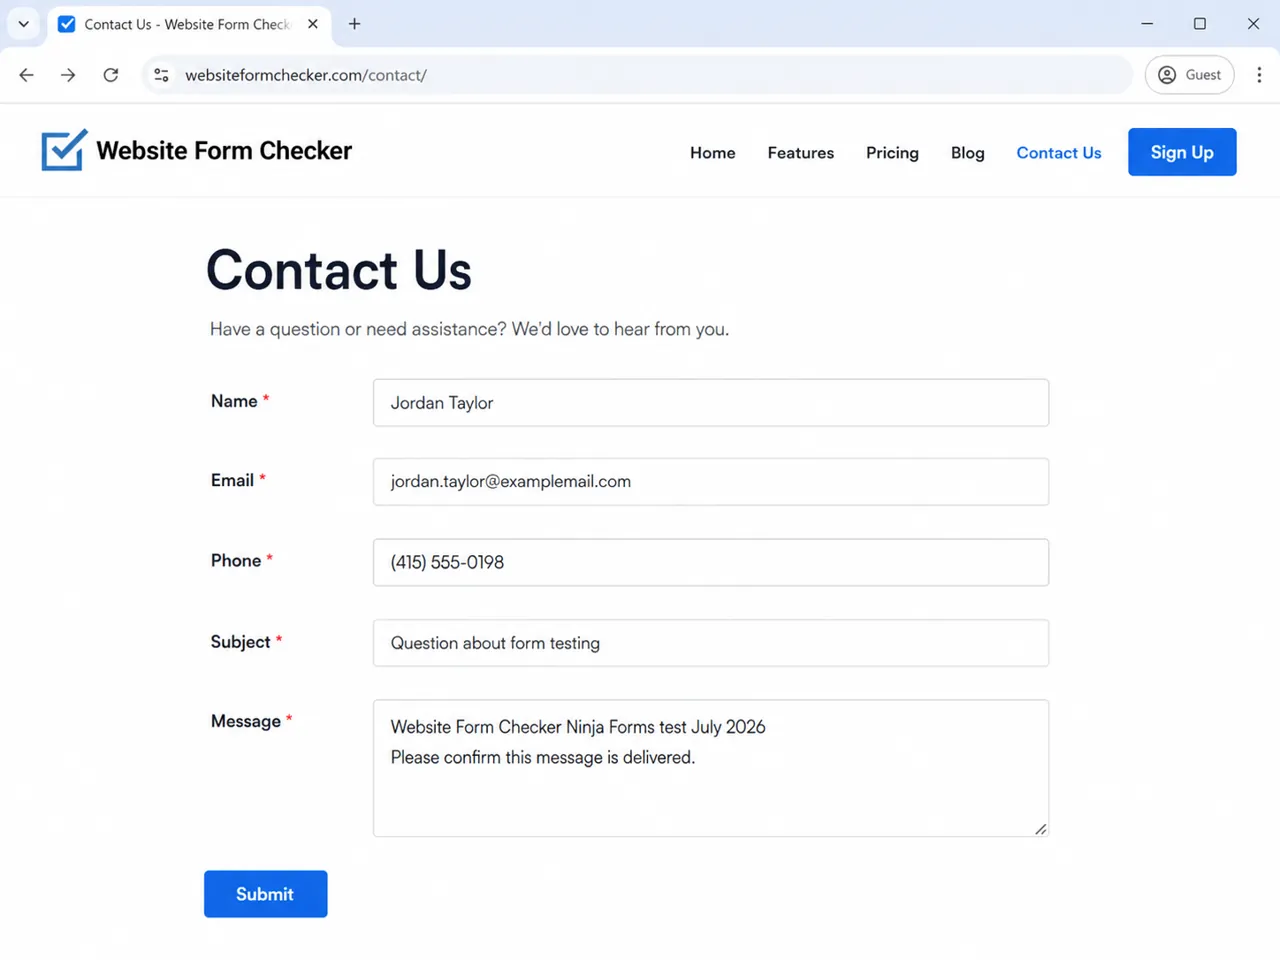
Start on the live contact page, not only inside the WordPress dashboard. Open the page in a private browser window and submit the form like a real visitor would.
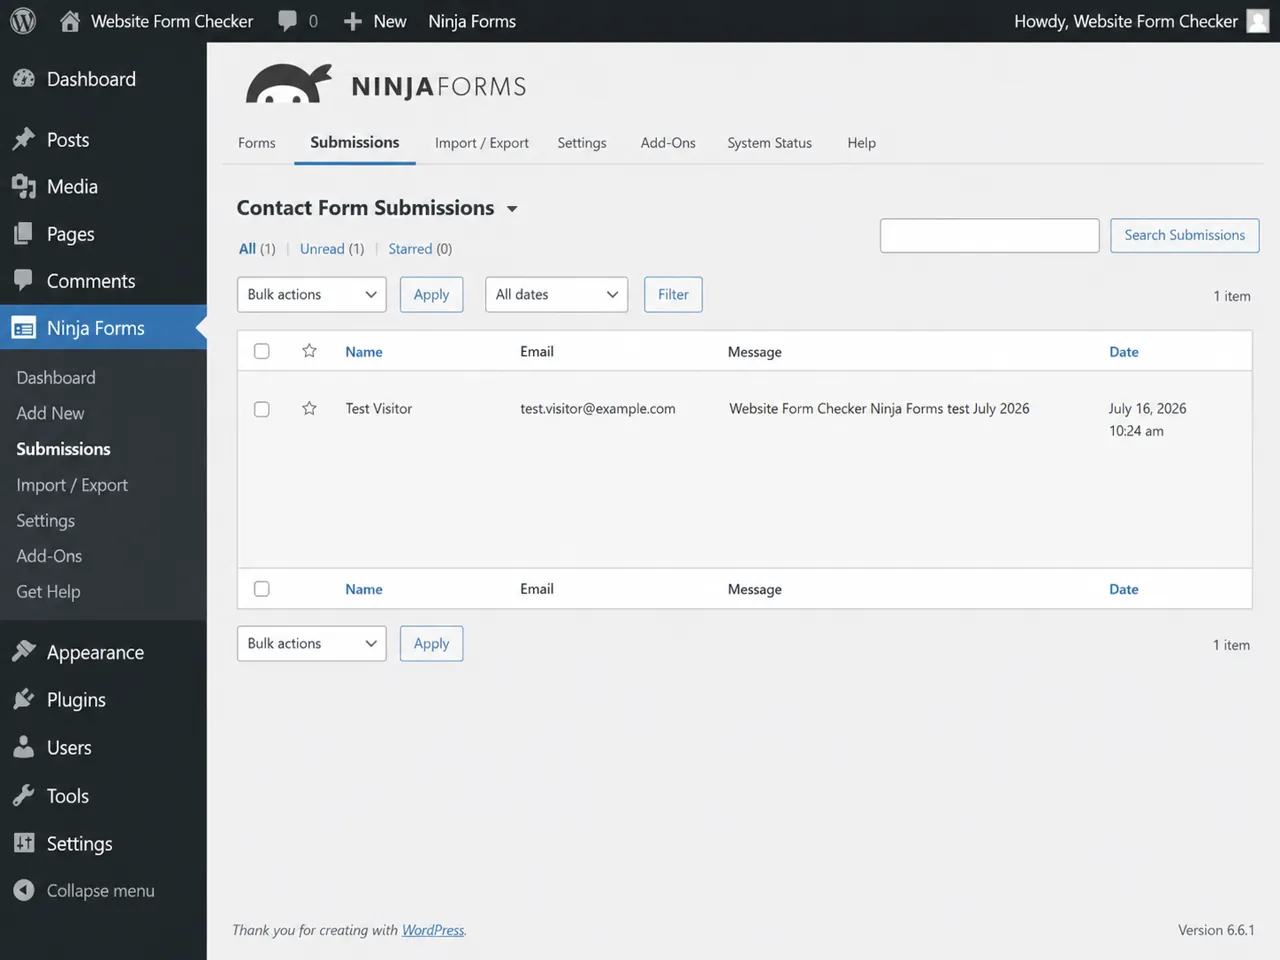
Use a unique phrase you can search for later, such as Website Form Checker Ninja Forms test July 2026. Put it in the message field, and use an email address you control so you can test Reply-To later.
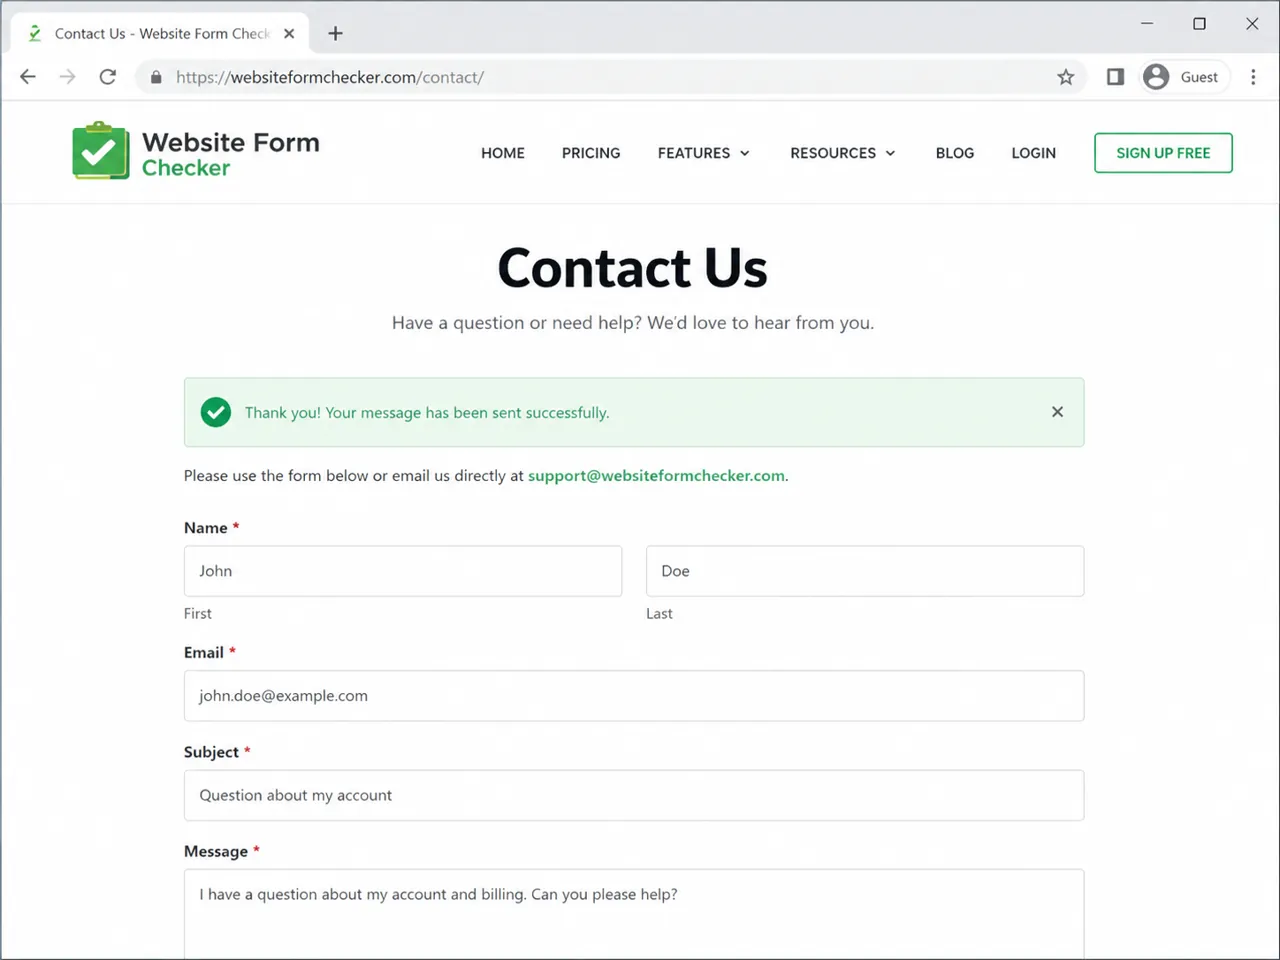
Do not trust the confirmation message by itself
After submitting the form, note exactly what happens on the page. If the form shows a confirmation message, the front-end submission likely completed. That still does not mean the notification email arrived.
If the page reloads, shows an error, spins forever, or never confirms the submission, troubleshoot the form first. Check required fields, JavaScript errors, caching, security rules, reCAPTCHA, and plugin conflicts before spending time on inbox delivery.
Open the Emails & Actions tab
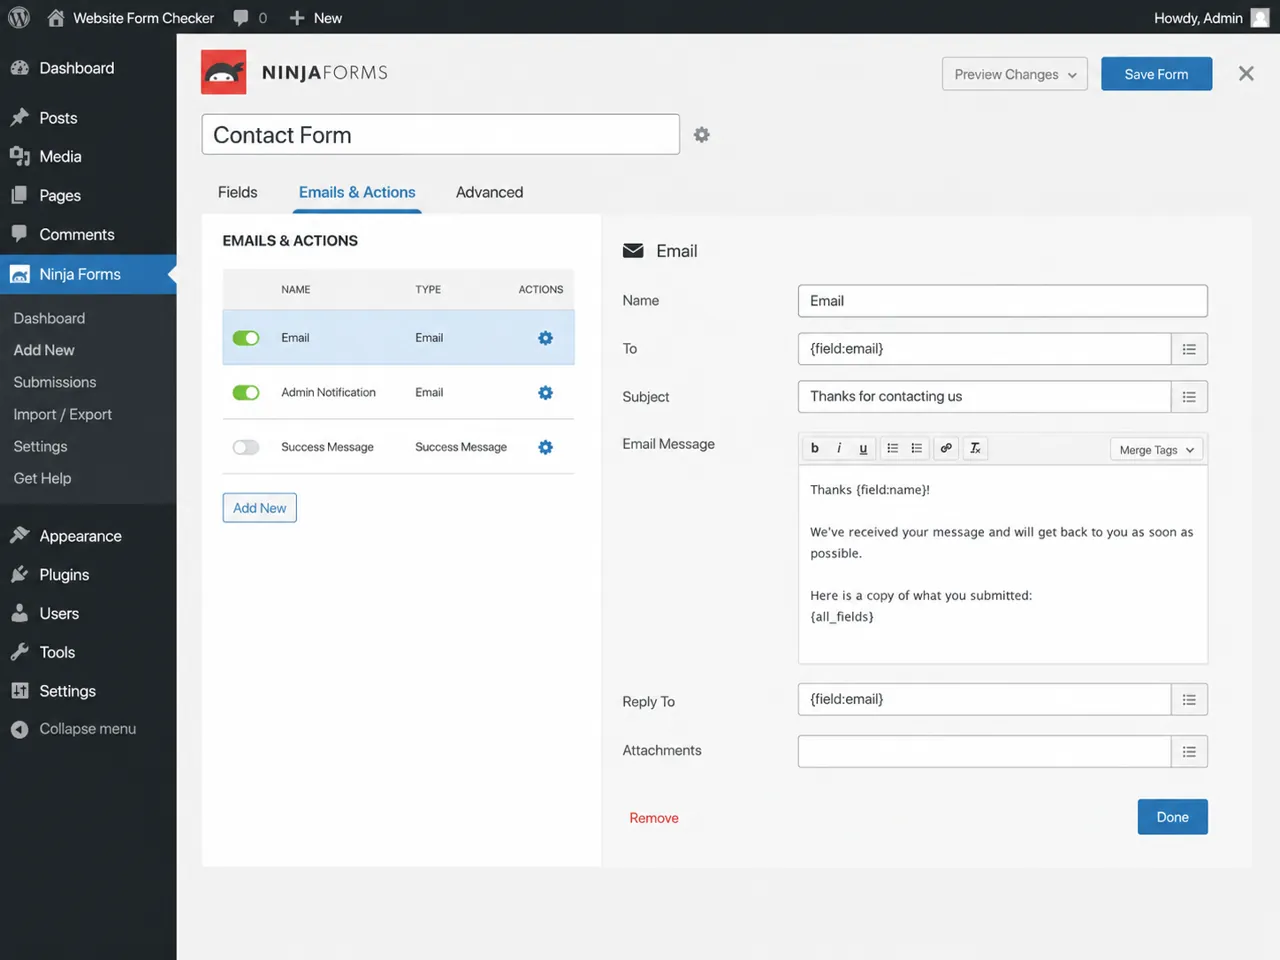
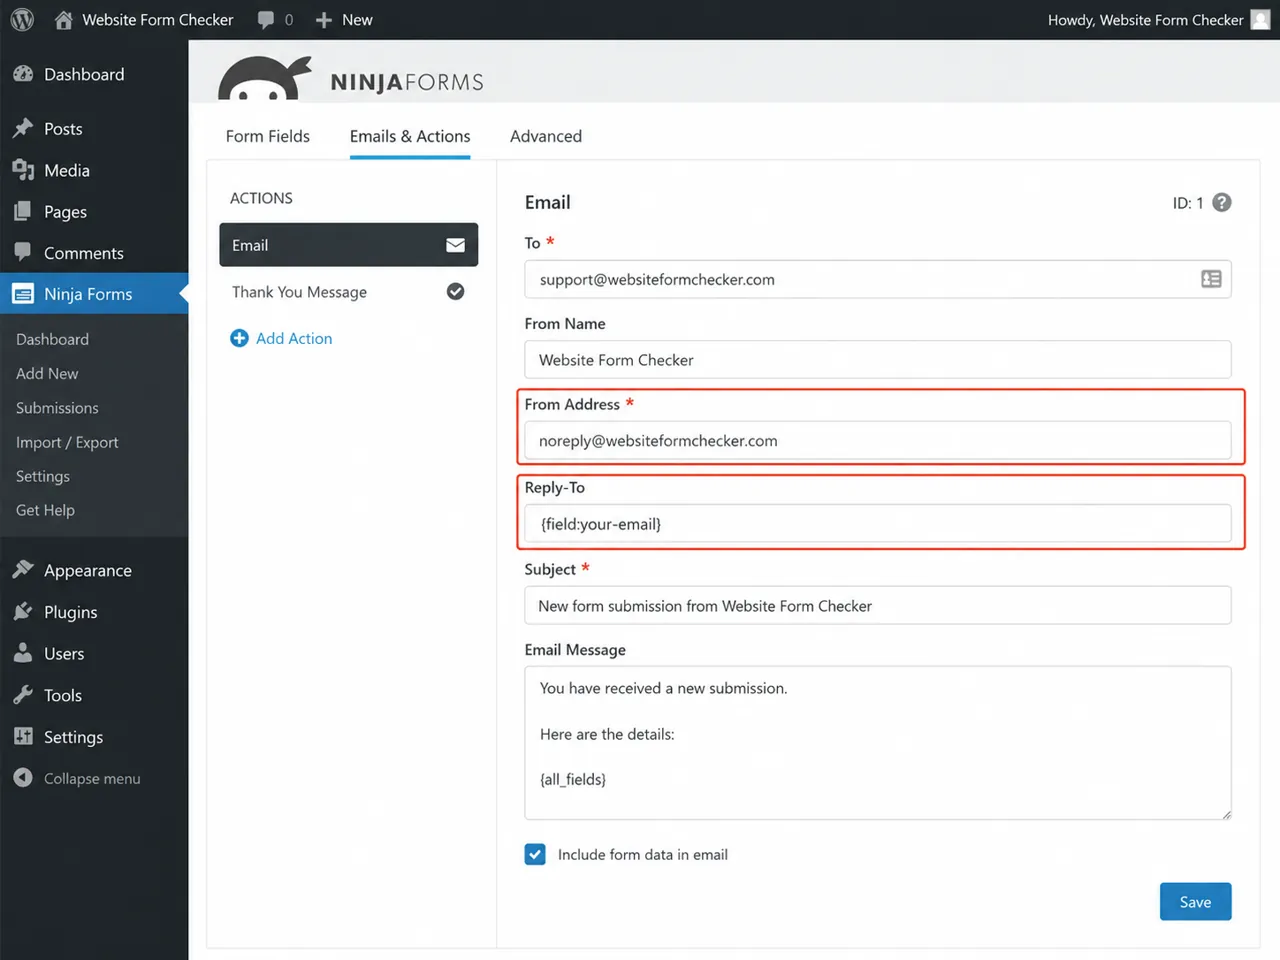
In Ninja Forms, each form can have actions that run after submission. The Email Action controls who receives a notification and what that email contains. Open the form in WordPress and go to the Ninja Forms > Emails & Actions tab.
Make sure the email action you expect is present and enabled. If there are multiple email actions, review each one. A form can send a visitor confirmation, an admin notification, or more than one internal notification, and each action can have different settings.
Check the To field
Open the email action and check the To field first. This is the recipient for the Ninja Forms notification. It should be a real business inbox, such as [email protected], [email protected], or the address your team uses for leads.
Look for typos, old employee addresses, missing commas between multiple recipients, or merge tags that point to the wrong field. If you are trying to notify your team, do not use the visitor email field as the only To address.
Check From Address and Reply-To
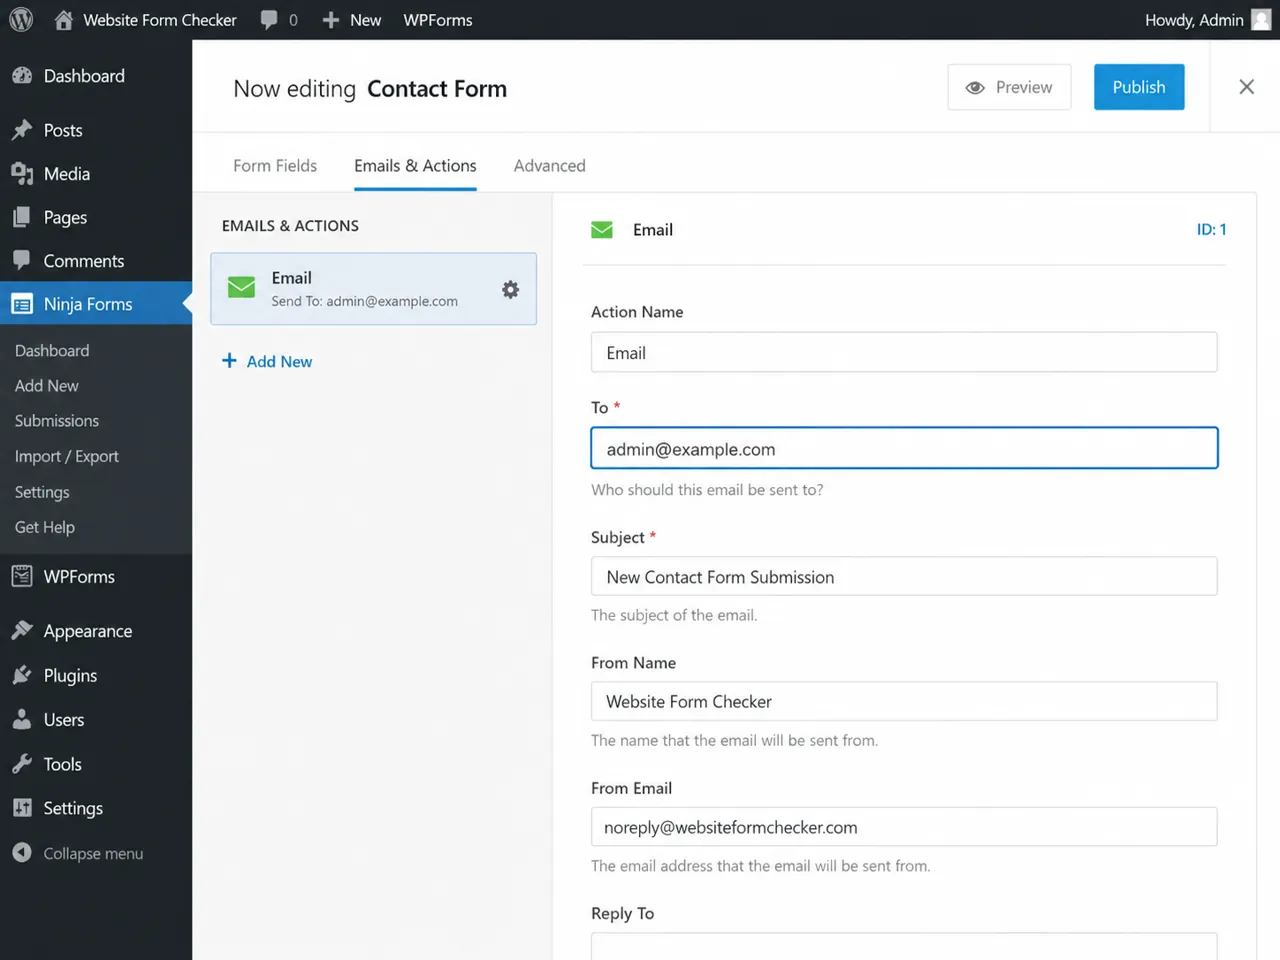
The From Address should usually use your own domain, such as [email protected] or [email protected]. Avoid using the visitor email as the From Address. Your website is not authorized to send from the visitor's Gmail, Yahoo, or company domain, so inbox providers may reject or filter the message.
Use the visitor email field in Reply-To instead. That keeps the message sent from an address your site can authenticate, while still letting your team click reply and respond to the lead.
Check the email message body
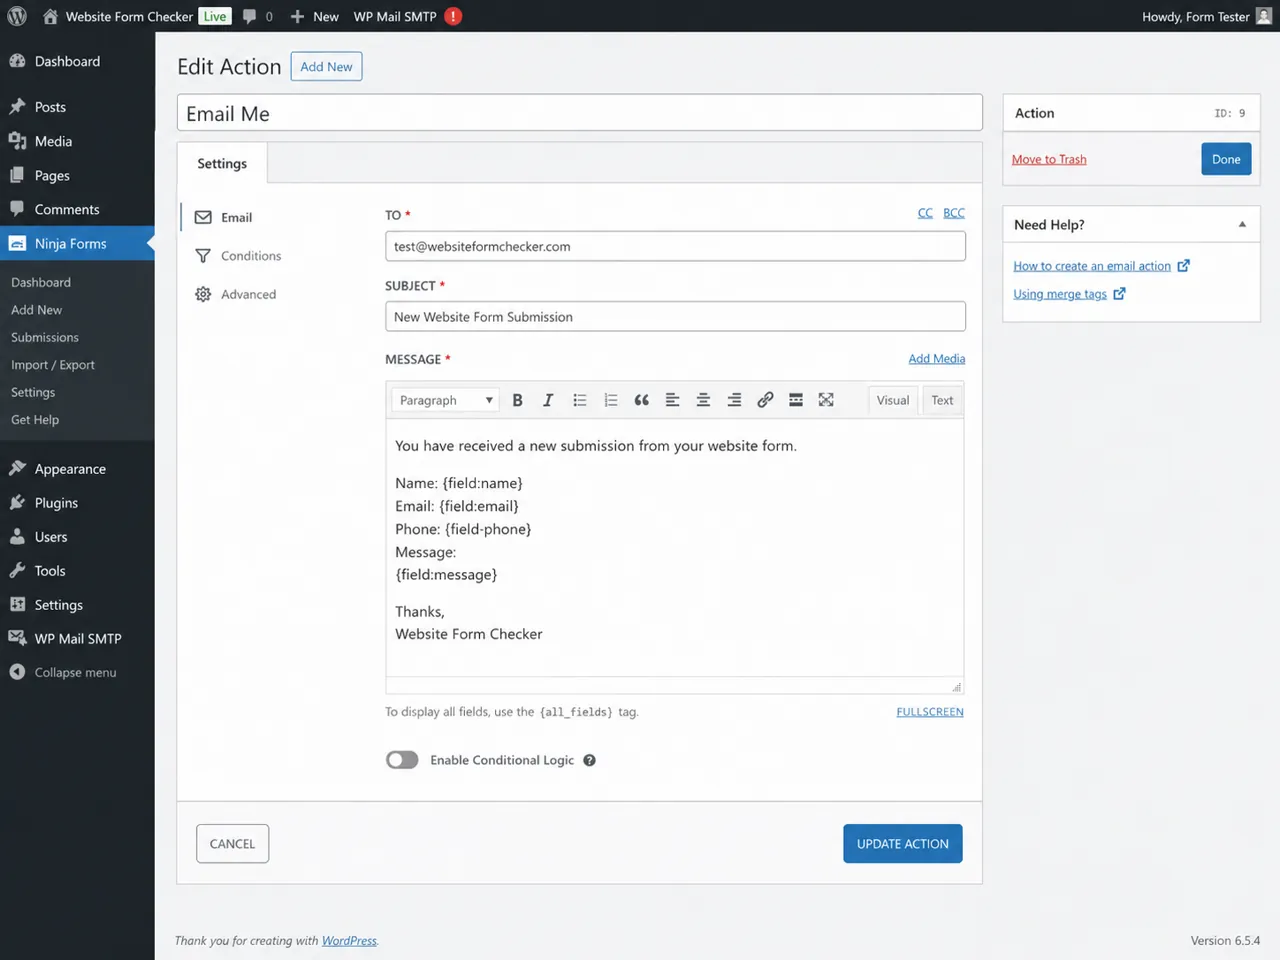
Open the email message body and confirm it includes the fields your team needs. At minimum, most contact form notifications should include name, email, phone, subject, and message. If you track where a lead came from, include the page URL or hidden source field too.
If the message body is empty or uses the wrong merge tags, the notification may arrive without the lead details. That can look like Ninja Forms emails not sending, even though the email is technically arriving.
Check whether the submission was saved
Next, separate the form submission from the email notification. In WordPress, go to Ninja Forms > Submissions and choose the form you tested. Search for your unique test phrase.
If the submission exists, the form accepted the entry. The problem is likely the email action, WordPress email, SMTP, spam filtering, or inbox rules. If there is no saved submission, check whether submission storage is enabled and whether the form is actually submitting on the live page.
Test WordPress email through SMTP
If the Ninja Forms settings look correct, test whether WordPress can send mail at all. Many WordPress sites rely on the default server mail function, which can be unreliable or blocked by hosting rules.
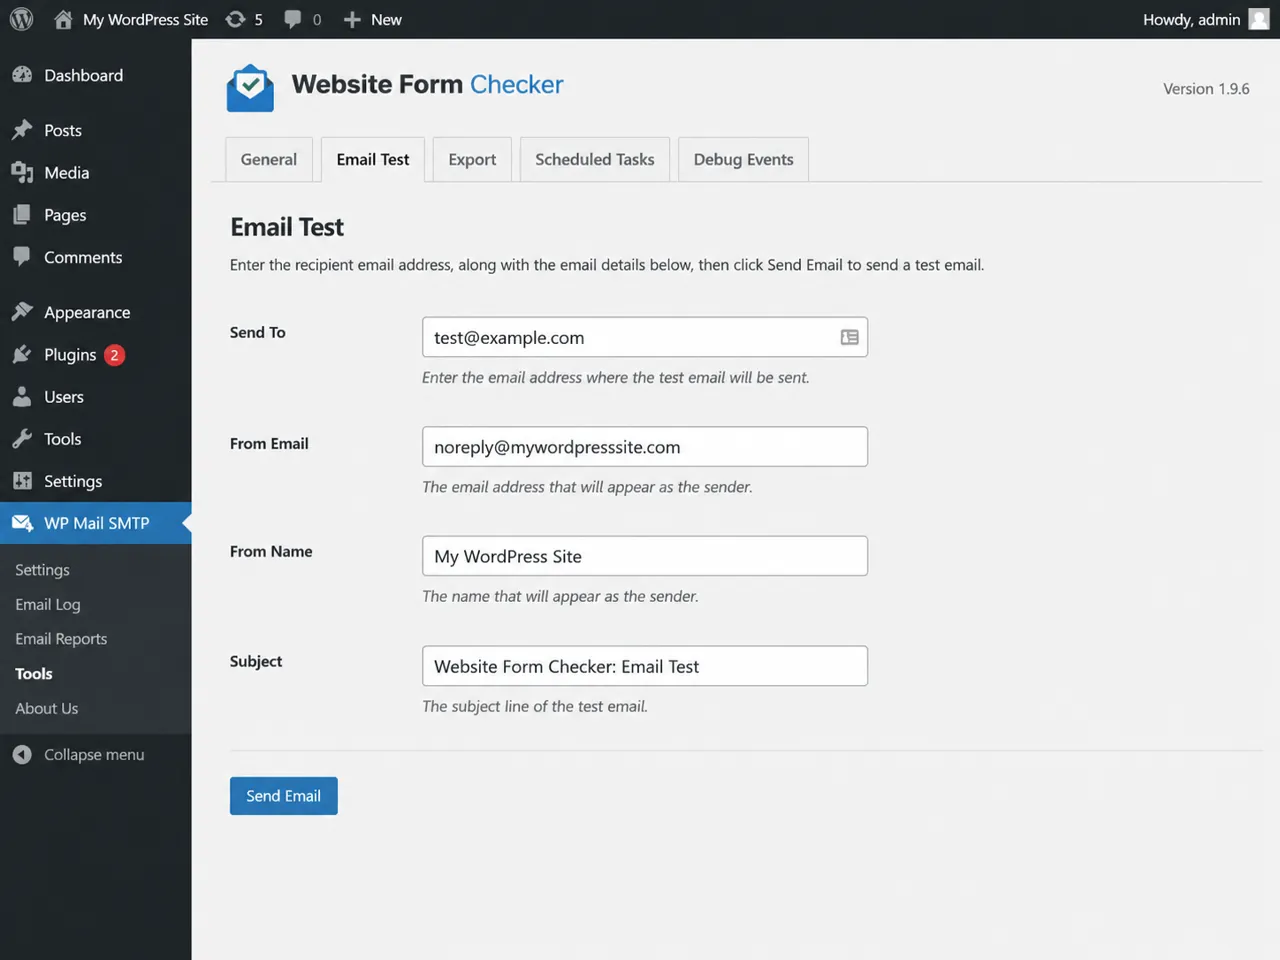
An SMTP plugin connects WordPress to a real mailer. In WP Mail SMTP, go to WP Mail SMTP > Tools > Email Test and send a test message to an inbox you control. If the SMTP test fails, fix the mailer before changing Ninja Forms again.
Check the selected mailer, sender email, login or API key, port, encryption, and any host warnings about blocked outbound mail. A broken SMTP setup can make every Ninja Forms notification fail, even when the form action is correct.
Search the inbox, spam folder, and filters
If the submission exists and SMTP works, search the mailbox. Use the exact phrase from your test message and search inbox, spam, junk, all mail, deleted items, promotions, and quarantine.
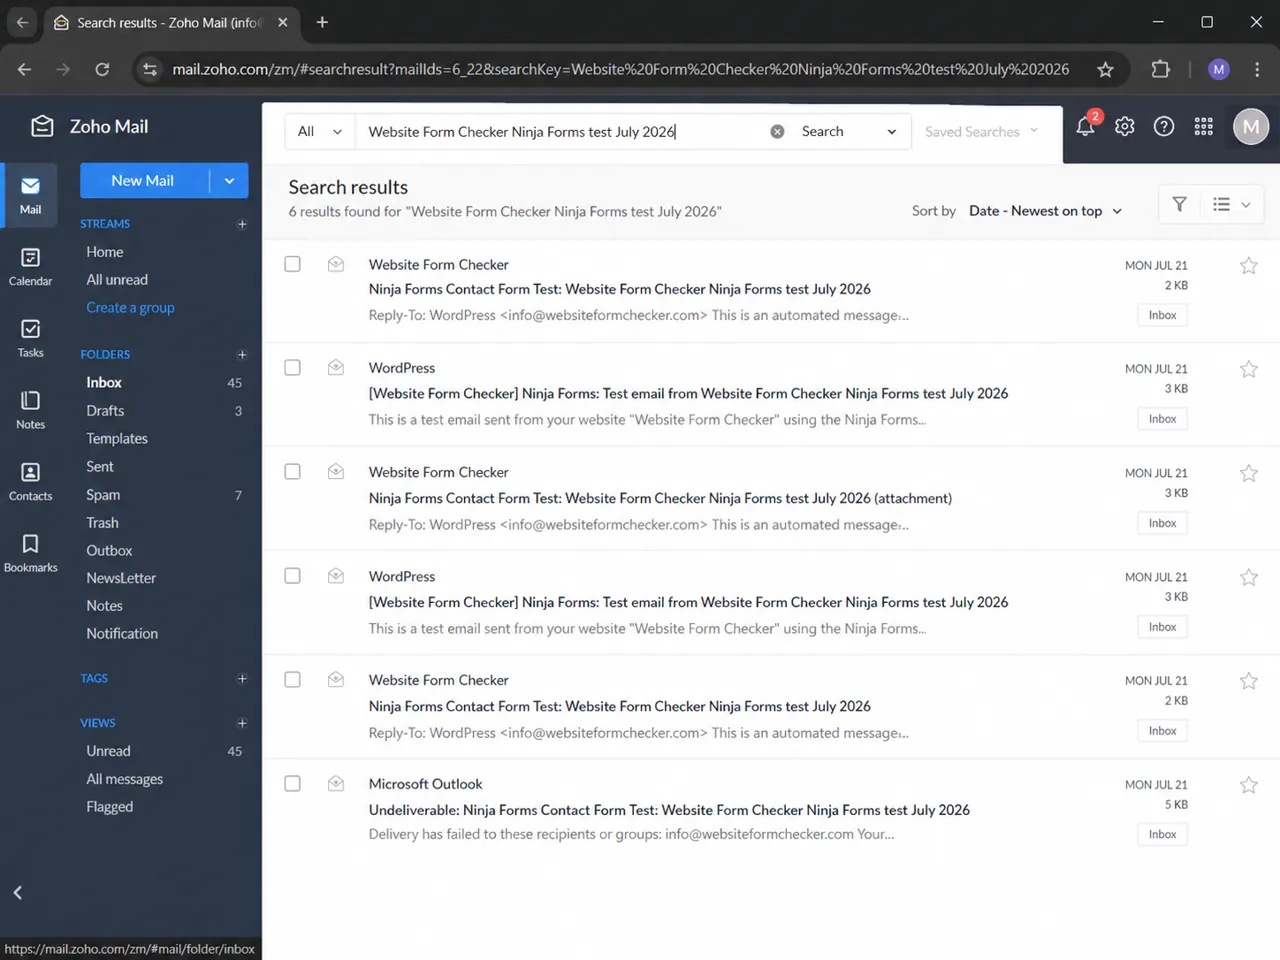
Also check mailbox filters and forwarding rules. A rule may be archiving notifications, marking them as read, moving them into a folder, forwarding them to an old employee, or deleting them before anyone sees them.
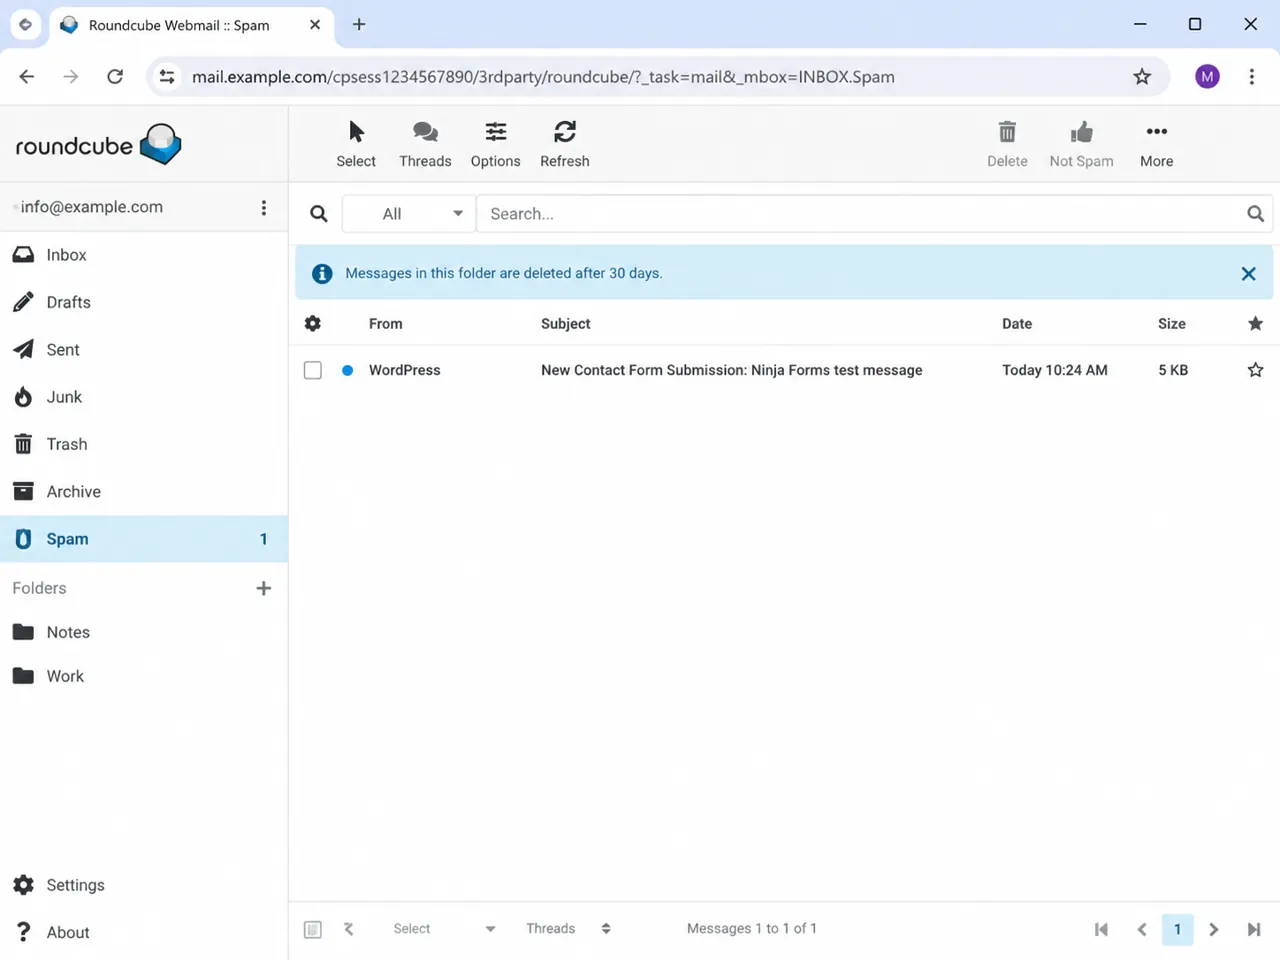
If the notification lands in spam, the form may be working but the sender setup is weak. Review the From Address, subject line, email content, links, and domain authentication records such as SPF, DKIM, and DMARC. These authentication problems are one of the most common silent failures, covered in more depth in 10 reasons your contact form is silently broken.
Check anti-spam, caching, and conflicts
If Ninja Forms works sometimes but not every time, look at anything that touches form submission. reCAPTCHA, honeypot fields, security plugins, firewalls, optimization plugins, and page caching can interrupt a form before the email action runs.
Test in a private browser window and repeat the same phrase. If you have a staging site, disable non-essential plugins there and test again. Change one thing at a time so you know which setting actually fixed the issue.
Run one final end-to-end test
Before calling the issue fixed, test the full live path. Submit the public Ninja Forms contact form, confirm the success message, check the submission record if available, and confirm the notification arrives in the correct inbox.
Open the email and verify that the name, email, phone, subject, and message are present. Then click reply. The reply should go to the visitor email address, not to your own sender address.
How to catch this next time before leads go missing
Once the form is fixed, the next problem is knowing when it breaks again. Plugin updates, SMTP password changes, DNS changes, spam rules, hosting changes, and mailbox filters can all break Ninja Forms notifications later without changing how the form looks on the page.
That is the gap Website Form Checker is built to watch. It sends real test submissions through your form on a schedule and alerts you if they stop arriving, so you catch the issue before a real customer gets ignored.
Use monitoring after the fix, not instead of the fix. First make Ninja Forms, the email action, SMTP, submissions, and the inbox work. Then monitor the live form so a silent failure does not sit unnoticed.
Quick checklist
- A live Ninja Forms test was submitted from the public page.
- A unique test phrase was used in the message field.
- The form showed a clear success message.
- The Emails & Actions tab was checked.
- The email action is enabled.
- The To field uses the correct business inbox.
- The From Address uses an address on your domain when possible.
- Reply-To uses the visitor email field.
- The message body includes the required merge tags.
- Submissions were checked in Ninja Forms > Submissions.
- SMTP was tested from WordPress.
- Inbox, spam, quarantine, filters, and forwarding rules were checked.
- Anti-spam, reCAPTCHA, caching, and plugin conflicts were tested if needed.
- A final live test reached the correct inbox with complete lead details.
Test your form right now, free
Paste your contact form URL. We'll open it in a real browser, find the form, detect spam protection, and tell you whether it's structured to actually deliver submissions. Takes about 20 seconds.
Run a free audit →