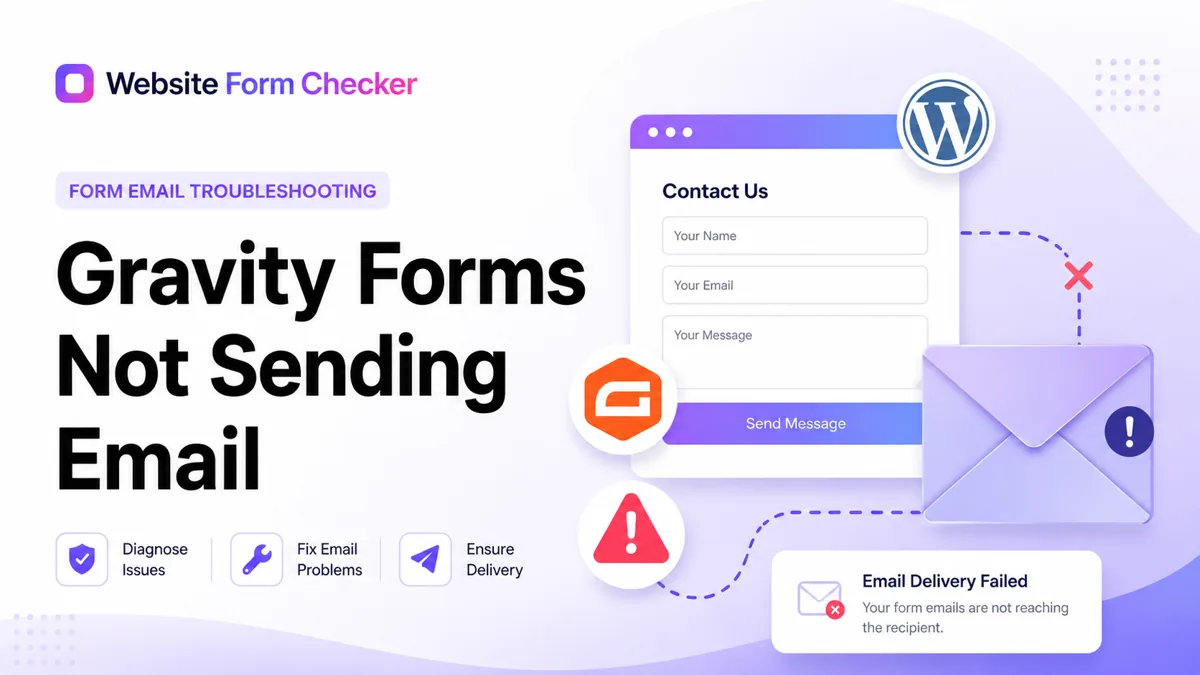
This guide uses a settings-to-inbox workflow for diagnosing Gravity Forms not sending email. Instead of changing every setting at once, you will create one controlled test submission, follow it through Gravity Forms, check the WordPress mail layer, and prove whether the notification arrived, failed, or was filtered. If you want a quick outside read on how the form is structured before you start, paste your form URL into our free form checker first.
Before you change settings, create one controlled test
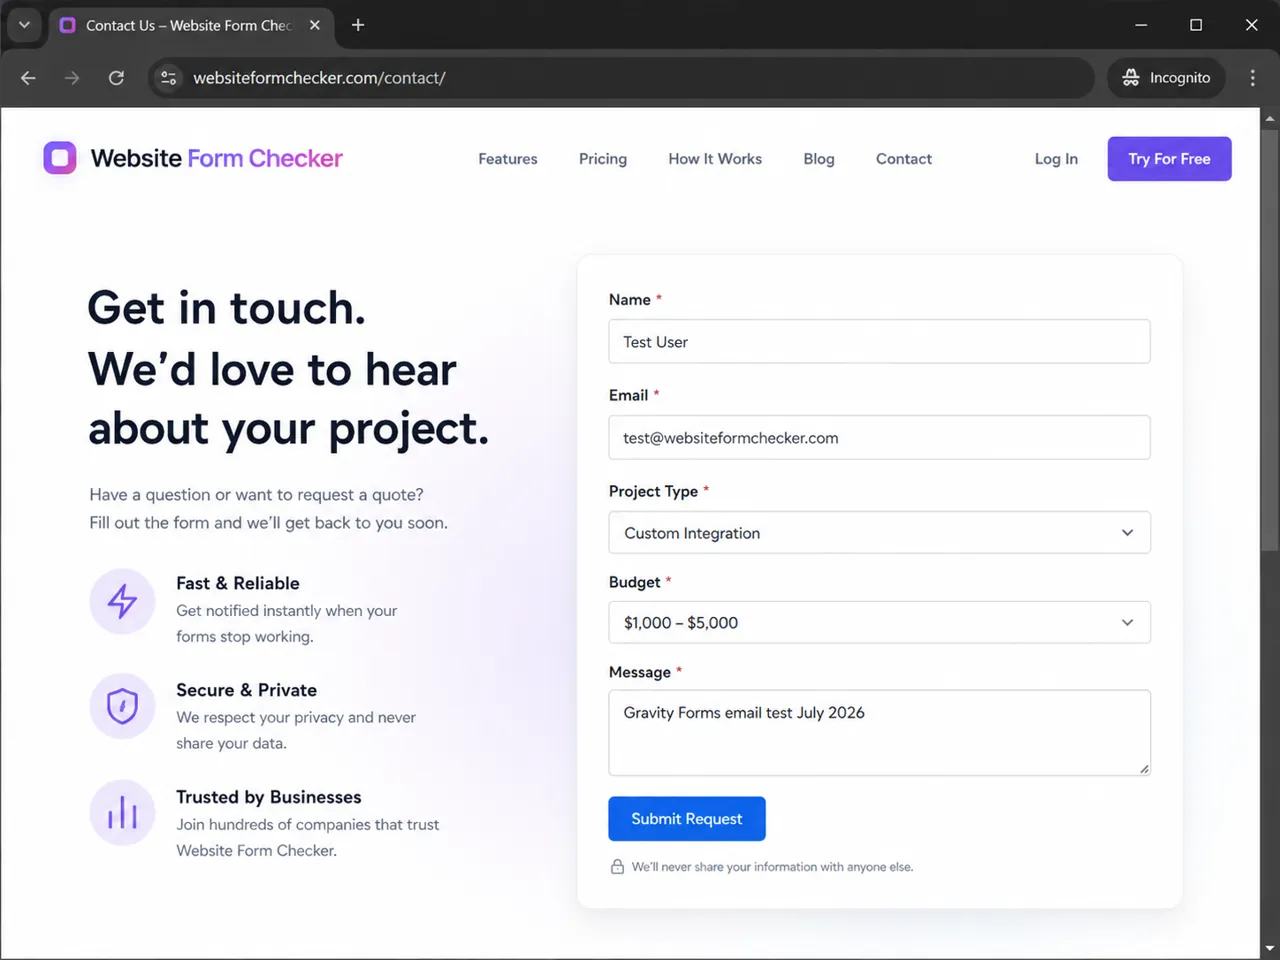
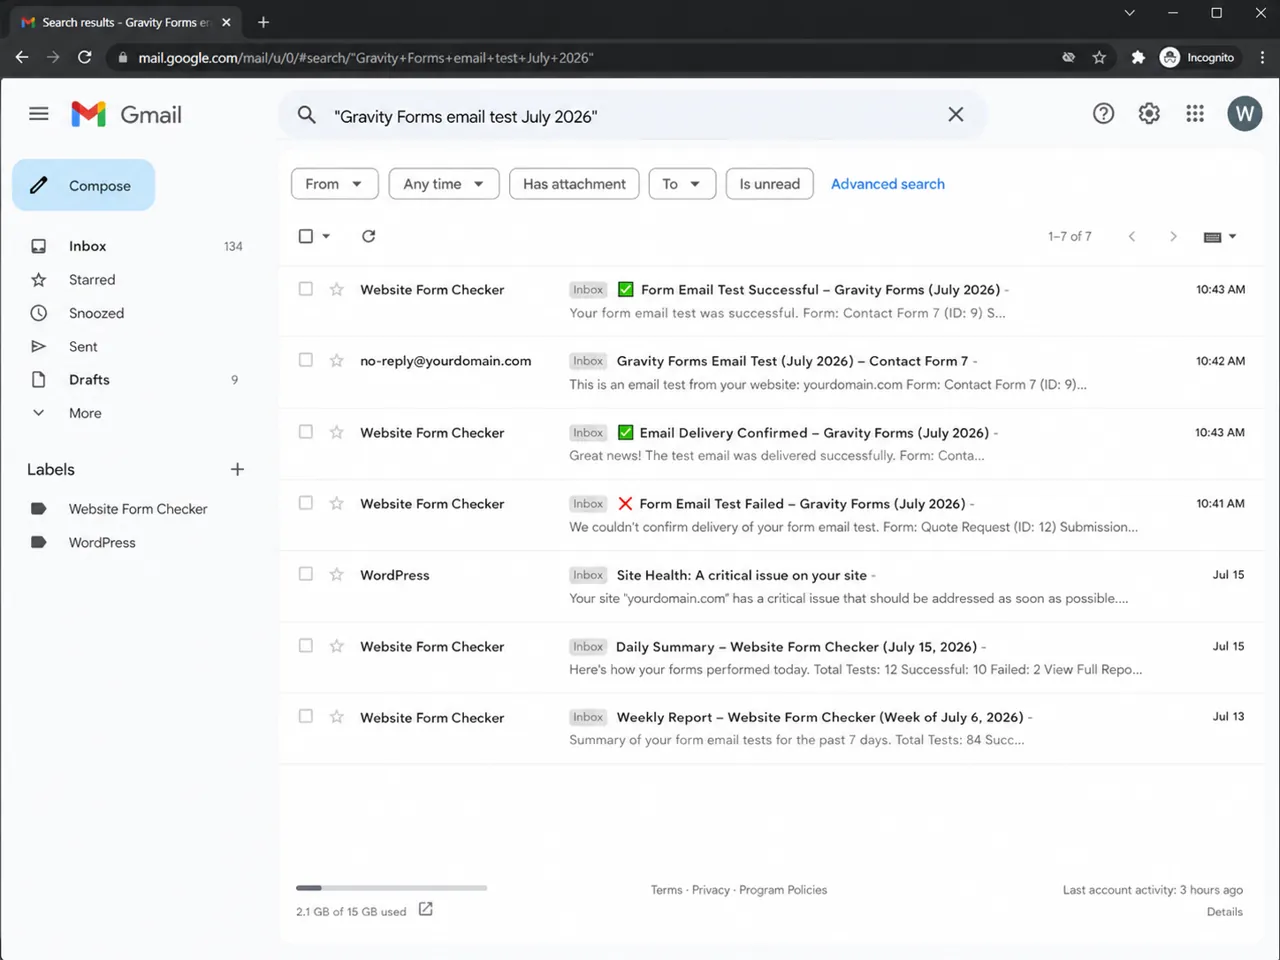
A controlled test gives you a clean reference point. Use a phrase that does not appear anywhere else in your inbox, such as "Gravity Forms email test July 2026." Submit it from the published page, not only from the form preview, because the live page is where visitors experience the form.
- Use a private browser window so cached sessions and admin cookies do not affect the test.
- Use a real recipient mailbox you can access immediately.
- Include the same unique phrase in the message field and, where possible, in the notification subject.
- Do not resend ten times before checking logs; one clean test is easier to trace.
Separate form success from email delivery
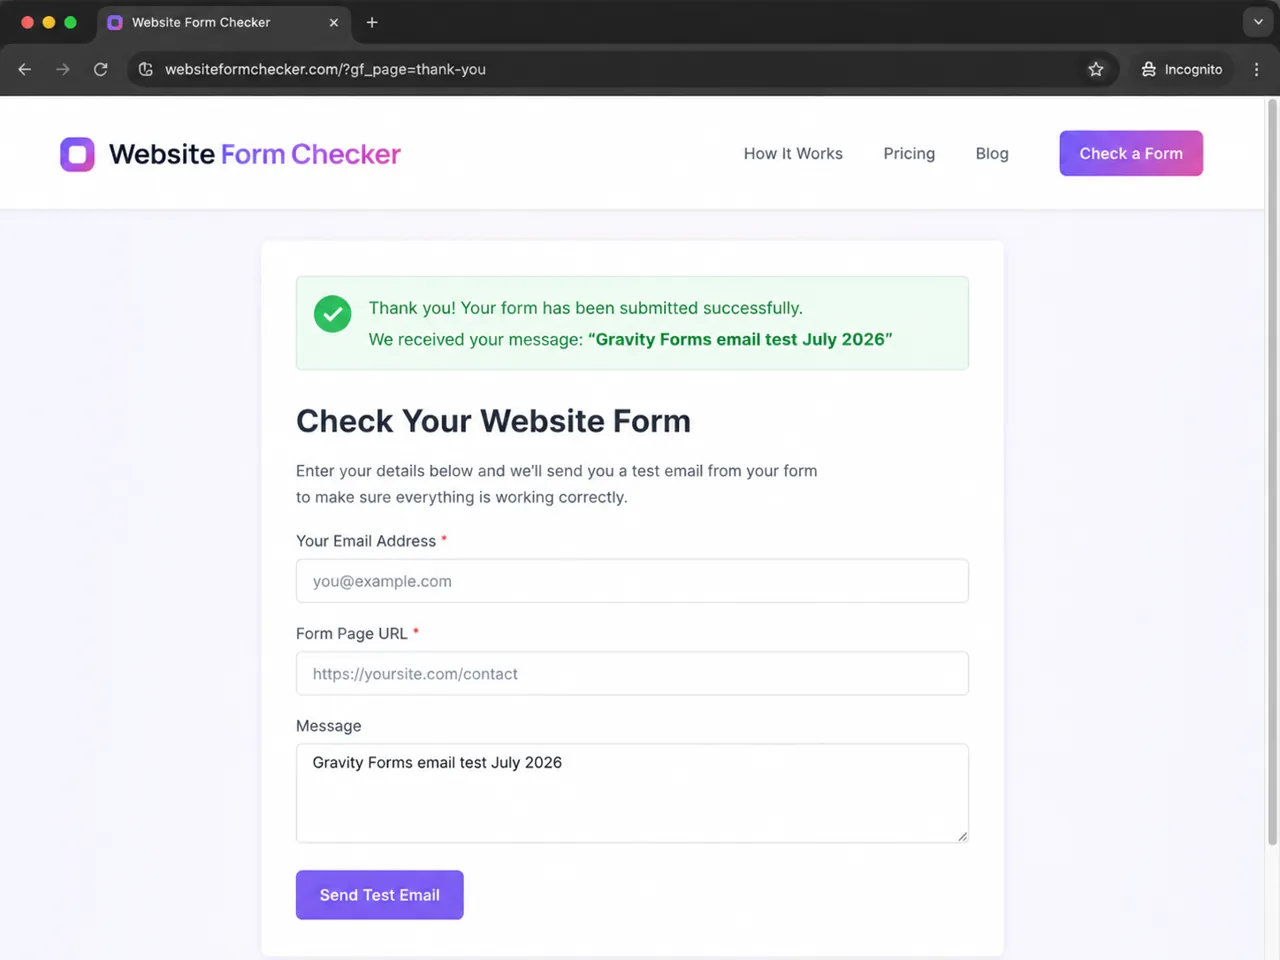
A confirmation message only proves that Gravity Forms accepted the submission and displayed the expected success state. It does not prove that an email notification arrived in the recipient inbox. That distinction matters because many Gravity Forms email problems are not form-submission problems.
After you submit the form, confirm that the success message appears. If the page stays stuck, shows a validation error, or redirects incorrectly, fix the form and page behavior before investigating email delivery. If the success message appears, continue to the notification and mail checks.
Confirm the form is saving the right fields
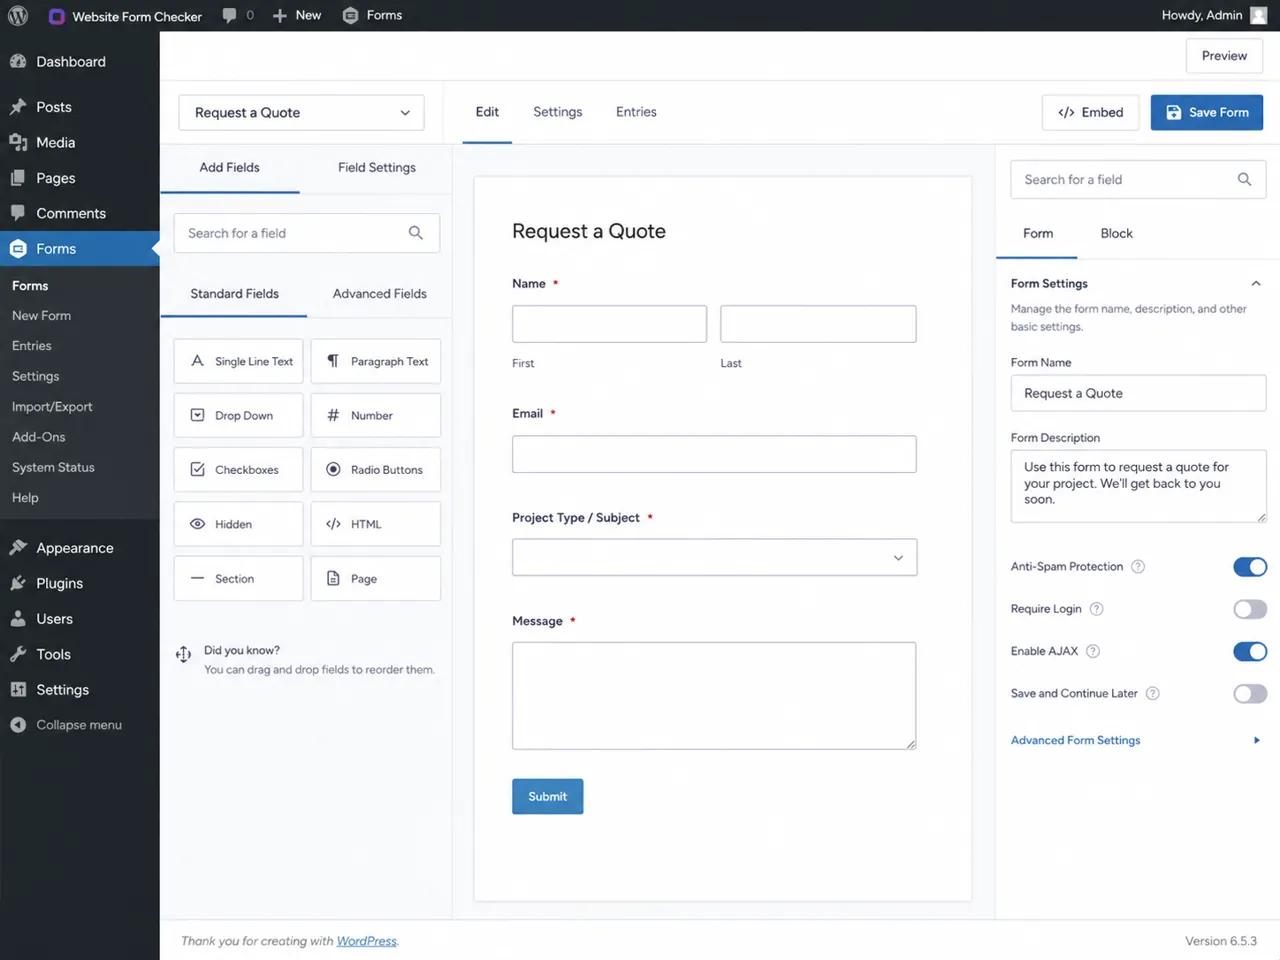
Open the form in Gravity Forms and verify that the expected fields exist: name, email, subject or inquiry type, message, and submit.
This sounds basic, but it prevents wasted troubleshooting when a notification is using a field that was renamed, deleted, or replaced.
If the notification subject uses a merge tag from a field that no longer exists, the message may still send, but it can look incomplete or confusing in the inbox. If the recipient is pulled from a dropdown or hidden field, make sure that field exists and still contains valid values.
Check confirmations so you know the visitor experience is working
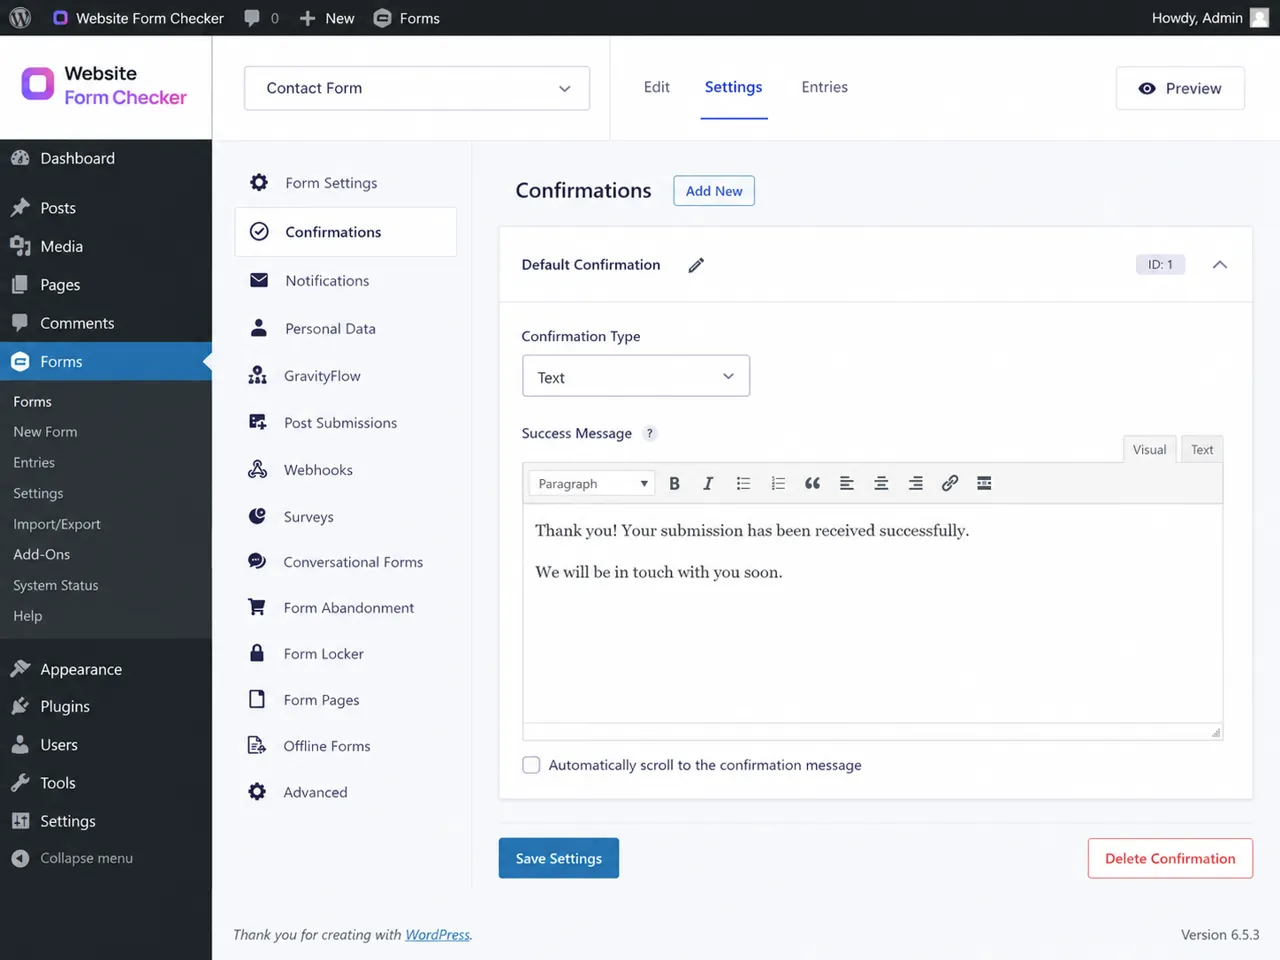
In Gravity Forms, confirmations are the on-page response after submission. They can show text, redirect to another page, or route users based on conditions.
Confirmations are not email notifications, but they help you understand whether the submission completed and whether the visitor received the expected response.
If users say the form "worked" because they saw a thank-you message, that means the form likely accepted the entry. It does not rule out Gravity Forms emails not sending. Treat the confirmation as the first checkpoint, then keep following the message through the notification path.
Review the main notification fields carefully
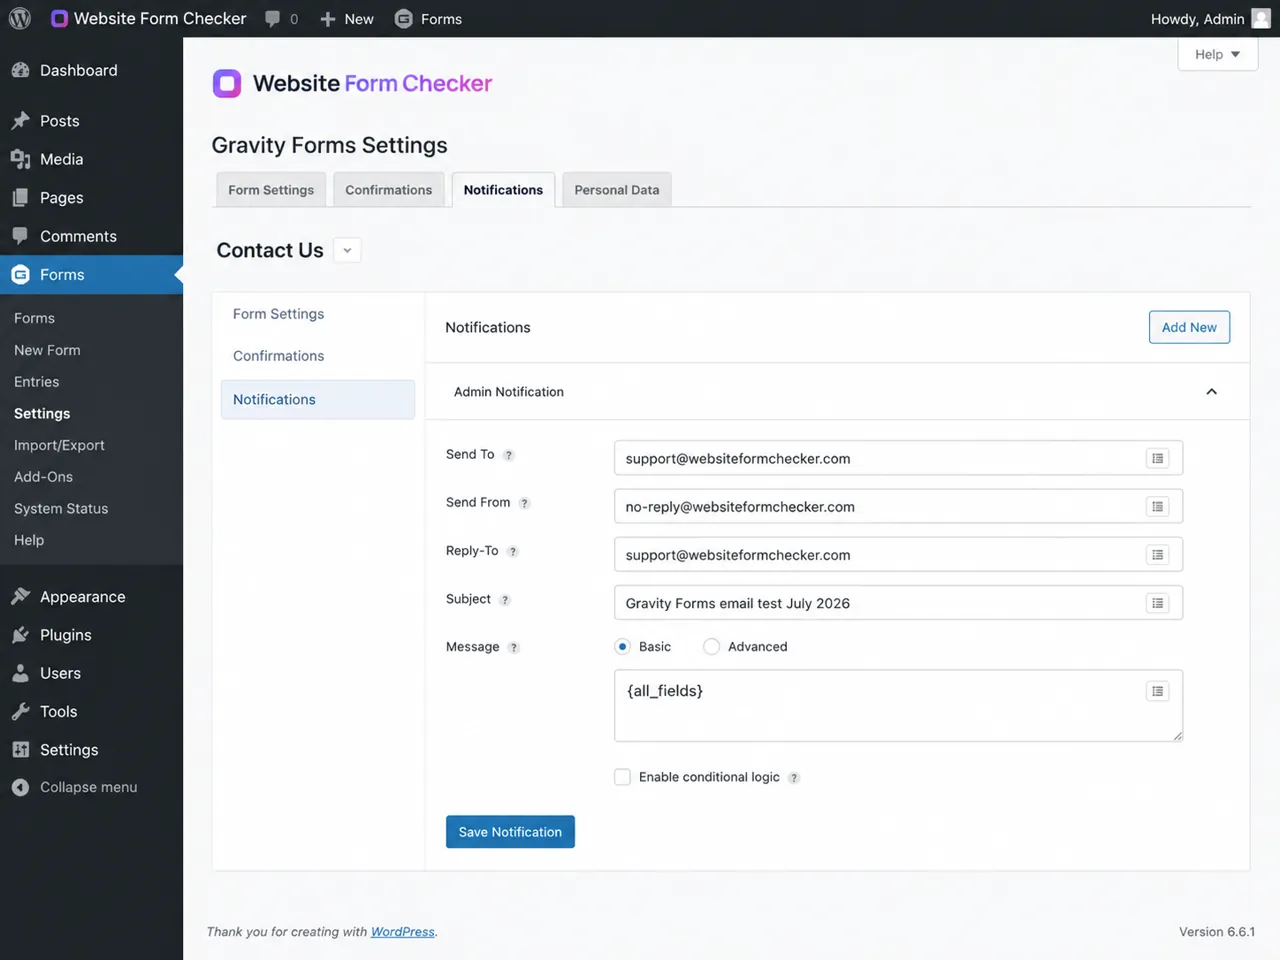
Open the form notification that should email the site owner or support team. Focus on four fields first: Send To, Send From, Reply-To, and Subject. A small mistake here can make a working form look broken.
Send To: Use a mailbox you control. Test with one recipient before adding multiple addresses.Send From: Use a domain-based address, such as[email protected]. Avoid using the visitor's email as the sender.Reply-To: Put the visitor email merge tag here so the site owner can reply to the submitter without spoofing the sender.Subject: Include the unique test phrase while troubleshooting so inbox searches are exact.
One of the most common causes of gravity forms not sending email notifications is an invalid or risky sender configuration. If your site sends from a visitor address like a Gmail or Yahoo address, mailbox providers may treat it as spoofing. Use the visitor email in Reply-To instead.
Check conditional logic and routing rules
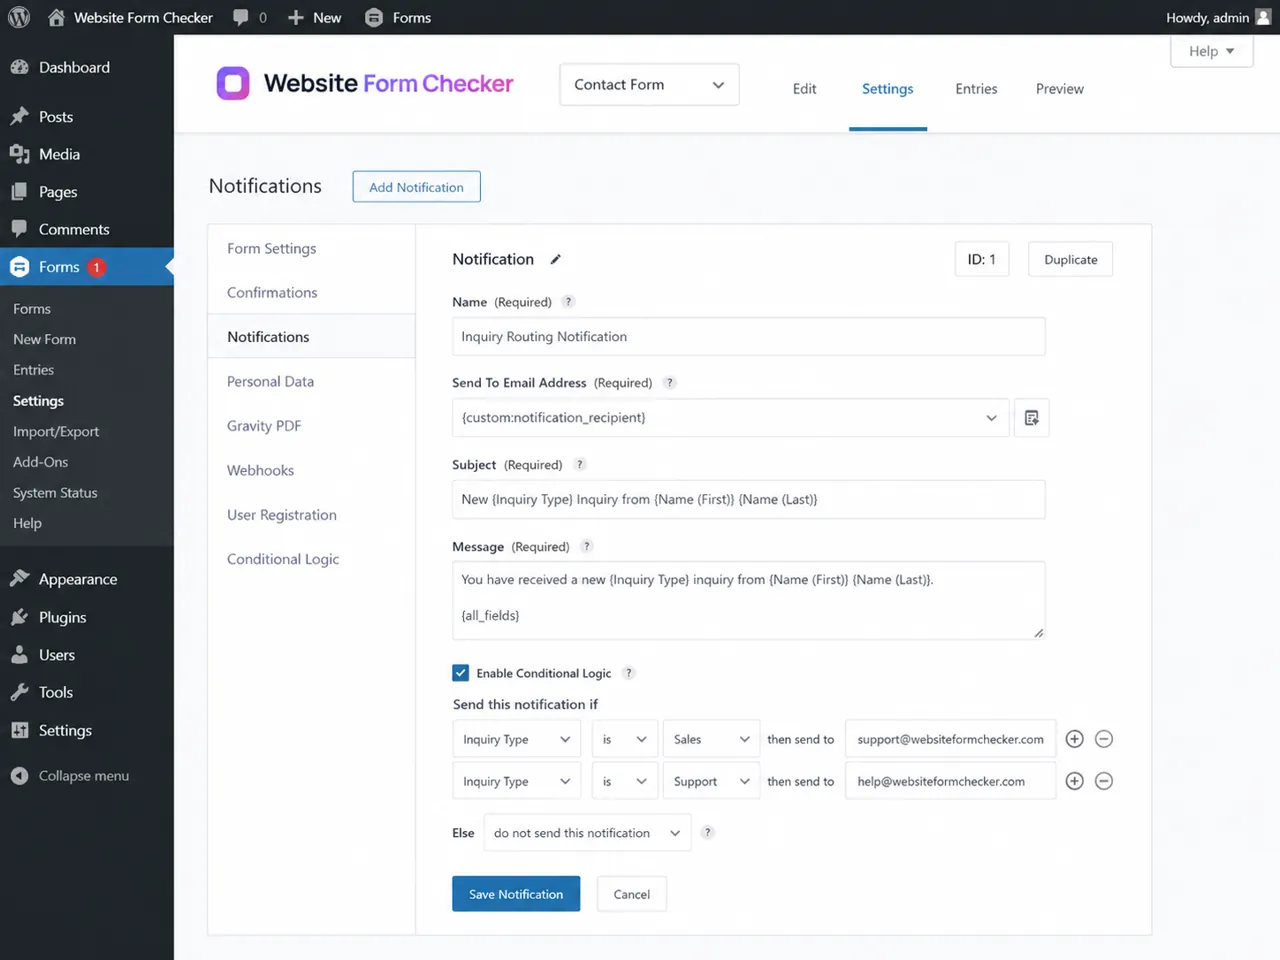
Conditional logic is useful when different teams should receive different inquiries. It can also make troubleshooting harder.
If a rule says "send this notification only when Inquiry Type is Sales," then a Support test may never trigger the Sales notification. The result looks like a gravity form email not sending, even when the form is obeying the rule.
Temporarily test with a submission that matches the condition exactly, or disable conditional logic for one test and see whether the notification appears. If the form uses email routing, check each destination address for typos, old team mailboxes, or missing domain names.
Verify the entry and notification activity
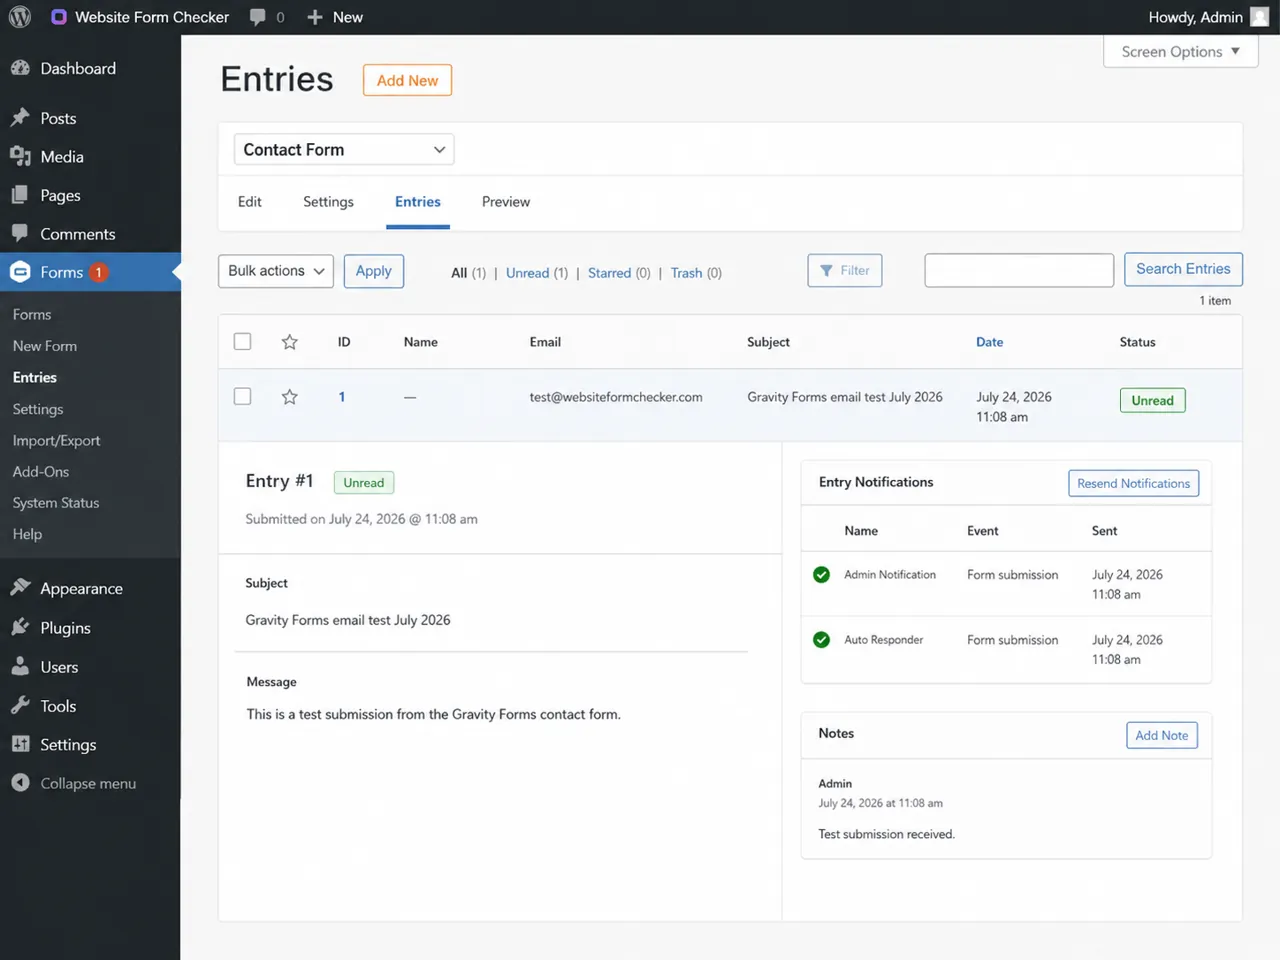
Next, go to Forms > Entries and open the latest test submission. This is the point where you verify whether Gravity Forms stored the entry and whether the notification activity looks normal.
If the entry is missing, you have a submission or validation problem. If the entry is present, the form data was captured and you can focus on notification delivery.
Look for entry notes, notification status, resend options, and timestamps. If the entry exists and Gravity Forms shows that the notification was generated, the next step is the WordPress mail layer or the recipient mailbox.
Use an email log to find the failure point
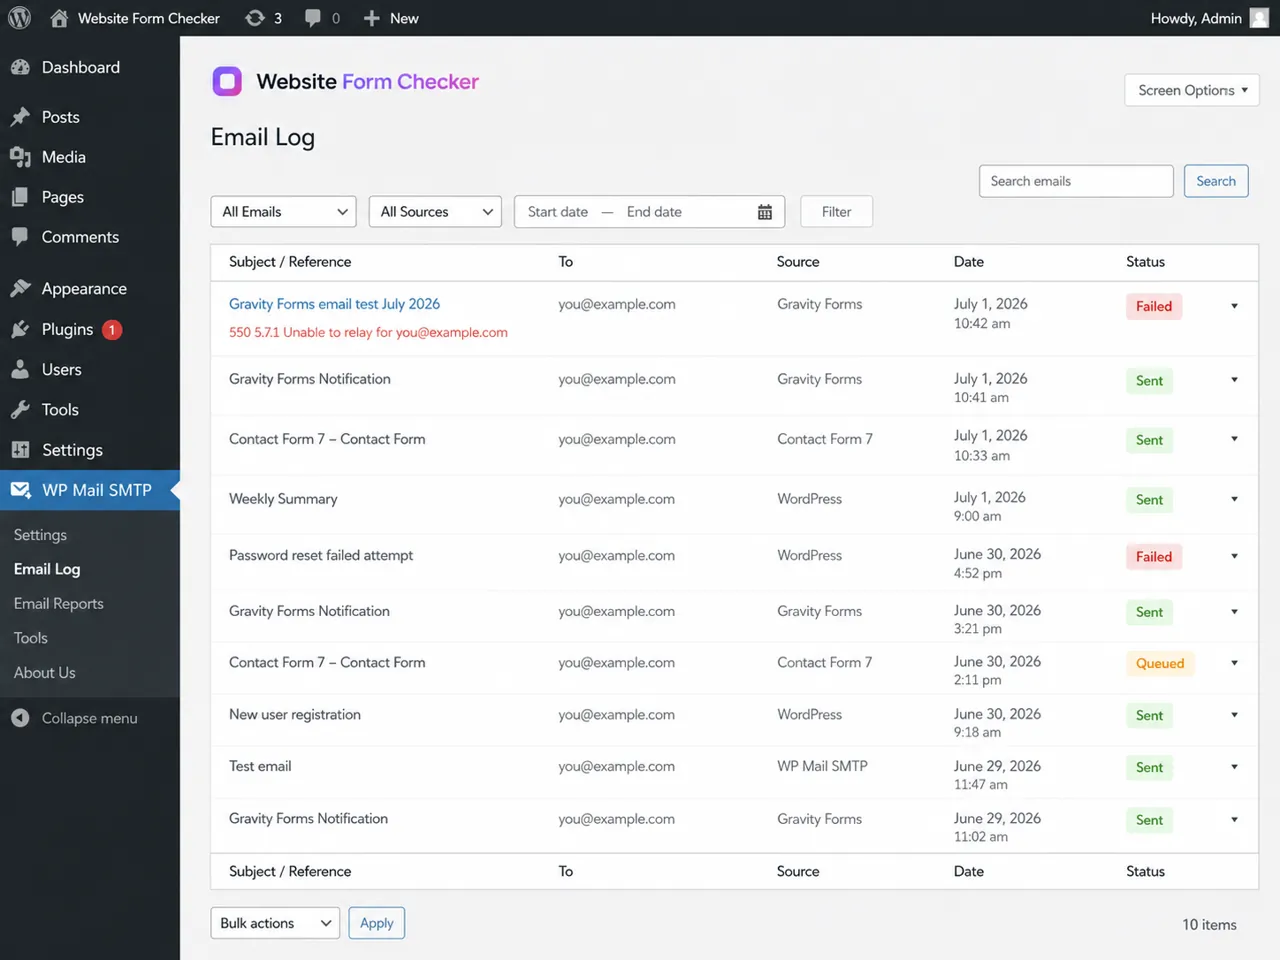
An email log turns guesswork into evidence. It shows whether WordPress attempted to send the message, which plugin or form created it, when it happened, who it was addressed to, and whether the mailer marked it as sent, failed, or queued.
A "sent" result from WordPress means the site handed the message to the mailer. It still does not guarantee inbox placement.
A "failed" result points to a sending issue such as an SMTP authentication problem, a blocked relay, a rejected From address, or a server mail configuration problem. A "queued" result means the message has not completed delivery yet and should be reviewed in the mailer or SMTP service.
Search the inbox with the exact phrase
Once you have a logged test, search the destination mailbox for the exact phrase you used in the form submission.
Search the inbox, all mail, promotions, spam, junk, and trash. Do not rely only on the unread inbox view. Many form notification emails arrive but are filtered away from the primary inbox.
If the test message appears in search results, the form and sender path are at least partially working. If it lands in spam, focus on sender authentication, domain-based From Email, message content, and mailbox reputation. If it does not appear anywhere, return to the SMTP log and check whether the message was accepted by the sending service.
Match the form entry to the received email
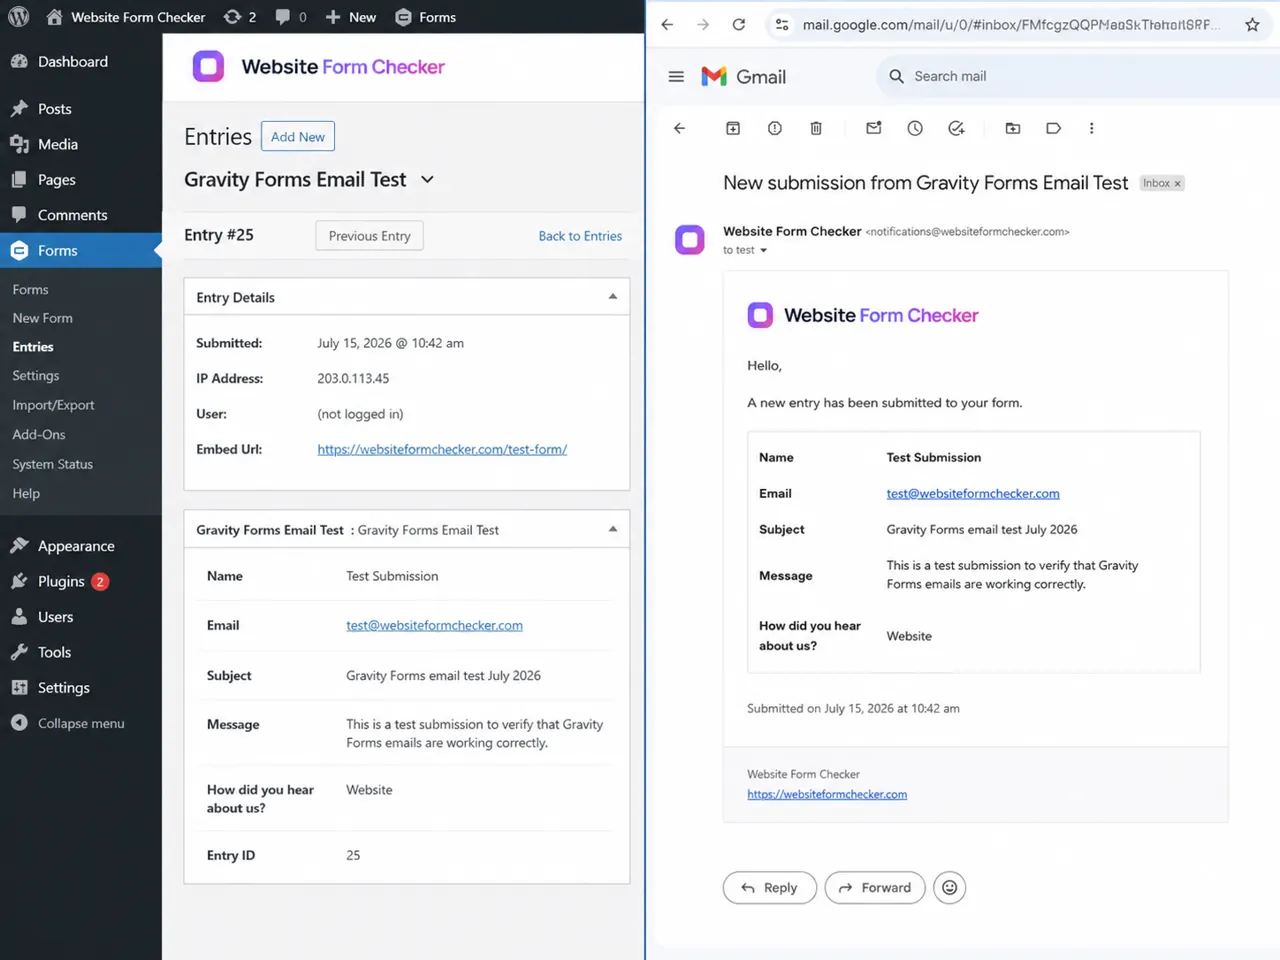
The final proof is simple: the Gravity Forms entry should match the notification email. Compare the submitter email, subject, message, timestamp, and any custom fields. If the entry and email match, the repair worked.
If the entry is correct but the email is missing fields, review merge tags in the notification message body. If the email is received but delayed, review the mailer and sending service logs.
This side-by-side check is especially useful before telling a client that the issue is fixed. It shows that the form captured the submission and the recipient inbox received the matching notification.
Common signals and what they usually mean
When you are following the test through each layer, the signal you see points you to the next thing to check.
| Signal | What to check next |
|---|---|
| Entry is missing in Gravity Forms | The form submission may be failing, blocked by validation, affected by JavaScript, or interrupted by caching or security rules. |
| Entry exists but no email log appears | The notification may be disabled, conditional logic may not match, or a plugin or custom code may be preventing the notification. |
| Email log shows failed | Check SMTP authentication, From Email domain, sending service credentials, blocked relay errors, and mailer configuration. |
| Email log shows sent but inbox is empty | Search all folders, check spam and junk, review domain authentication, and inspect the sending service delivery log. |
| Only some notifications are missing | Check conditional logic, routing rules, multi-recipient formatting, and whether specific recipient mailboxes are rejecting messages. |
Recommended fix order
Do not rebuild the entire form before you know where the failure happens. Work through the repair in this order:
- Submit one live-page test with a unique phrase.
- Confirm the success message appears on the page.
- Verify the entry exists in Gravity Forms.
- Open the active notification and check
Send To,Send From,Reply-To, andSubject. - Disable or match conditional logic during the test.
- Send through authenticated SMTP instead of relying only on the default WordPress mail path.
- Review the email log for sent, failed, or queued status.
- Search the destination mailbox for the exact phrase, including spam and junk.
- Compare the entry to the received email before marking the issue resolved.
SMTP and sender setup notes
Gravity Forms creates the notification, but WordPress and the configured mailer handle delivery. If the website uses the default WordPress mail function without authenticated SMTP, delivery can be inconsistent depending on hosting, server configuration, and recipient filtering. An SMTP plugin or transactional email service gives you a clearer sending path and better logs.
Use a sender address that belongs to the site domain, then authenticate that domain with the provider your client uses for sending. Avoid mixing a website domain, a free mailbox sender, and an unrelated SMTP service. The From Email, SMTP account, and domain authentication should tell the same story.
- Good sender pattern:
[email protected]or[email protected]. - Risky sender pattern: the visitor email address placed in the From Email field.
- Best Reply-To pattern: the visitor email merge tag, so replies go to the person who submitted the form.
- Best test pattern: one recipient mailbox, one unique test phrase, one timestamped submission.
FAQ
Why is Gravity Forms saving entries but not sending email?
Entries and email notifications are separate parts of the workflow. Gravity Forms can save the form data successfully while a notification is disabled, blocked by conditional logic, rejected by SMTP, or filtered by the recipient mailbox.
Should I use the visitor email as the From Email?
No. Use a domain-based sender address for From Email and place the visitor email in Reply-To. This makes the message easier for mailbox providers to trust while still letting the site owner reply to the submitter.
What should I do if the email log says sent but the inbox is empty?
Search all folders for the exact test phrase, including spam, junk, promotions, trash, and all mail. If the message still does not appear, review the SMTP provider delivery log to see whether the recipient server accepted, deferred, or rejected it.
Can conditional logic stop Gravity Forms notifications?
Yes. If a notification is set to send only when certain field values are selected, a test submission that does not match those values will not trigger the notification. Test with matching values or temporarily disable the rule while diagnosing.
Final check, and how to catch this next time
A reliable Gravity Forms email fix ends with evidence, not assumptions. The entry should be saved, the notification should be correctly configured, the mail log should show a clear delivery status, and the inbox should contain the matching message. Once those checkpoints line up, you can confidently tell the client that Gravity Forms is sending notifications again.
The harder part is knowing when delivery breaks again. Plugin updates, SMTP password changes, DNS changes, spam filters, and hosting changes can all break notifications later without changing how the form looks on the page. That is the gap Website Form Checker is built to watch. It sends real test submissions through your form on a schedule and alerts you if they stop arriving, so you catch the failure before more leads disappear.
Test your form right now, free
Paste your contact form URL. We'll open it in a real browser, find the form, detect spam protection, and tell you whether it's structured to actually deliver submissions. Takes about 20 seconds.
Run a free audit →