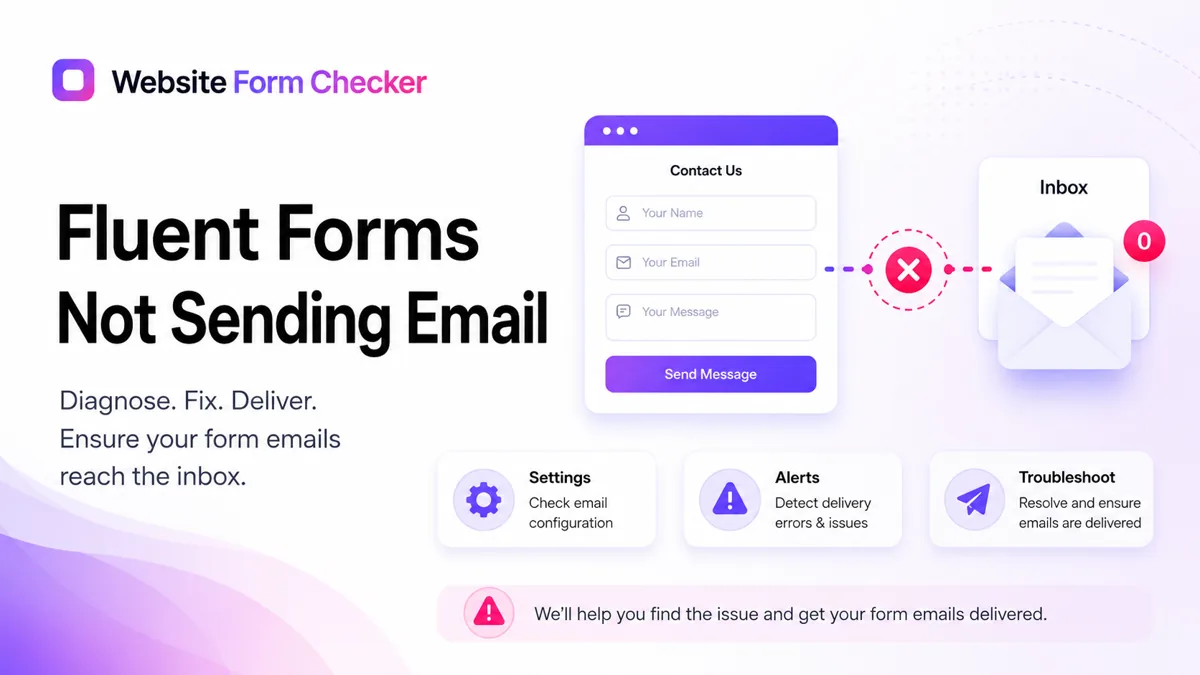
The fastest way to solve this is to trace one test submission through each stage: the live form, the saved entry, the Fluent Forms notification, the WordPress mail system, the SMTP provider, and the final inbox. This process shows whether the form failed to save the submission or whether the email failed later in the delivery path. You can also paste your form URL into our free form checker first to see how the form is structured before you start digging.
Start with a traceable test from the live form
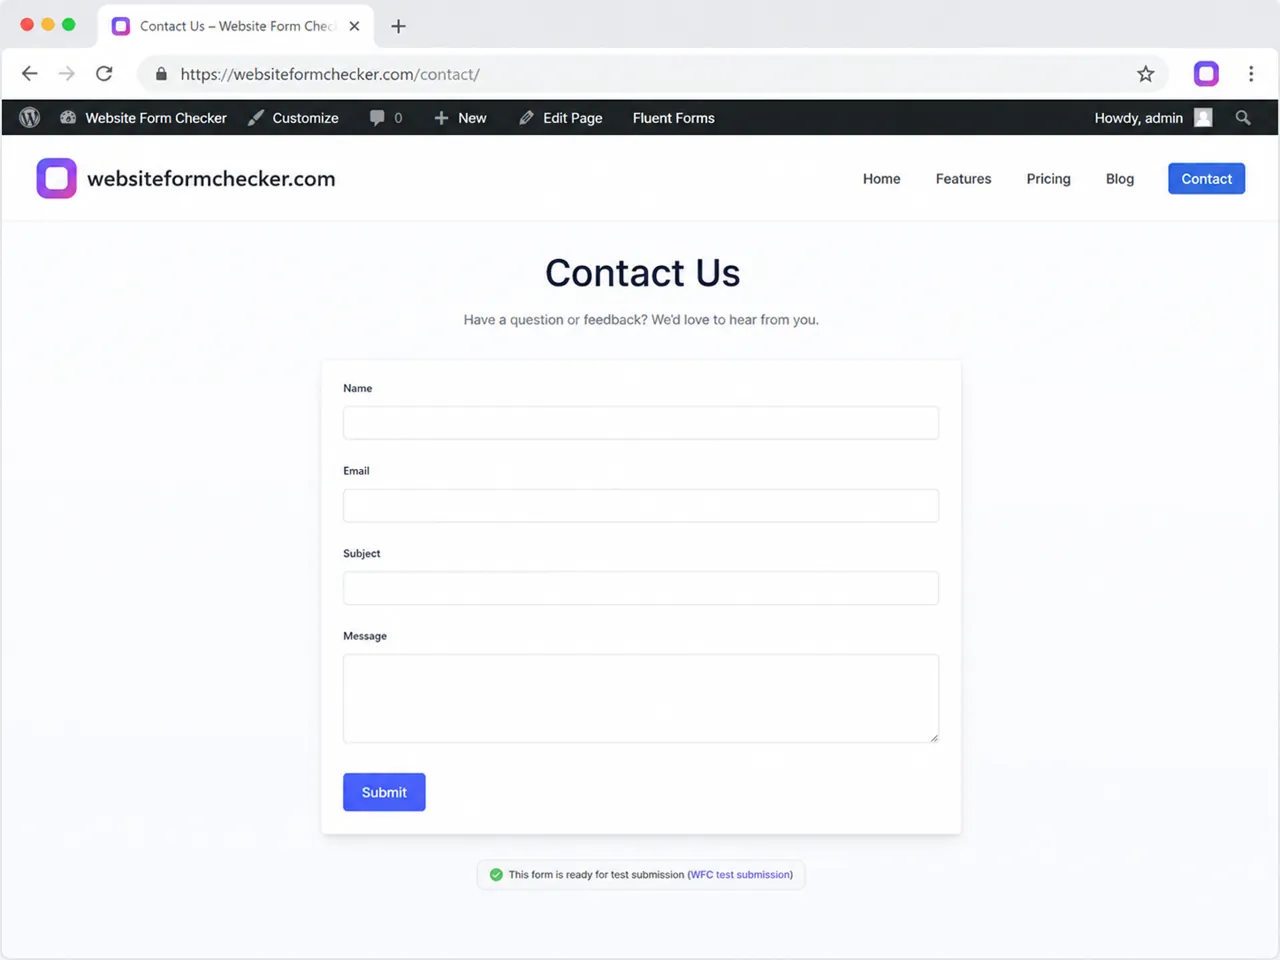
Open the public page that contains the form in a private browser window. Do not test only from the WordPress editor or preview screen.
Submit the form with a phrase you can search for later, such as WFC Fluent Forms test 01. Use an email address you can access and record the exact time of the test.
Watch for the confirmation message after clicking Submit. The message proves the page responded, but it does not prove Fluent Forms saved the entry or sent the notification. Keep the test phrase and time available for the next checks.
Confirm the Fluent Forms notification is enabled
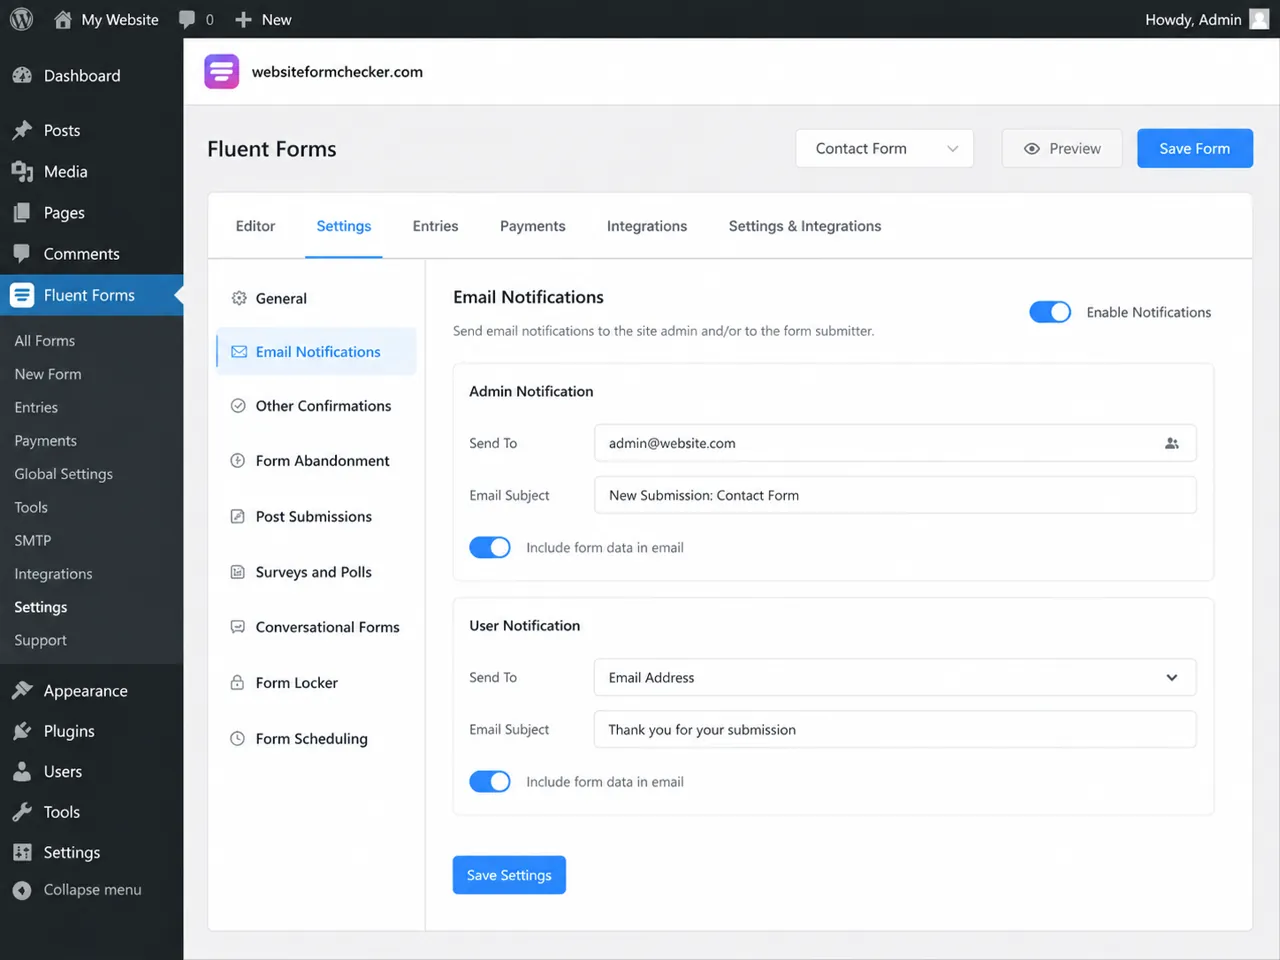
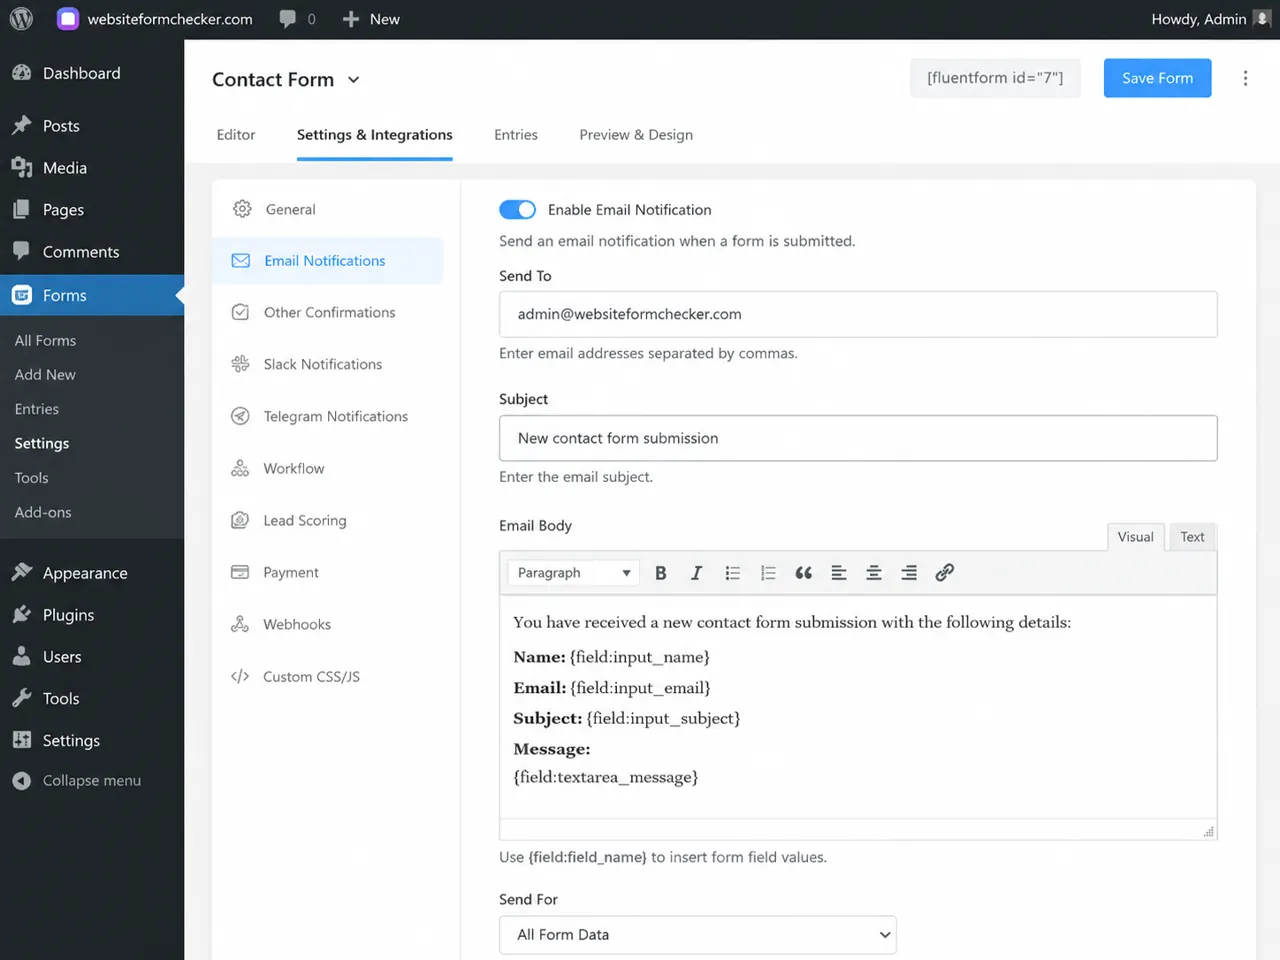
In WordPress, open Fluent Forms, choose the affected form, and go to Settings & Integrations > Email Notifications.
Find the admin or user notification that should run after submission. Make sure its toggle is enabled. A fully configured notification can still do nothing when the notification itself is disabled.
Open the notification settings and give it a clear internal name, such as Admin lead notification. This makes it easier to identify the correct notification in submission logs, especially when the form sends separate messages to the site owner, the visitor, and other team members. The current options are documented in the official Fluent Forms notification guide.
Check the recipient before changing anything else
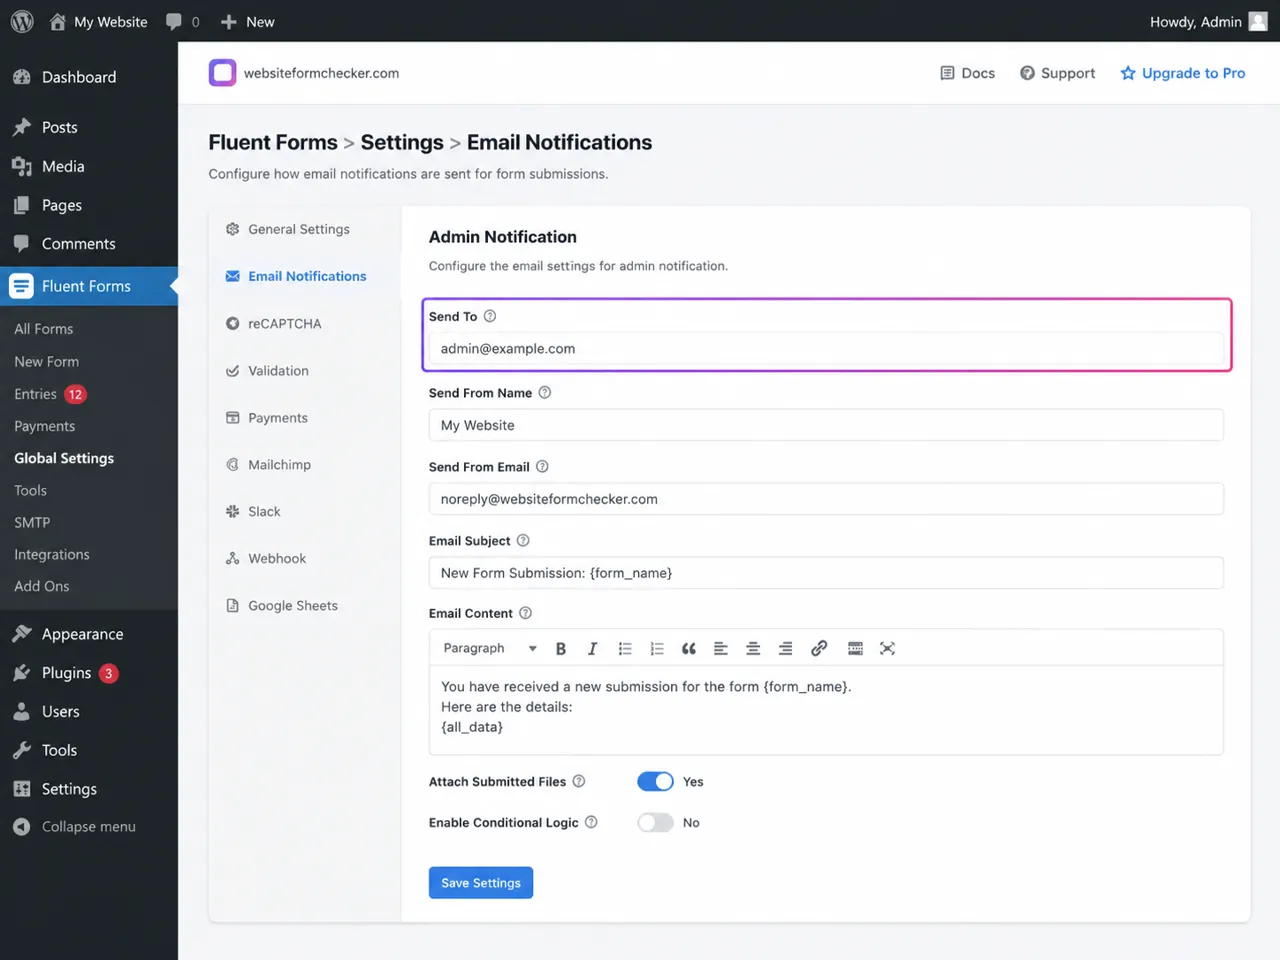
The Send To setting controls where the notification goes. For an admin notification, use Enter Email and verify the address carefully. Fluent Forms can also use the WordPress admin email shortcode, but confirm that the address stored under Settings > General is current.
For a visitor confirmation, use Select a Field and choose the email field from the form. Do not type a merge tag from memory. Select the actual field so Fluent Forms can insert the submitted address.
If several people need the same notification, separate recipient addresses with commas. Avoid old inboxes, misspelled domains, and addresses that forward to accounts nobody checks.
Use the correct From Email and Reply-To address
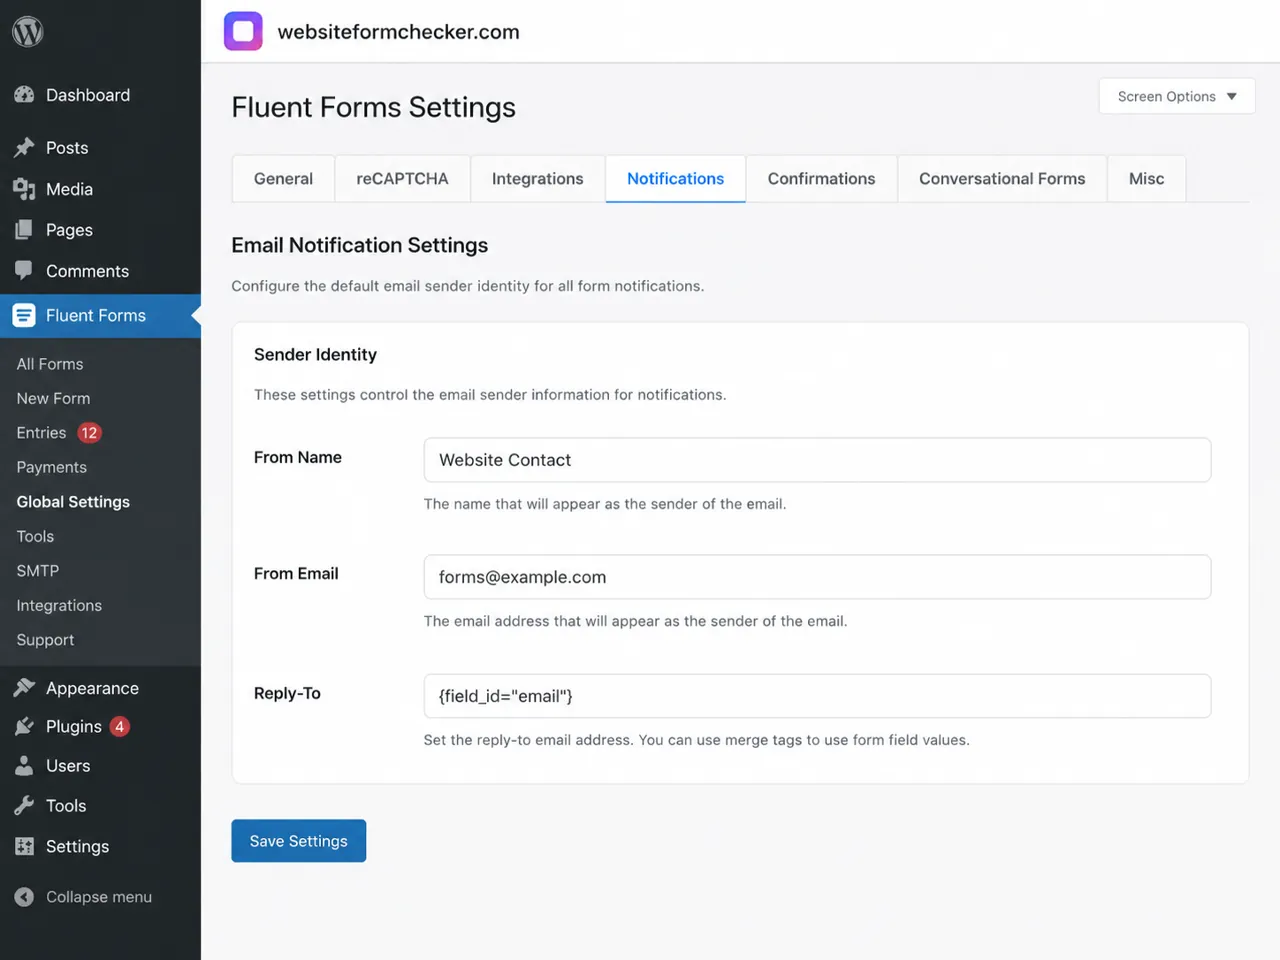
Open the notification's Advanced settings and review From Name, From Email, and Reply-To.
Use a From Email on a domain your sending provider is authorized to send from, such as [email protected]. Using the visitor's Gmail or Yahoo address as the From Email can create authentication problems because your website is not allowed to send on behalf of that domain.
Put the visitor's email field in Reply-To instead. That lets the recipient click Reply and answer the lead without making the visitor's address the sender.
Verify the subject, body, and field shortcodes
Use a clear subject that contains useful form data, such as New support request from {name}. A descriptive subject makes the test easier to find and helps the business identify the form that produced it.
Check the email body for the fields the team needs. Insert Fluent Forms shortcodes from the interface instead of guessing their format. Include the visitor's name, email, message, and any routing field that affects who should receive the notification.
If the email arrives but important information is blank, the delivery system may be working while the notification template is using the wrong field shortcode.
Test conditional logic for a silent block
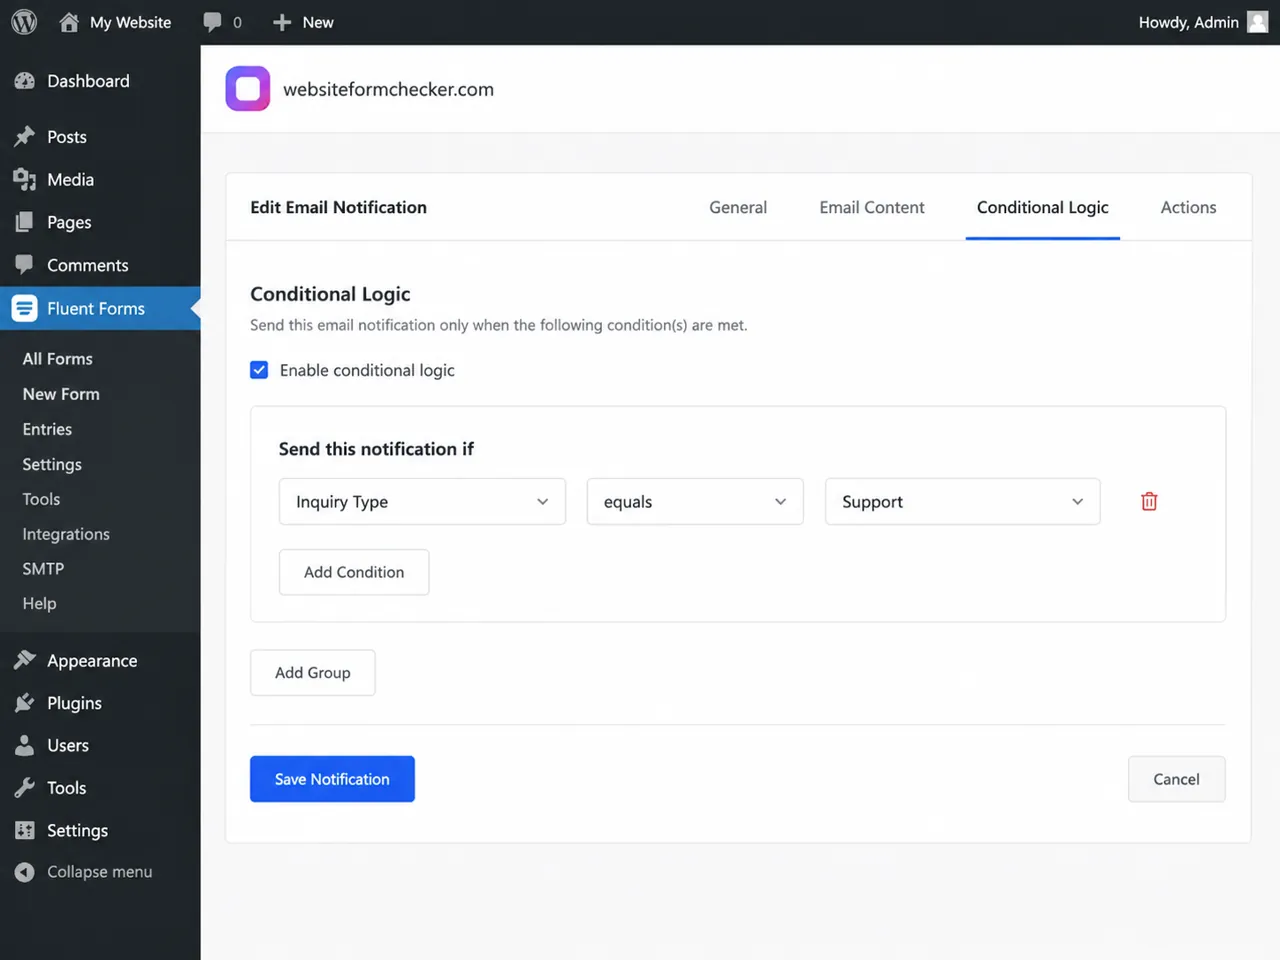
Conditional logic can silently prevent an otherwise valid notification from running. Open the Conditional Logic section and review every rule.
For example, a rule such as Inquiry Type equals Support means the notification will not run for Sales or General inquiries. Temporarily disable conditional logic and repeat the live test. If the notification starts working, rebuild the rule and test each option.
Also check whether more than one condition must be true. A rule group using AND is stricter than a group using OR, so one unexpected field value can block the email.
Decide whether the form failed or the email failed
Look for the saved entry
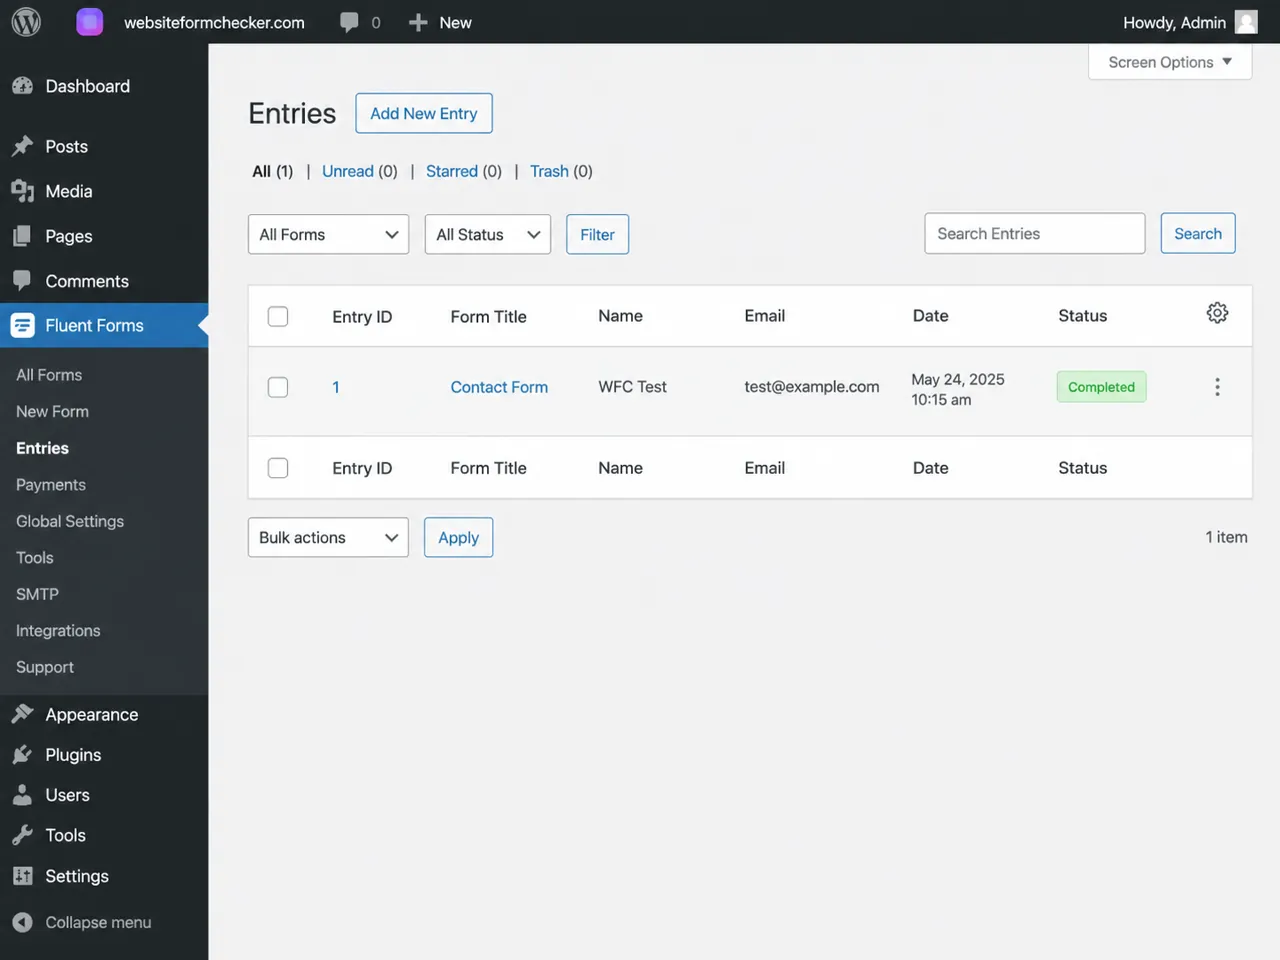
Go to Fluent Forms > Entries and open the form you tested. Search for the unique phrase, name, or email address from the live submission.
If the entry is present, Fluent Forms accepted and stored the submission. The problem is likely in the notification settings or email delivery path.
If the entry is missing, focus on the form itself. Test for JavaScript errors, caching conflicts, anti-spam blocks, reCAPTCHA failures, security rules, or a plugin conflict. Clear relevant caches and retest the published page after each change.
Read the Submission Logs
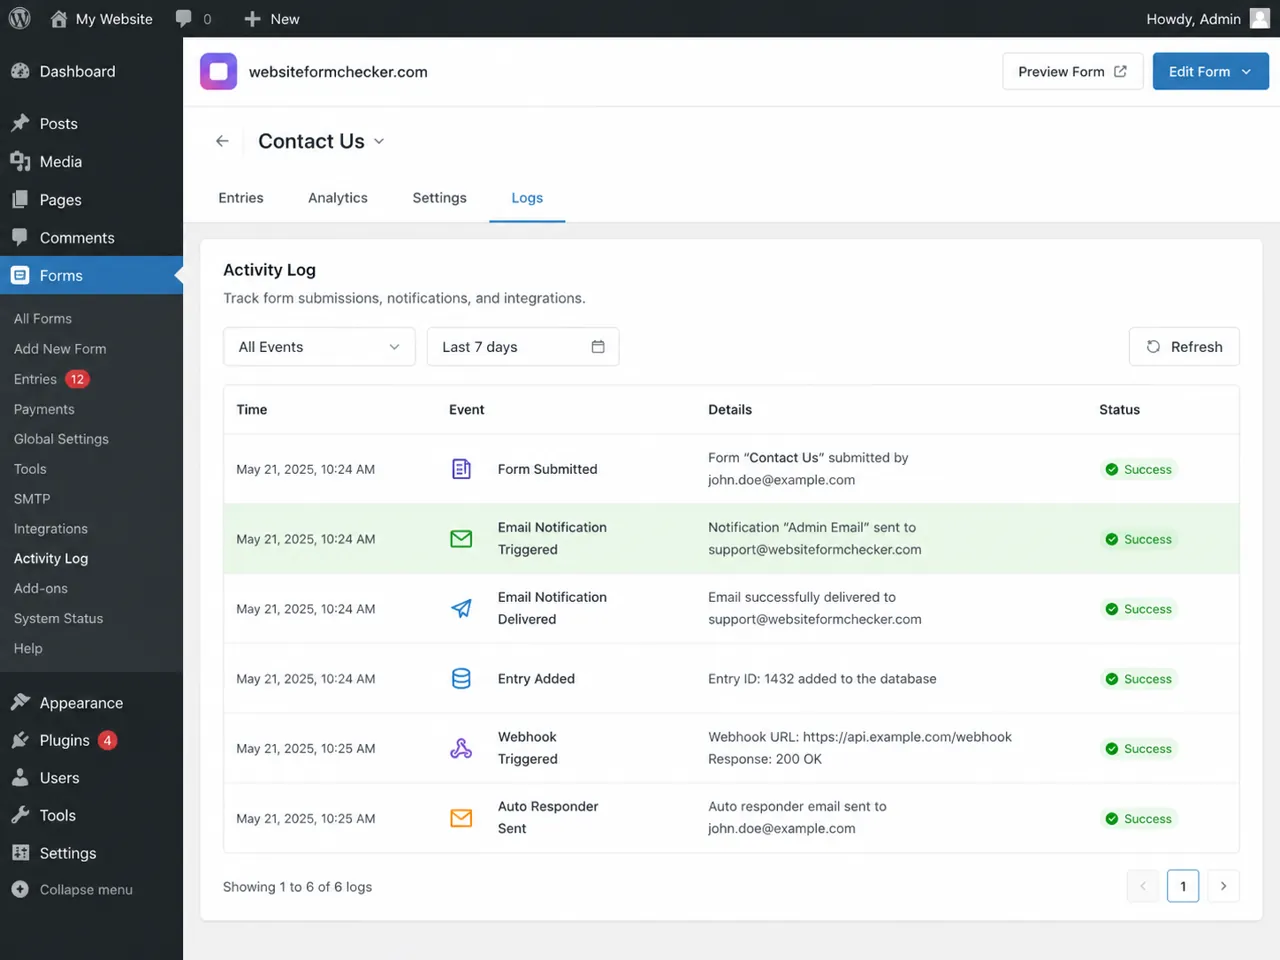
Open the test entry and scroll to its Submission Logs. Fluent Forms records the actions connected to that submission.
A success message showing that the email notification was broadcast or triggered means Fluent Forms reached the email-sending step. At that point, the problem is probably outside the form plugin.
A failed notification log is more direct. Read the error attached to the failed action, then check the recipient, conditional logic, sender settings, and any mail-related error shown by WordPress or your SMTP plugin. Fluent Forms also provides a focused email confirmation troubleshooting guide.
Move WordPress email through authenticated SMTP
WordPress normally hands email to the server's default mail function. Some hosts restrict that function, and unauthenticated messages are more likely to be filtered or rejected.
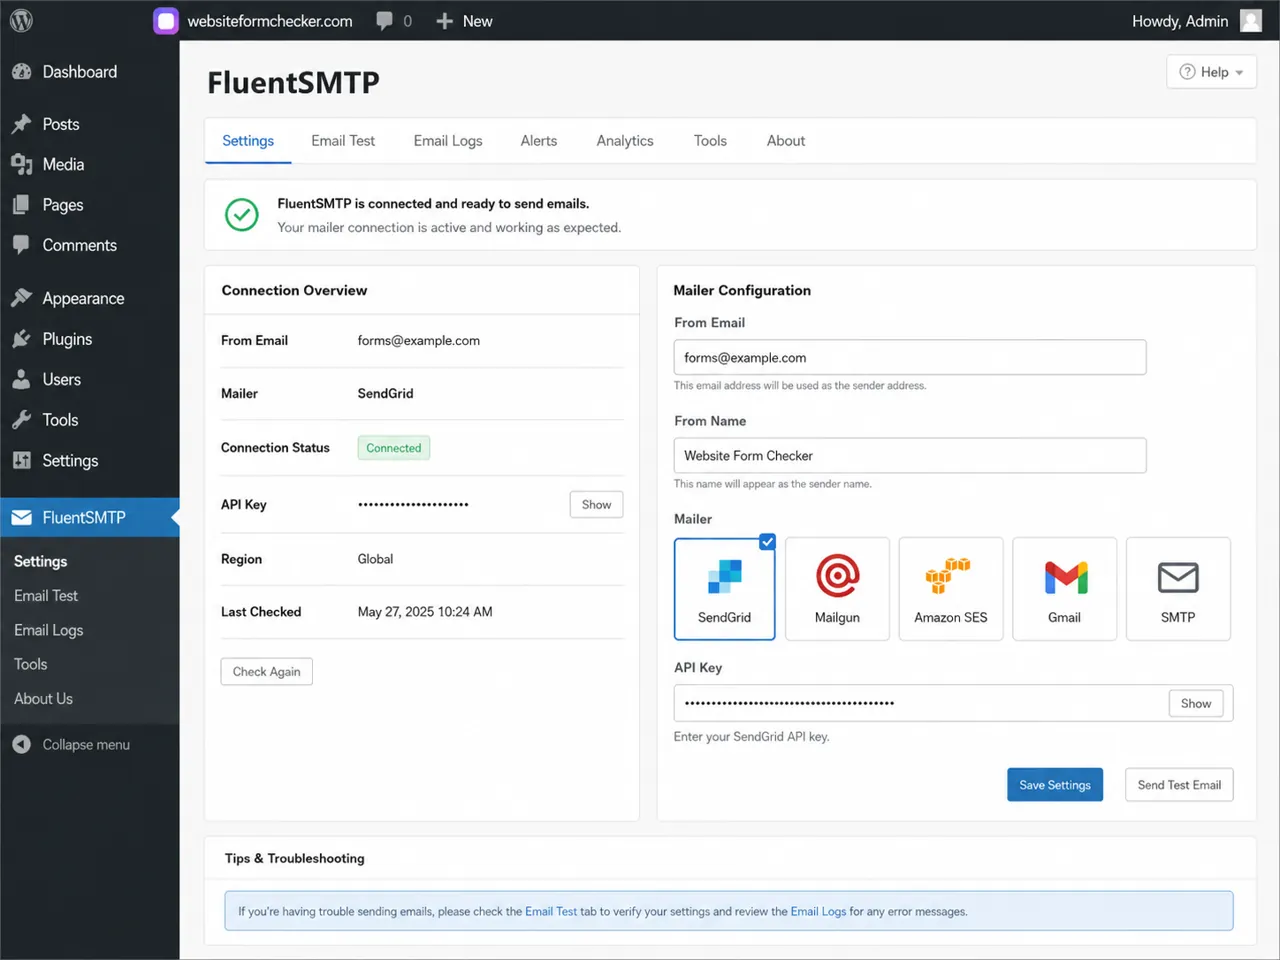
Configure an SMTP plugin such as FluentSMTP and connect it to a proper delivery provider. In FluentSMTP, verify the From Email, From Name, selected connection, and connection status. The From Email should normally match a domain that has been verified with the provider.
Complete the provider's domain authentication steps when available. SPF and DKIM help receiving servers verify that the provider is allowed to send mail for your domain. DMARC adds a policy for messages that fail authentication. You do not need to become a DNS expert, but the records must match the instructions from your email provider.
Use FluentSMTP logs to separate sending from inbox placement
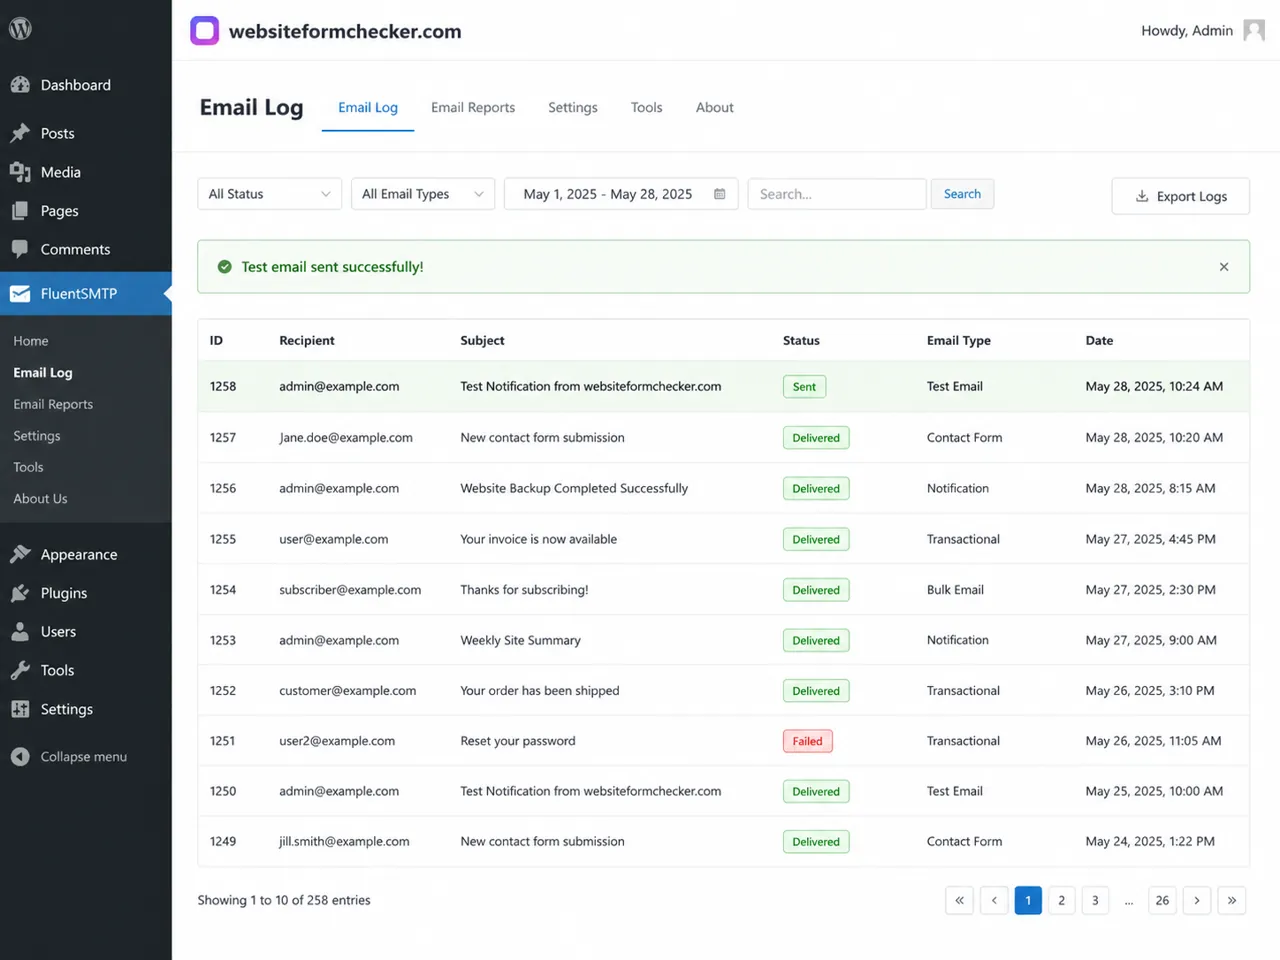
After sending another live test, open FluentSMTP > Email Logs and search for the test subject or recipient.
A failed log usually includes a server response that can point to an invalid credential, rejected sender, connection problem, rate limit, or recipient error. Correct the reported issue and send a new test rather than assuming the old message will recover.
A successful or delivered log confirms that WordPress handed the message to the configured provider. It does not guarantee inbox placement. Search the inbox for the exact test phrase, then check spam, junk, quarantine, forwarding rules, shared mailbox rules, and filters. The official FluentSMTP email log guide explains the status and filtering controls available in the log screen.
Also test a second recipient on another email provider to see whether the problem affects one mailbox or every destination.
Run one final end-to-end test
Run one last test from the published form, not from the editor. Use a new test phrase so you do not confuse it with earlier attempts.
A complete pass should confirm all of the following:
- The live form submits without an error.
- The expected confirmation message appears.
- A new entry is saved in Fluent Forms.
- The correct notification is triggered in the submission log.
- FluentSMTP records a successful send.
- The email reaches the intended inbox.
- Reply sends the response to the visitor's address.
- The message contains every field the business needs.
Do not stop after one part passes. A saved entry without an inbox notification still represents a missed lead.
Catch the next failure before leads go missing
Once Fluent Forms is sending email again, the next risk is a silent failure later. Plugin updates, SMTP password changes, DNS edits, hosting changes, and new spam rules can break the delivery path without changing the form's appearance.
Website Form Checker sends real test submissions through a live website form on a schedule and alerts the site owner when those submissions stop arriving. That provides a practical warning before an unnoticed form failure turns into a longer run of missed inquiries.
Fluent Forms email troubleshooting checklist
- Submit a traceable test from the public form.
- Confirm the Fluent Forms notification is enabled.
- Verify Send To, From Email, From Name, and Reply-To.
- Check the subject, email body, and field shortcodes.
- Review and test conditional logic.
- Confirm the entry was saved.
- Read the entry's Submission Logs.
- Connect an authenticated SMTP provider.
- Review FluentSMTP Email Logs.
- Search spam, quarantine, filters, and forwarding rules.
- Complete a final end-to-end test.
- Monitor the live form after the repair.
Test your form right now, free
Paste your contact form URL. We'll open it in a real browser, find the form, detect spam protection, and tell you whether it's structured to actually deliver submissions. Takes about 20 seconds.
Run a free audit →