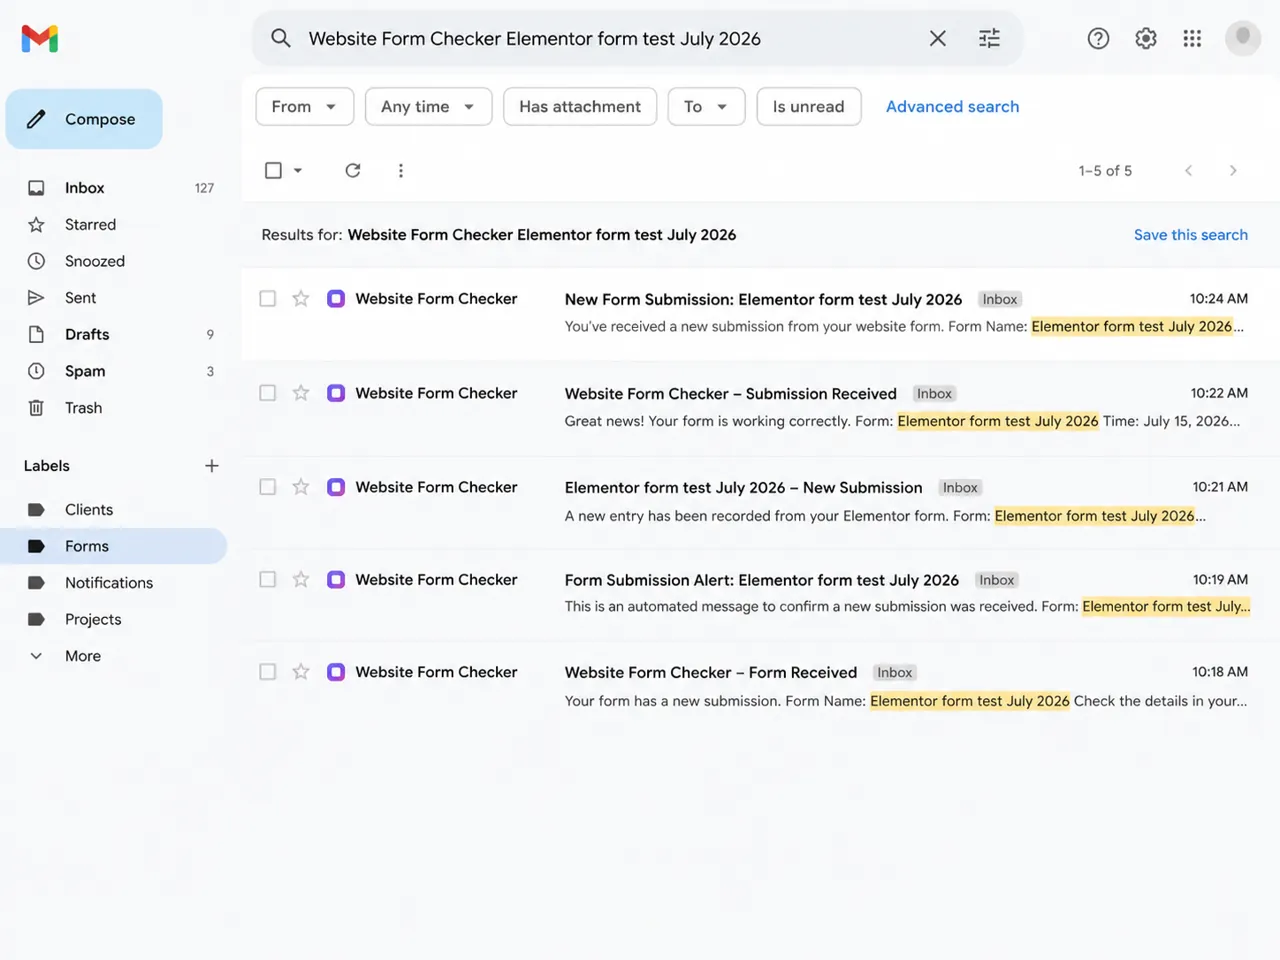
Before you change any email settings, send one real submission through the live Elementor form from a private browser window. Use a recipient address you control and a unique test phrase like Website Form Checker Elementor form test July 2026, then note the exact time you submitted. A unique phrase makes it easier to search Elementor submissions, mail logs, inbox results, and spam folders without guessing which test came from which fix. You can also paste your form URL into our free form checker first to see how the form is structured before you start digging.
What you need to prove before changing settings
Before you edit email settings, separate the problem into four possible failure points:
- The visitor-facing form does not submit correctly.
- Elementor accepts the form but the Email action is missing or misconfigured.
- WordPress sends the email, but the server or SMTP layer rejects it.
- The email is delivered, but it lands in spam, gets filtered, or is searched under the wrong phrase.
This matters because each failure point has a different fix. If the submission is missing in Elementor, changing SMTP will not help. If the mail log shows a failed SMTP event, changing field IDs will not help. If the mail log shows sent but the inbox is empty, the issue is more likely deliverability, filtering, or the mailbox search path.
Start with a fresh test on the live page
Open the published contact page in a private or logged-out browser window. Do not test only inside the Elementor editor preview. The live page is what visitors actually use, and it includes the real theme, caching layer, security rules, and front-end JavaScript environment.
Fill in every required field and enter a test phrase that you will not use anywhere else. The message should include the form name, the site name, and a date or sequence number. This gives you a clean search term later.
- Use a real recipient address that you can access.
- Use a normal subject line instead of a spammy test subject.
- Avoid sending many repeated tests in a short period, because mailbox filters may start grouping or suppressing them.
- Take note of the exact time you submitted the form.
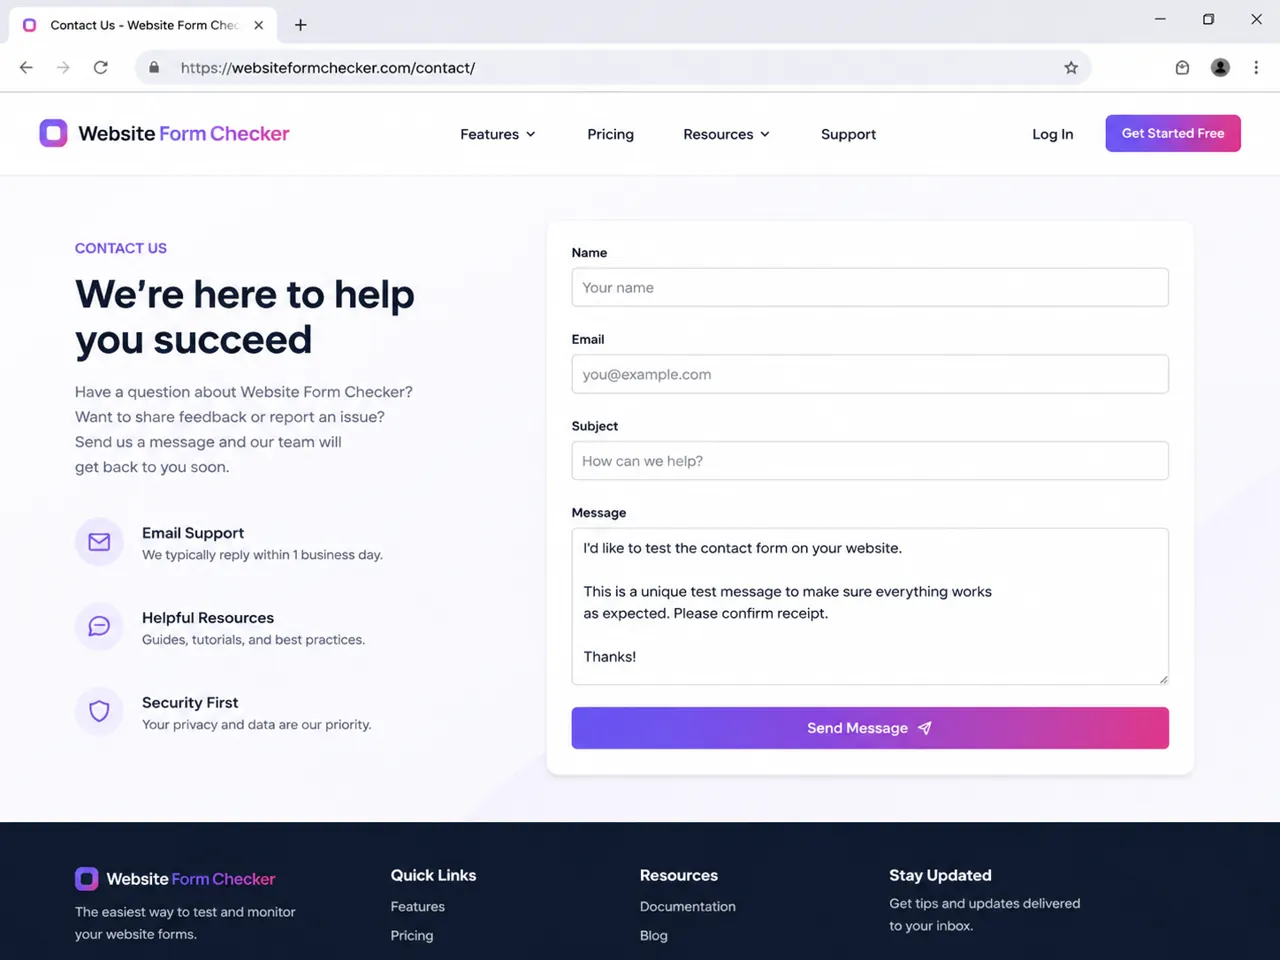
Read the success message correctly
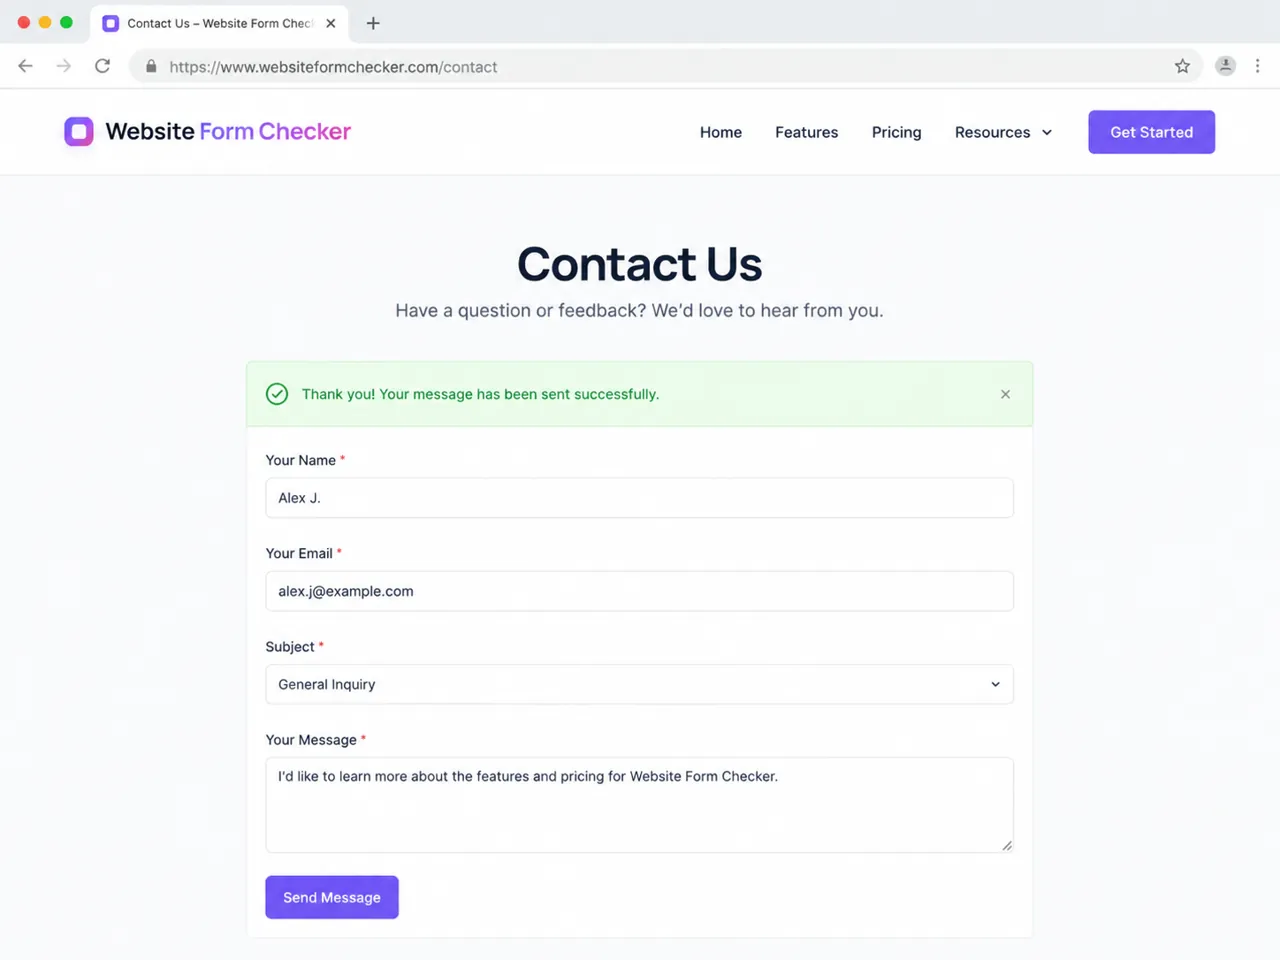
A green success message is useful, but it does not prove that the email arrived. It only tells you that the browser submitted the form and the site returned a successful response. Elementor can still save the submission while the notification email fails after that point.
If the page shows an error instead of a success message, fix the form submission first. Check required fields, field IDs, security plugins, JavaScript errors, caching or minification, and any server firewall rule that might block form POST requests.
If the success message appears, move deeper into Elementor and confirm what should happen after submit.
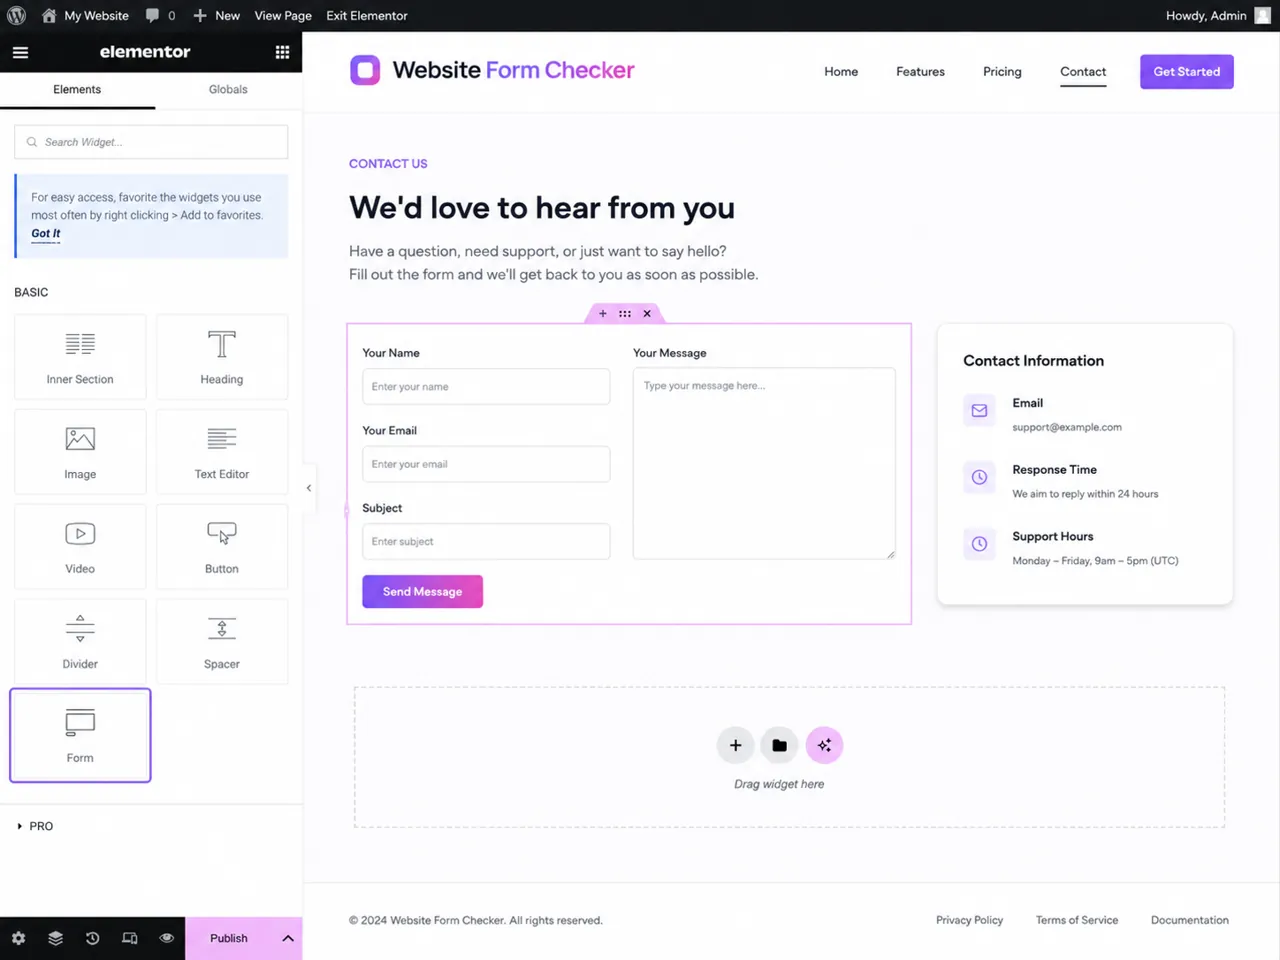
Open the Elementor editor and select the exact Form widget
Edit the contact page with Elementor and click the actual form widget. This is important on pages that contain multiple forms, popups, templates, or duplicated sections. A common mistake is editing one form while visitors submit a different embedded form on the live page.
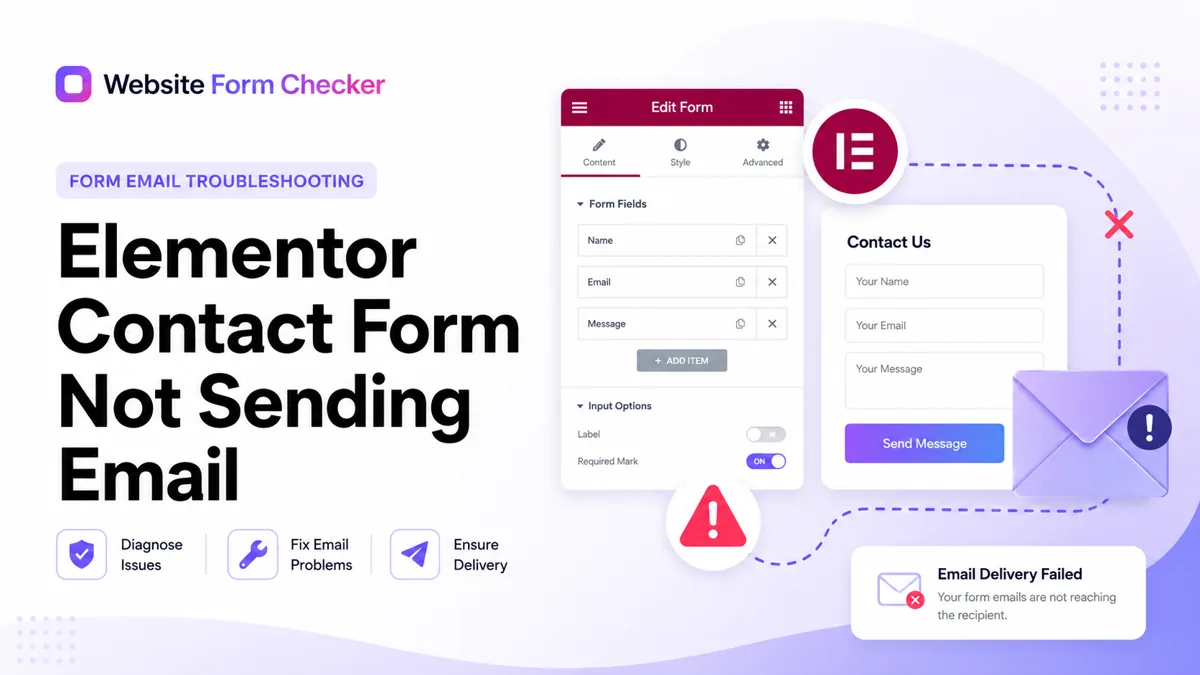
Look for the selected widget border on the canvas and the Edit Form panel on the side. Confirm that the selected widget is the one visitors can see on the published page.
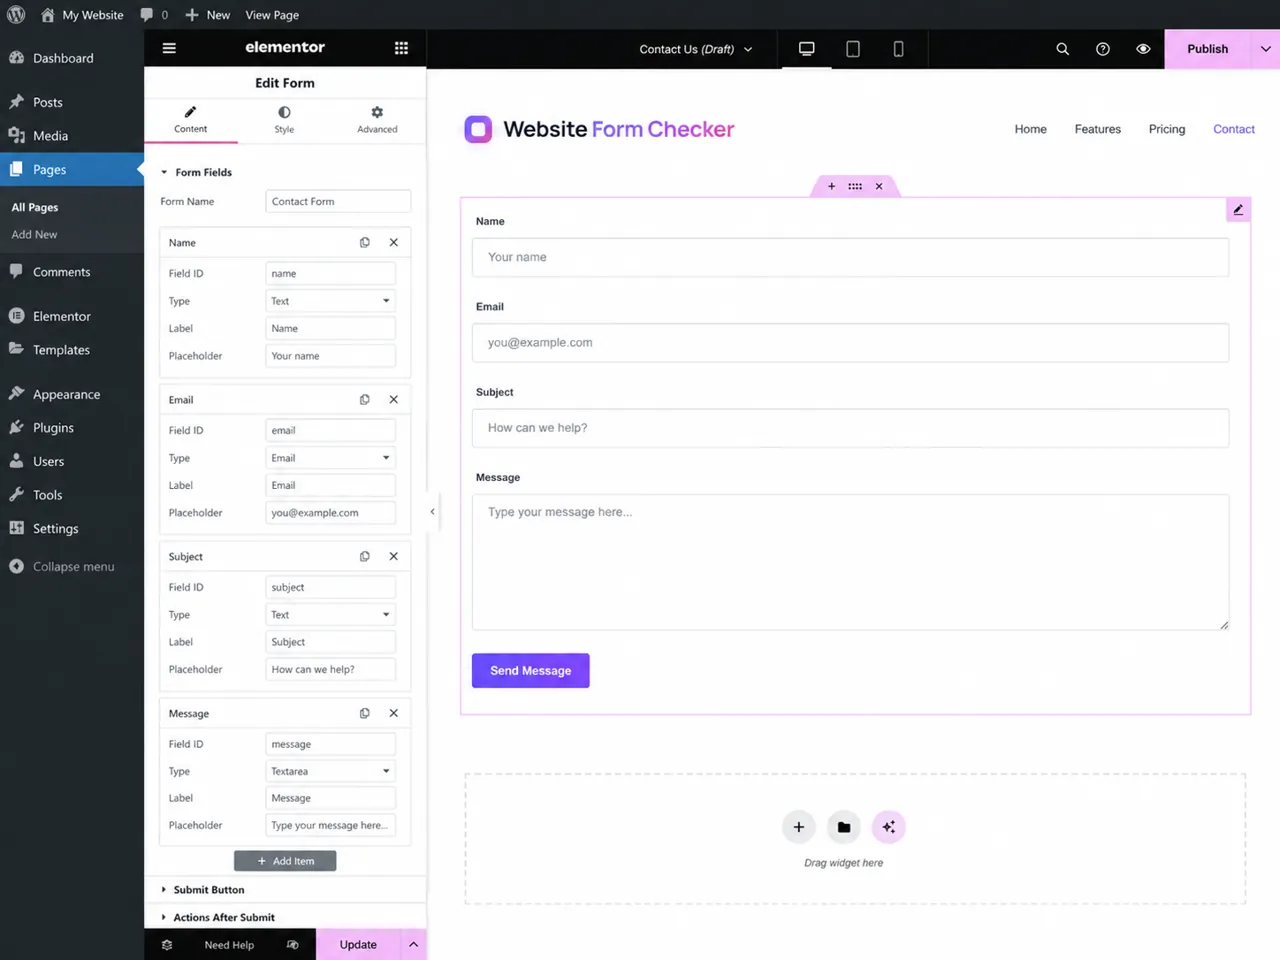
Check form fields and field IDs
In the Form Fields panel, review each field that will be inserted into the email. The labels are what users see, but the field IDs are what Elementor uses when it builds the email content and shortcodes. If field IDs are missing, duplicated, or renamed without updating the email template, the notification can send with blank values or behave unpredictably.
Pay close attention to these fields:
- Name should have a simple ID such as
name. - Email should be an
Emailfield type and have a simple ID such asemail. - Subject should have a clear ID such as
subjectif you use it in the email subject. - Message should have a clear ID such as
message. - Required fields should match what the visitor must complete before submitting.
Avoid spaces, punctuation, and overly complex IDs. If you change field IDs, retest the form and update any email message shortcodes that depend on those IDs.
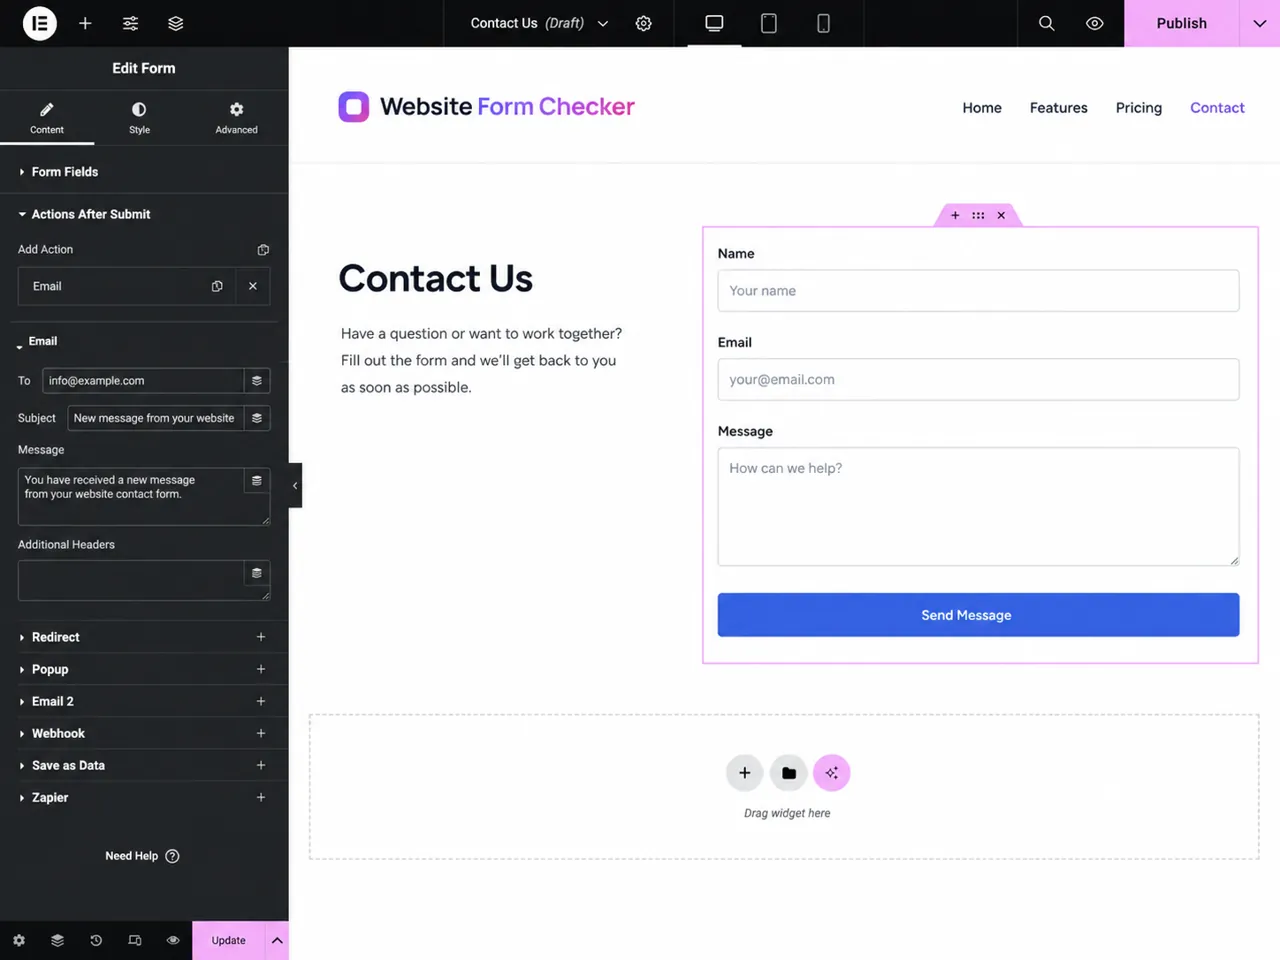
Confirm Email is active under Actions After Submit
Elementor decides what to do after a form is submitted through Actions After Submit. If Email is not selected there, Elementor will not send the admin notification even if all the email fields look correct elsewhere.
Open the Actions After Submit panel and make sure Email is present. If you also want a copy saved inside WordPress, keep Collect Submissions or Save Submissions enabled where available. If you want an autoresponder to the visitor, use a separate Email 2 action instead of mixing admin and visitor notifications into one message.
For many Elementor Pro cases, the issue is simply that the form was copied from another page and the Email action was removed or replaced by another action, such as redirect, webhook, or popup.
Audit the Email action field by field
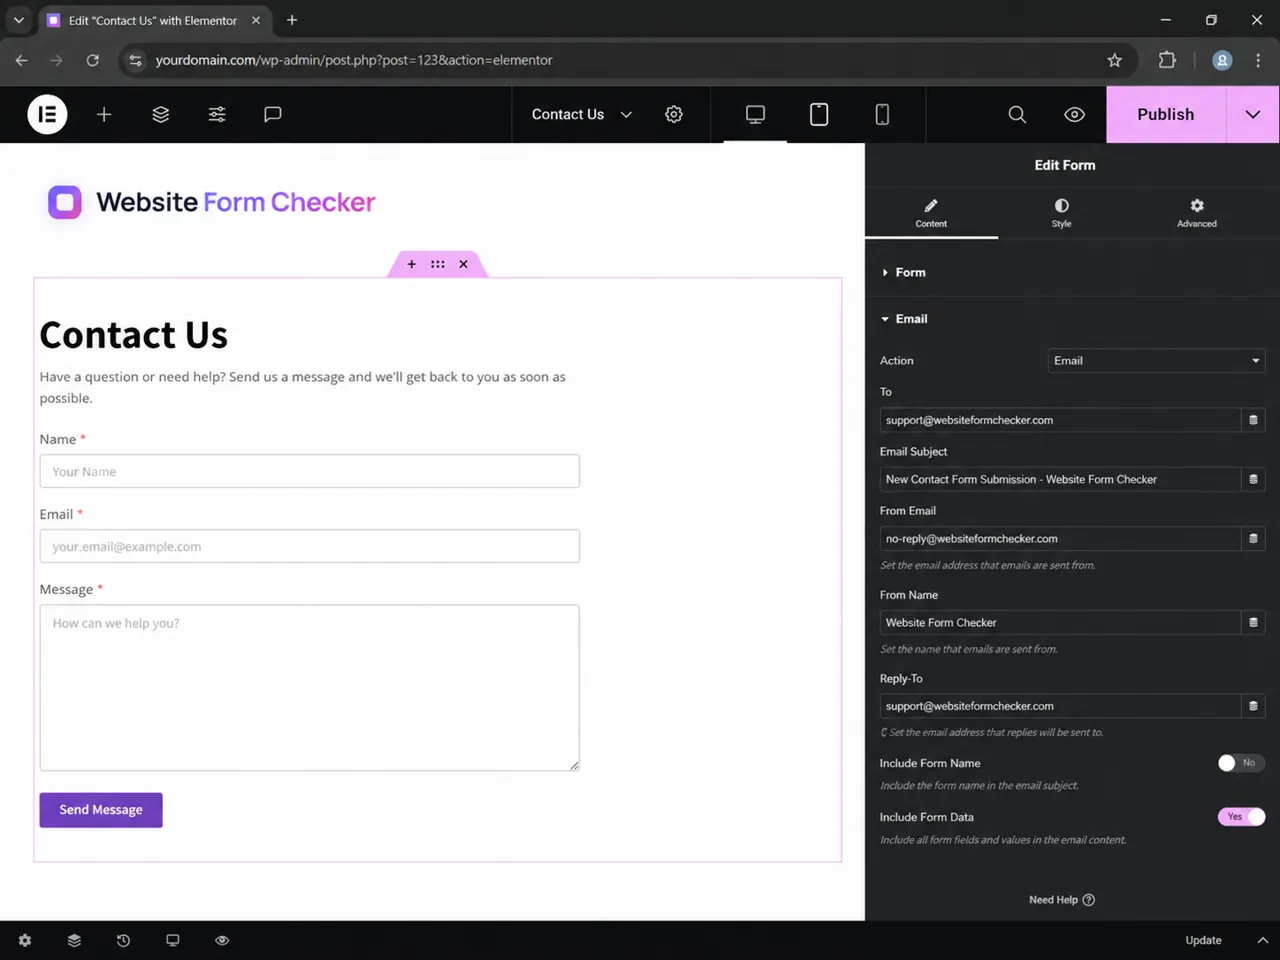
Open the Email action settings and check the values carefully. This is where most Elementor notification problems come from. The safest setup is to send the email from a domain-based address and use Reply-To for the visitor address.
Recommended setup:
To: the inbox that should receive the notification, such as[email protected].Email Subject: a readable subject that includes the form name or test phrase.From Email: a domain-based address, such as[email protected].From Name: the website or business name, such as Website Form Checker.Reply-To: the visitor email field, if the field ID is correct, or a monitored support inbox.
Do not use the visitor email address as the From Email. It may look convenient, but it can make the message appear forged because your website is not authorized to send on behalf of every visitor domain. Use the visitor address as Reply-To instead.
If the problem began after changing the sender address, switch the From Email back to a domain address and retest through SMTP.
Check Elementor Submissions before checking the inbox
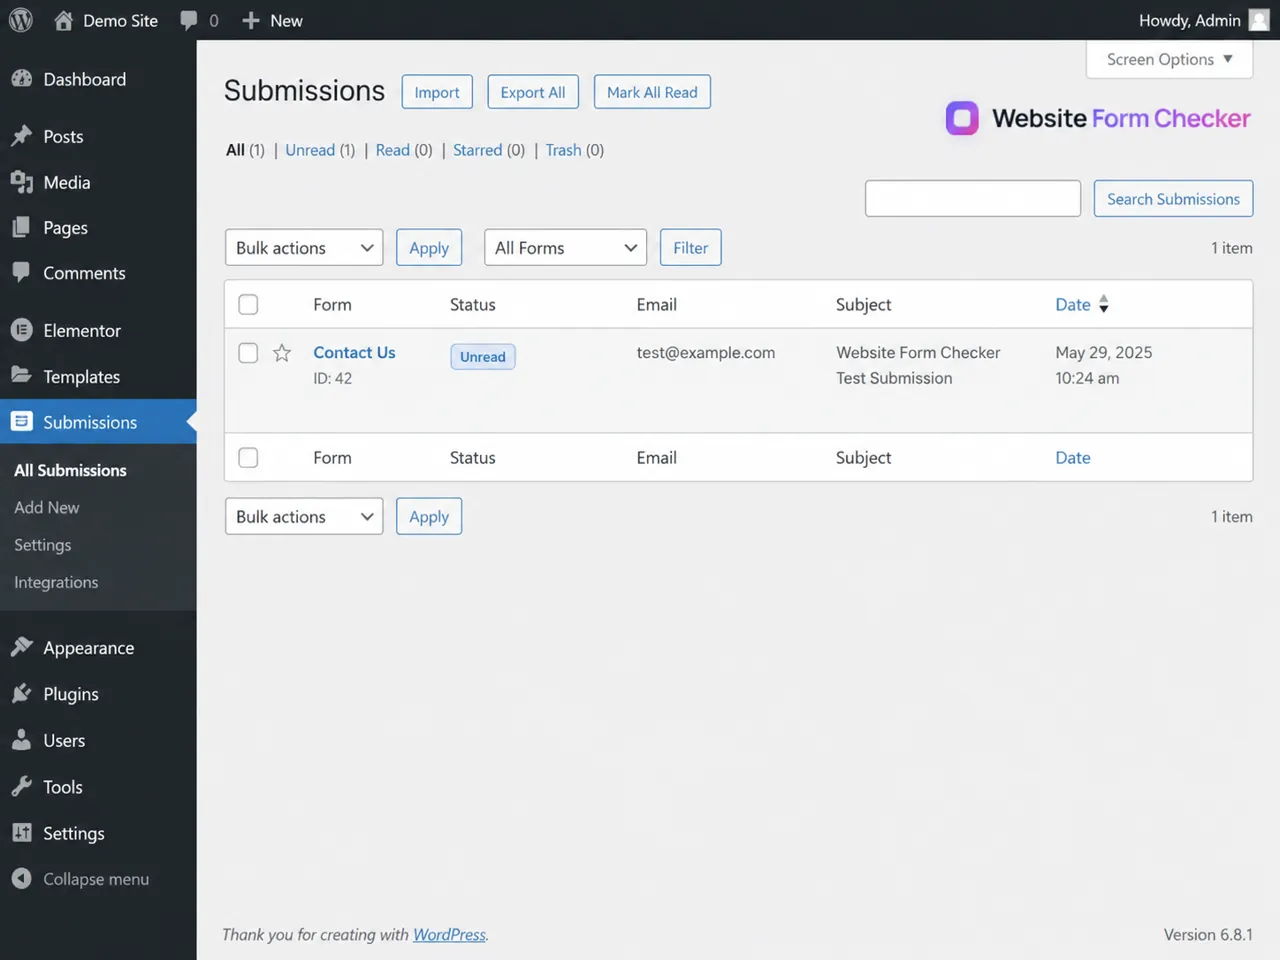
If Elementor saves submissions, the Submissions screen tells you whether the form data reached WordPress. Find the test entry using the form name, date, email address, or test phrase.
There are three useful outcomes:
- No submission saved: the form may not be submitting, or submissions are not enabled.
- Submission saved, no email in log: the Email action may be missing or misconfigured.
- Submission saved and mail log shows an event: the problem is likely at the WordPress mail, SMTP, or mailbox layer.
This step prevents wasted troubleshooting. If the entry is not saved, do not spend an hour searching Gmail. Fix the form submission path first.
Use a mail log to see what WordPress attempted
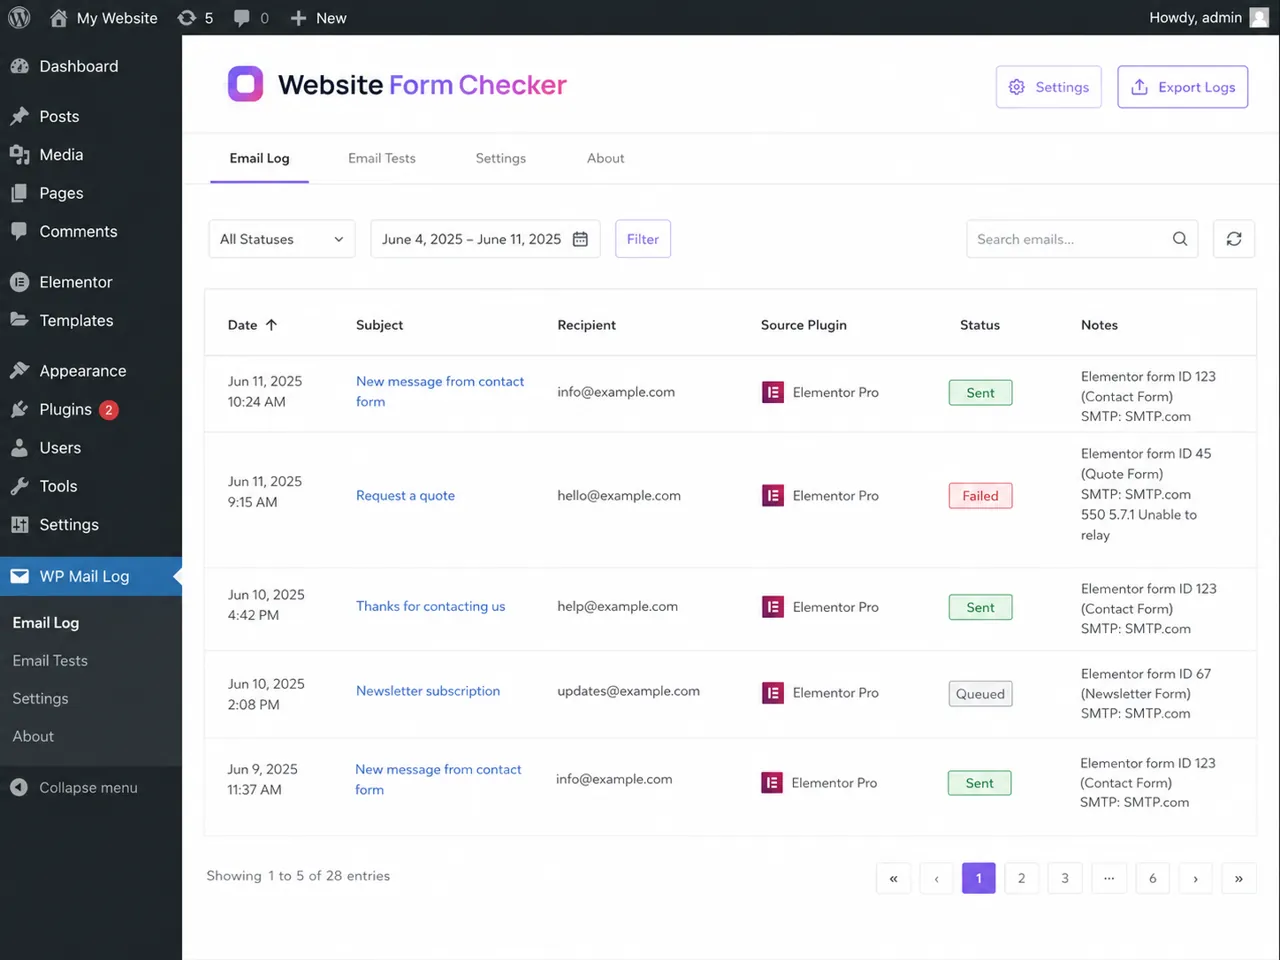
A mail log is the fastest way to separate an Elementor problem from a delivery problem. If the log shows an Elementor Pro form email event, WordPress attempted to send the notification. If the status is Failed or Queued, the log may also show the SMTP response, recipient, subject, or plugin source.
Look for these details in the log:
- The exact timestamp of your test.
- The subject line or test phrase.
- The recipient address used by Elementor.
- The source plugin, such as Elementor Pro.
- The delivery status: sent, failed, queued, or blocked.
- Any SMTP error code or message shown in the notes.
If the log says sent but the inbox is empty, the message may have been accepted by the SMTP provider and then filtered later. If the log says failed, repair the SMTP connection, authentication, sender address, or DNS authentication before retesting.
Search the inbox with the exact test phrase
Do not only refresh the inbox. Search for the exact phrase you typed into the Elementor form. Then search the sender address, subject line, and recipient address. Mail clients can thread messages, filter them into labels, or hide them under promotions, updates, archives, or spam.
Search in this order:
- Main inbox.
- All Mail or archive.
- Spam or junk.
- Promotions, updates, or custom filters.
- The mailbox connected to the
Tofield, not only the site owner email. - Any forwarding mailbox or group alias used as the recipient.
If the email appears in spam, the form is sending but the message reputation needs work. Fix the From Email, configure SMTP, check SPF, DKIM, and DMARC records for the sending domain, and avoid spammy subject lines or repetitive test content.
Match the submission against the received email
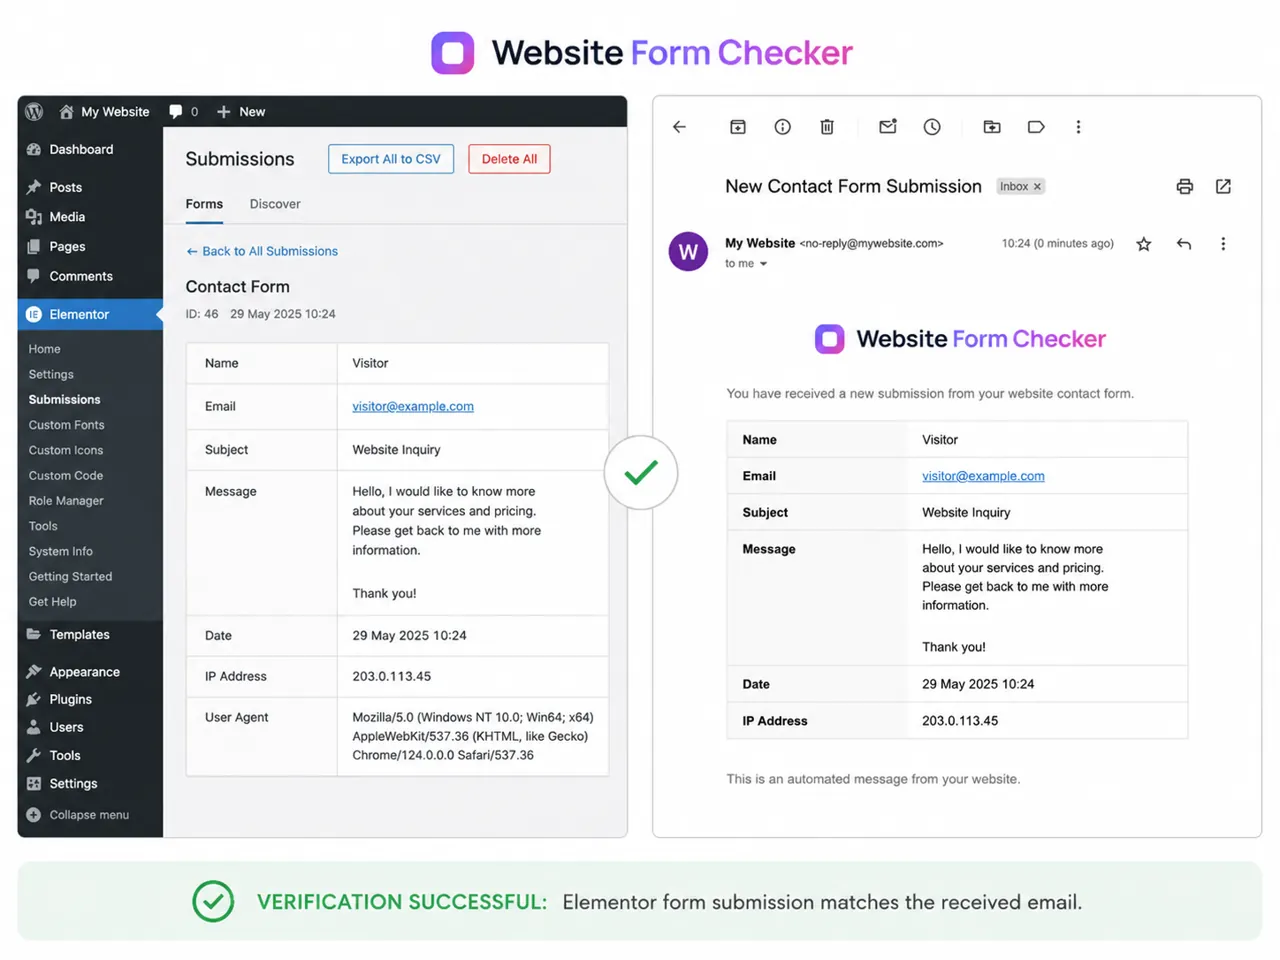
When the email arrives, compare it against the saved Elementor submission. The key fields should match: name, email, subject, message, date, and form name. This is the final proof that the form is not only submitting, but also sending the correct notification data.
If the email arrives but fields are missing, return to the Form Fields and the Email action message template. Missing fields usually point to wrong field IDs, wrong shortcodes, or a custom email body that no longer matches the form.
Troubleshooting matrix
Use this matrix to jump from the symptom you can see to the layer that is most likely at fault.
| What you see | Likely cause | What to check next |
|---|---|---|
| No success message on the page | Front-end form submission is failing | Required fields, JavaScript errors, caching, security plugin blocks, server errors |
| Success message appears but no saved submission | Submissions are disabled or Elementor is not saving entries | Enable submissions if available, check the selected Form widget, retest live page |
| Submission saved but no email log event | Email action is missing or the form action is not configured | Actions After Submit, Email action panel, recipient and subject fields |
| Mail log shows Failed | SMTP or sender authentication issue | SMTP credentials, sender address, mailer settings, DNS records, provider error message |
| Mail log shows Sent but no inbox message | Filtering or deliverability issue | Spam, All Mail, aliases, forwarding rules, quarantine, SPF, DKIM, DMARC |
| Email arrives but fields are blank | Wrong field IDs or mismatched shortcodes | Form Fields panel, message body tokens, Include Form Data setting |
| Visitor gets an email but admin does not | Email 2 or autoresponder is working, admin Email action is not | Separate Email and Email 2 actions, recipient fields, routing rules |
When the problem is not Elementor
Sometimes the phrase Elementor contact form not sending email makes the issue sound like an Elementor bug, but the failure may be outside Elementor. If multiple plugins on the same WordPress site cannot send email, the site mail layer is the real problem. Test a separate WordPress email, password reset email, or SMTP test email to confirm.
Common non-Elementor causes include:
- The hosting server blocks or limits PHP mail.
- SMTP credentials are wrong or expired.
- The
From Emaildoes not match the authenticated sender domain. - The domain is missing SPF, DKIM, or DMARC records.
- A security, anti-spam, or firewall plugin blocks form submissions.
- A caching or optimization plugin breaks Elementor front-end scripts.
- The recipient mailbox has filters, aliases, or quarantine rules that hide the notification.
The cleanest fix for most WordPress form delivery problems is to send site mail through a real transactional mailer or SMTP service. After connecting SMTP, send a plugin test email first, then repeat the live Elementor form test. A successful SMTP test does not automatically prove the Elementor form is configured correctly, but it does prove that WordPress has a working mail route.
A safe retest workflow after every change
Retesting is easier when you change one thing at a time. After each fix, run the same controlled test instead of changing five settings at once.
- Change one setting only.
- Clear page cache if the form page is cached.
- Open the live page in a private window.
- Submit a new test phrase with a timestamp.
- Check Elementor Submissions.
- Check the mail log.
- Search the recipient mailbox and spam folder.
- Record what changed and what the result was.
This workflow turns a vague "Elementor email form not sending" complaint into a documented delivery trail. It also gives your developer, host, or SMTP provider enough evidence to help if the problem is outside WordPress.
Trace it once, then never lose a lead to it again
The best way to fix an Elementor contact form not sending email is to trace the message, not guess at the cause. Start with the live form, confirm the success state, verify the Form widget and field IDs, make sure Email is active under Actions After Submit, audit the sender and recipient fields, then use submissions and mail logs to prove what happened next. Once the saved submission, mail log, inbox search, and opened notification all match, you have proof the form works from the visitor-facing page to the final inbox.
The harder problem is knowing when that path breaks again. Plugin updates, SMTP password changes, DNS changes, spam filters, and hosting changes can all break delivery later without changing how the form looks on the page. That is the gap Website Form Checker is built to watch. It sends real test submissions through your form on a schedule and alerts you if they stop arriving, so you catch the failure before more leads disappear.
Quick checklist
- Email is selected under Actions After Submit.
- The To field uses a valid, monitored recipient address.
- The From Email uses the website domain, not the visitor email.
- Reply-To uses the visitor email field or a valid support inbox.
- Every form field has a unique field ID.
- The email subject is clear and not likely to trigger spam filters.
- The message body includes all fields or the correct shortcodes.
- SMTP is connected and a test email sends successfully.
- The mail log records the Elementor form notification event.
- The inbox and spam folder were searched with the exact test phrase.
Test your form right now, free
Paste your contact form URL. We'll open it in a real browser, find the form, detect spam protection, and tell you whether it's structured to actually deliver submissions. Takes about 20 seconds.
Run a free audit →