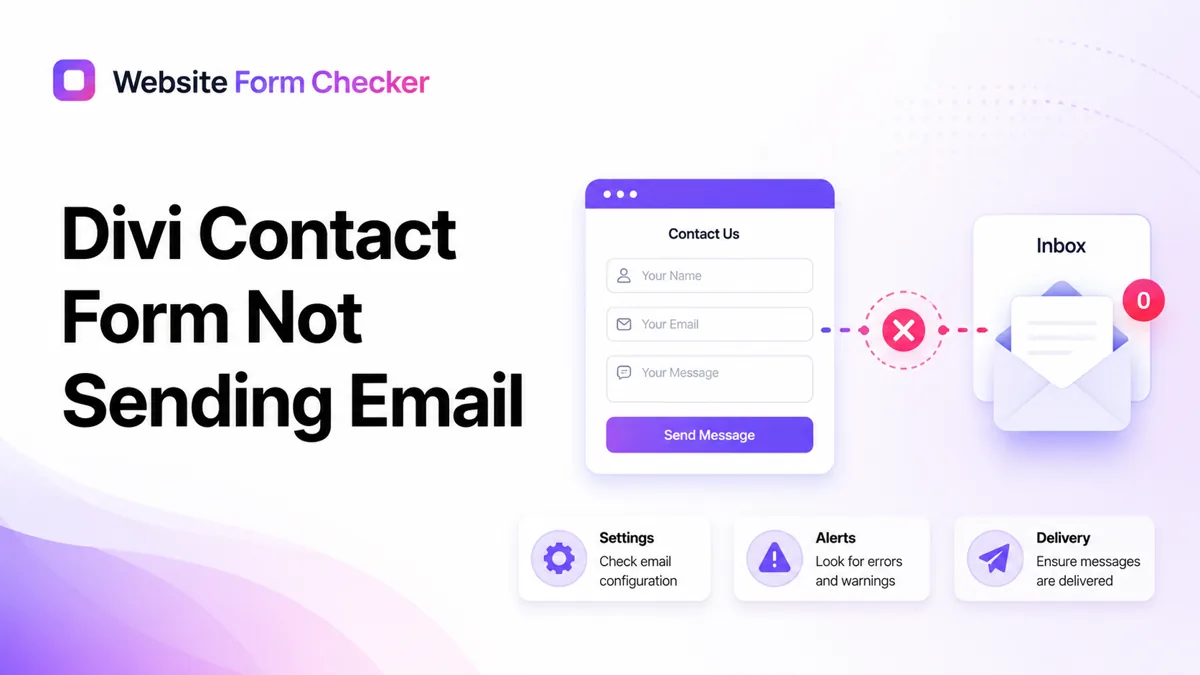
The fastest way to solve a Divi contact form not sending email is to trace one test submission through every step: the live form, the Divi module settings, WordPress mail, the receiving mailbox, and the reply path. Work through the checks below in order so you know exactly where the message stopped. You can also paste your form URL into our free form checker first to see how the form is structured before you start digging.
Start with a traceable test from the live page
Open the published page in a private or incognito browser window. Do not test inside the Visual Builder because cached scripts, admin cookies, and builder previews can behave differently from the page a visitor uses.
Fill out every required field and add a unique phrase that will be easy to search for later, such as Divi delivery test August 2026. Submit the form once and record the time.
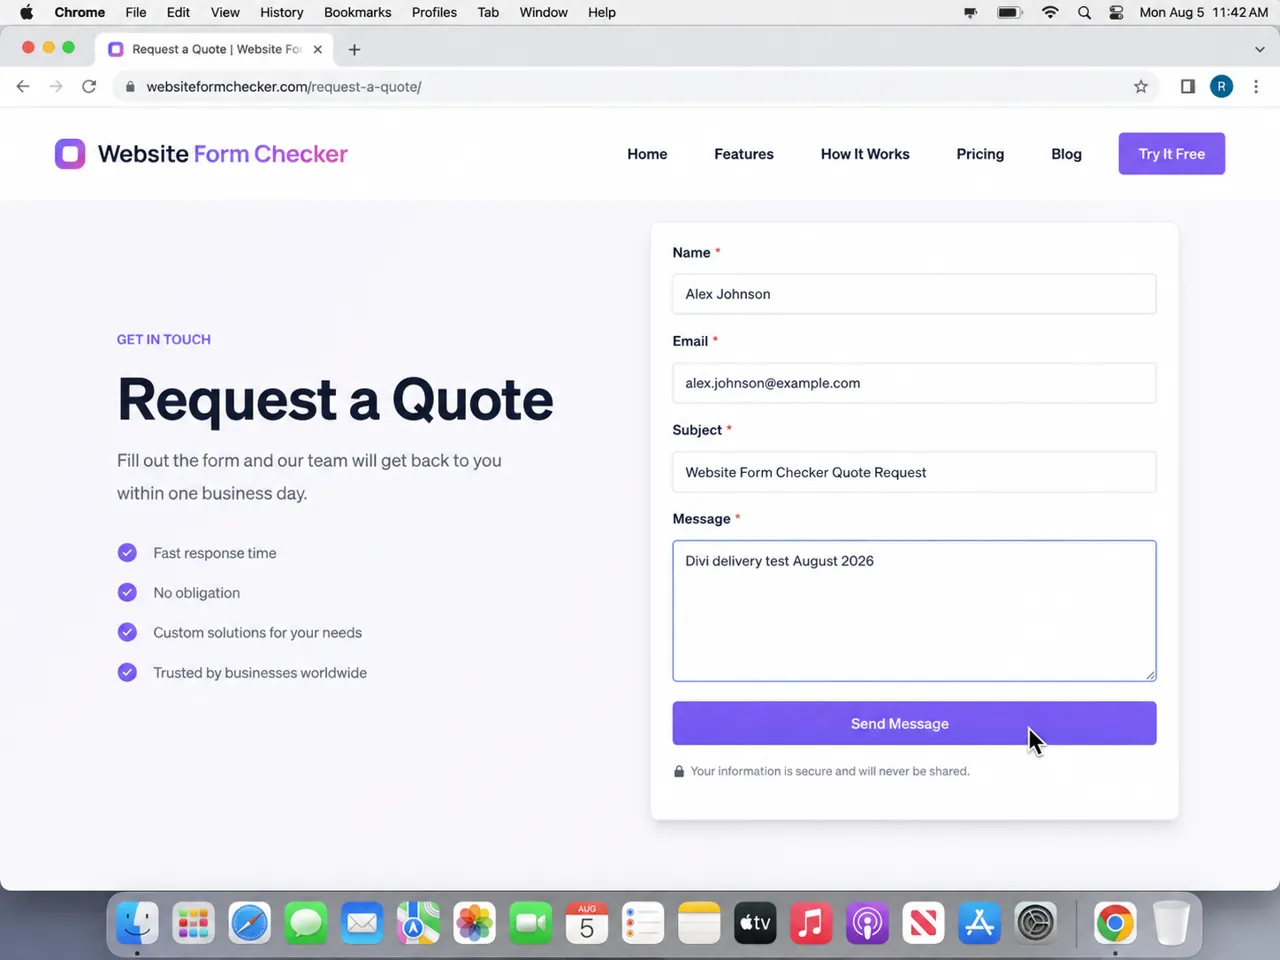
Watch what happens after you click the button. A visible success message or redirect proves that Divi accepted the browser request. It does not prove that WordPress created and delivered the email.
Open the exact Contact Form module that visitors use
Edit the published page with the Divi Visual Builder. Hover over the form and open the Contact Form module settings with the gear icon. This matters on sites that reuse global modules, saved layouts, templates, or duplicated forms. It is easy to edit one copy while the live page uses another.
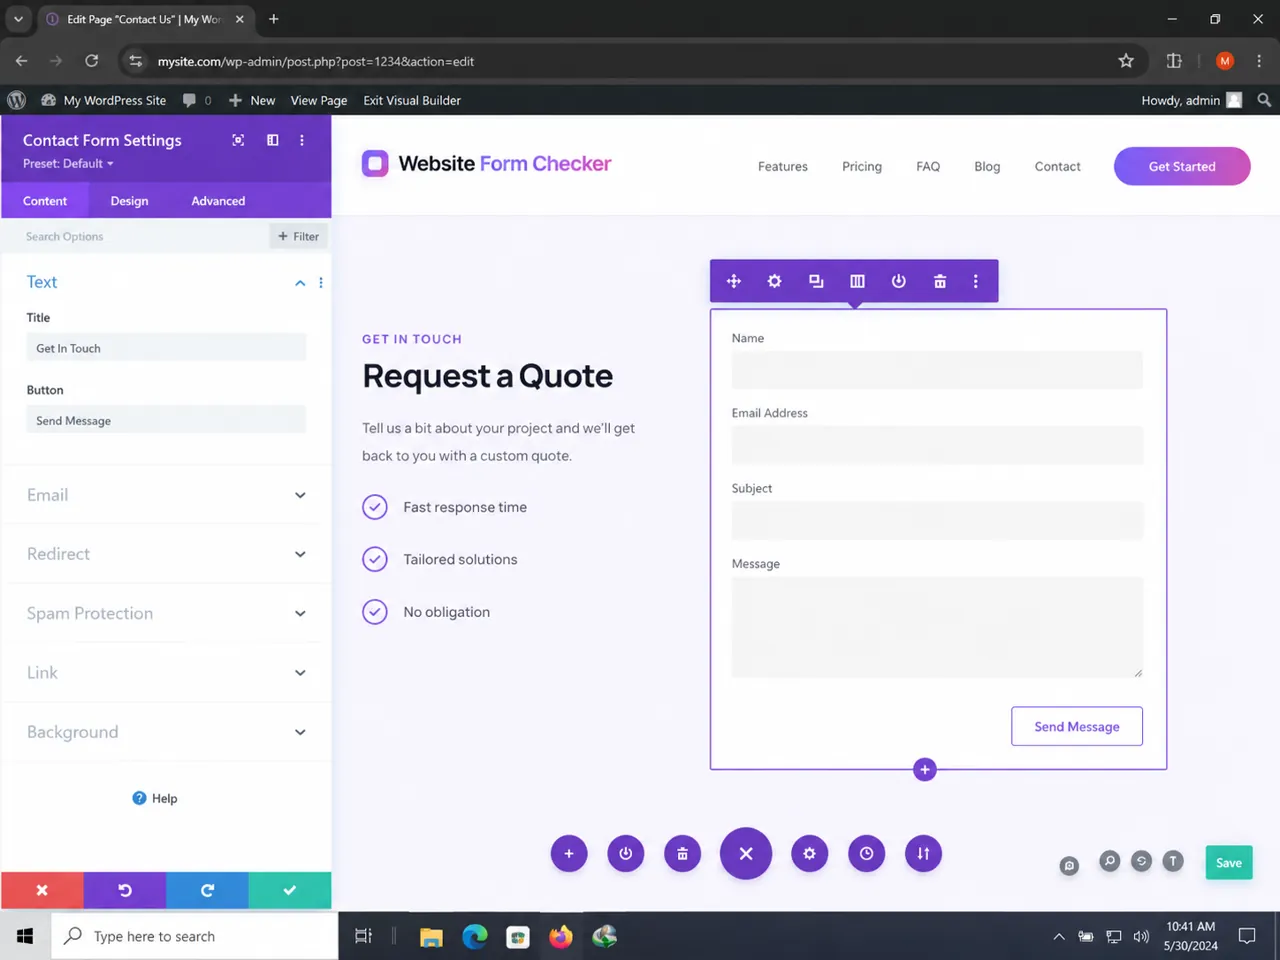
Save the page after every meaningful change, exit the builder, clear any page cache, and retest the public URL. A change that exists only in the builder has not fixed the live form.
Verify the email field and every field ID
Open each field inside the module. The visitor email field should use the Email field type, not a plain text field. Make it required if the business needs a reply address.
Give every field a short, unique Field ID such as name, email, subject, phone, and message. Field IDs are not just internal labels. Divi uses them inside the Message Pattern that builds the email body.
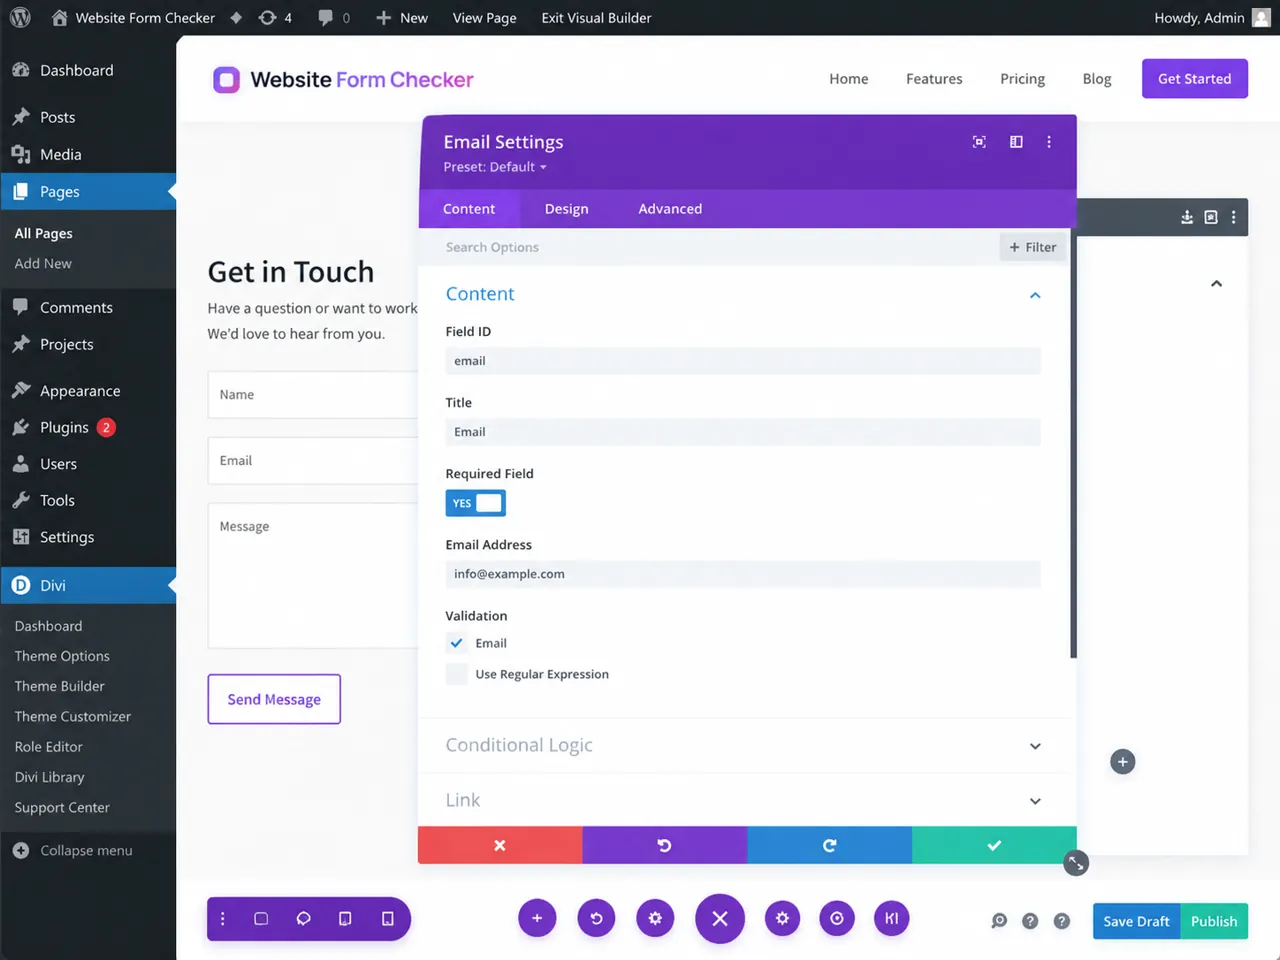
Avoid spaces and punctuation in field IDs. Also treat capitalization as important. If the field ID is email but the Message Pattern calls %%Email%%, the value may not appear because the IDs do not match exactly.
Separate the success message from email delivery
In the Contact Form module, open Content > Text and review the Success Message and submit button text. The message should tell the visitor only that the form was accepted on the page. It should not promise that someone received the email unless you have verified the full delivery path.
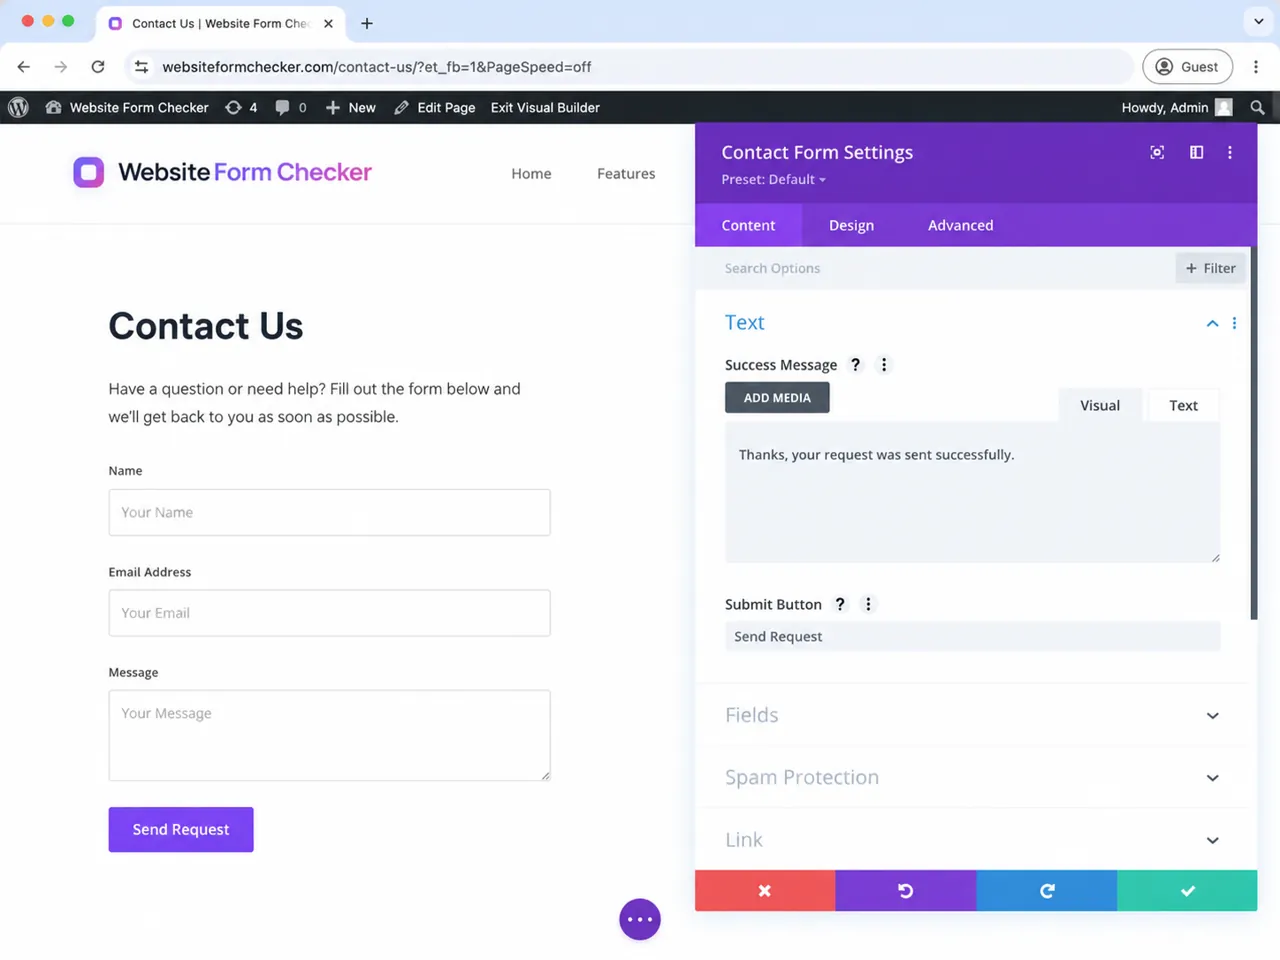
If the form does not show a success state at all, troubleshoot the front end first. Update Divi and WordPress, test without optimization or JavaScript deferral, and look for a visible validation error. A form that never completes cannot send a notification.
Check the recipient and Message Pattern
Open Content > Email. Enter the mailbox that should receive new leads in the Email Address field. If this field is empty, Divi can fall back to the administration email used by WordPress, which may be an old address or a mailbox nobody checks.
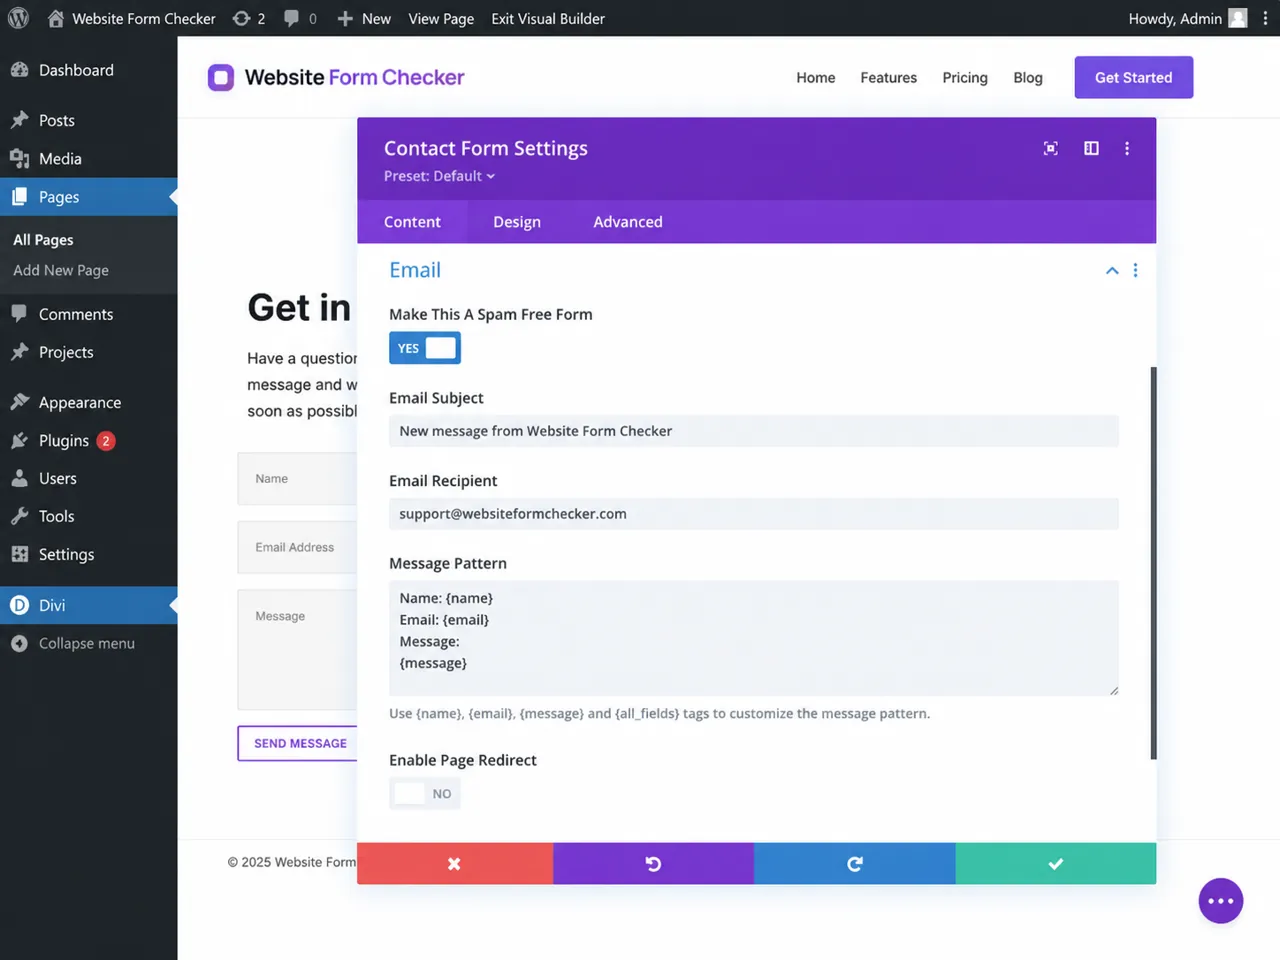
Build a Message Pattern that includes every needed field
Divi uses double percent signs around a field ID. A practical pattern looks like this:
Name: %%name%%
Email: %%email%%
Subject: %%subject%%
Message: %%message%%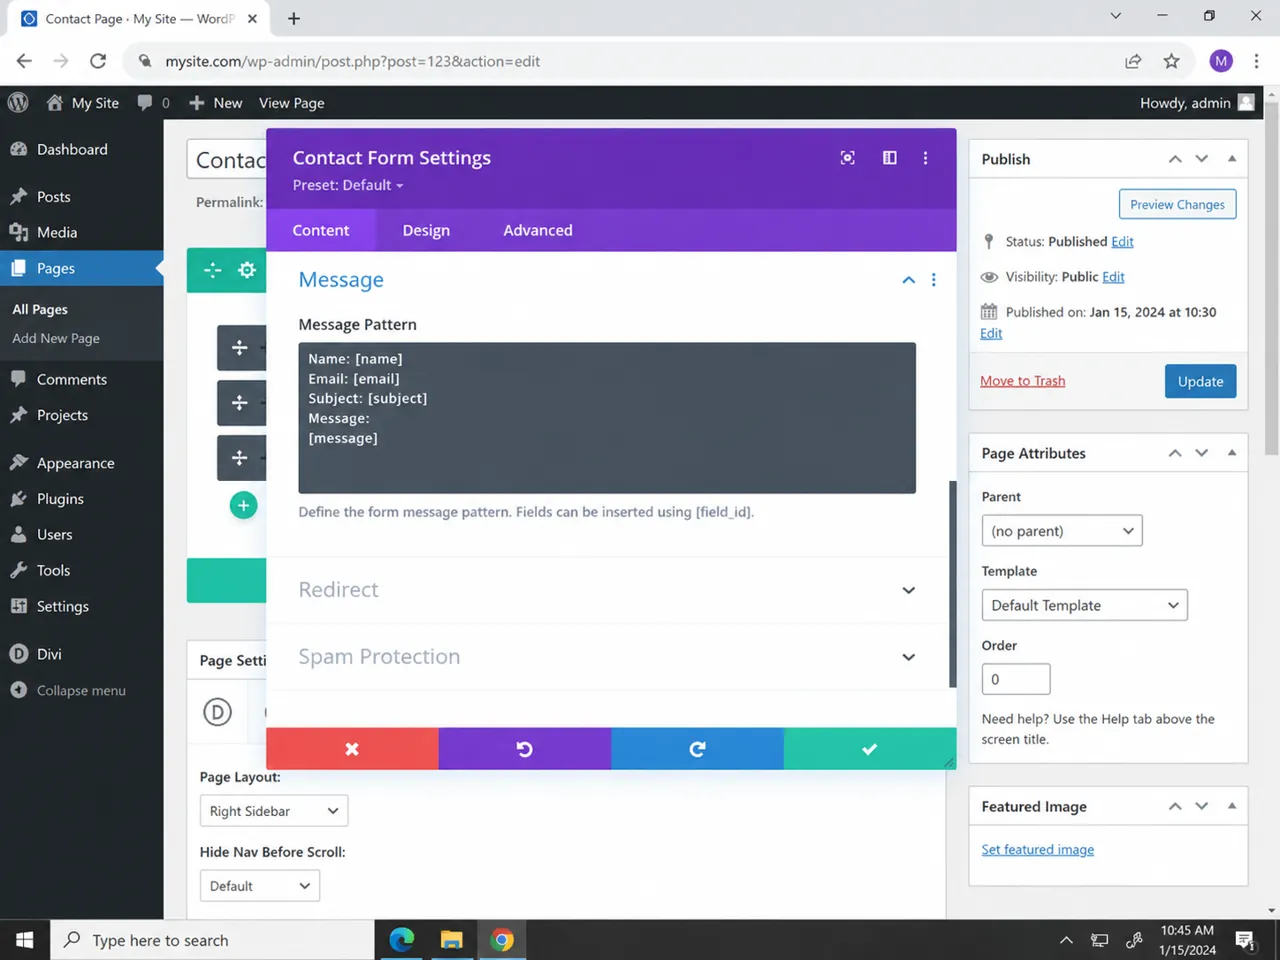
If the notification arrives but important values are blank, compare every token with the Field ID in the matching form field. The standard Message Pattern does not accept HTML, so keep it plain and readable.
Check redirects before you blame email
Divi can display a success message or redirect the visitor to another URL. Open Content > Redirect and confirm that the destination exists, loads normally, and is not blocked by a cache, security rule, or redirect loop.
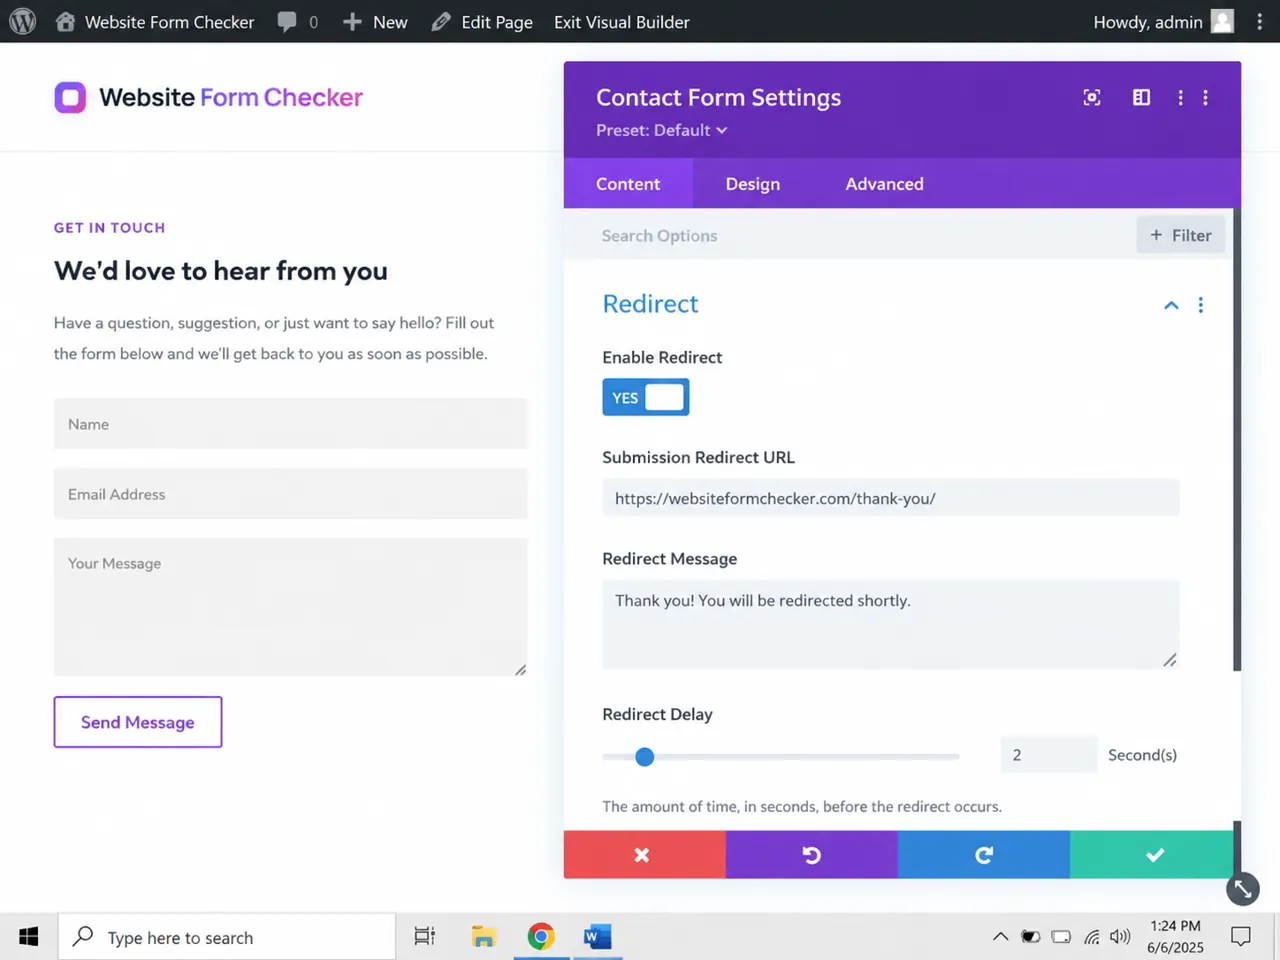
A redirect problem can make a working submission look broken. The reverse is also true: a polished thank-you page can make a broken email path look healthy. Test the redirect and the inbox as two separate results.
Use a mail log to find where the message stopped
The native Divi Contact Form module is centered on email delivery and does not give every site a built-in submissions dashboard. If you already use a database extension, mail log, SMTP plugin, hosting mail log, or transactional email provider, inspect the record for your test time and recipient.
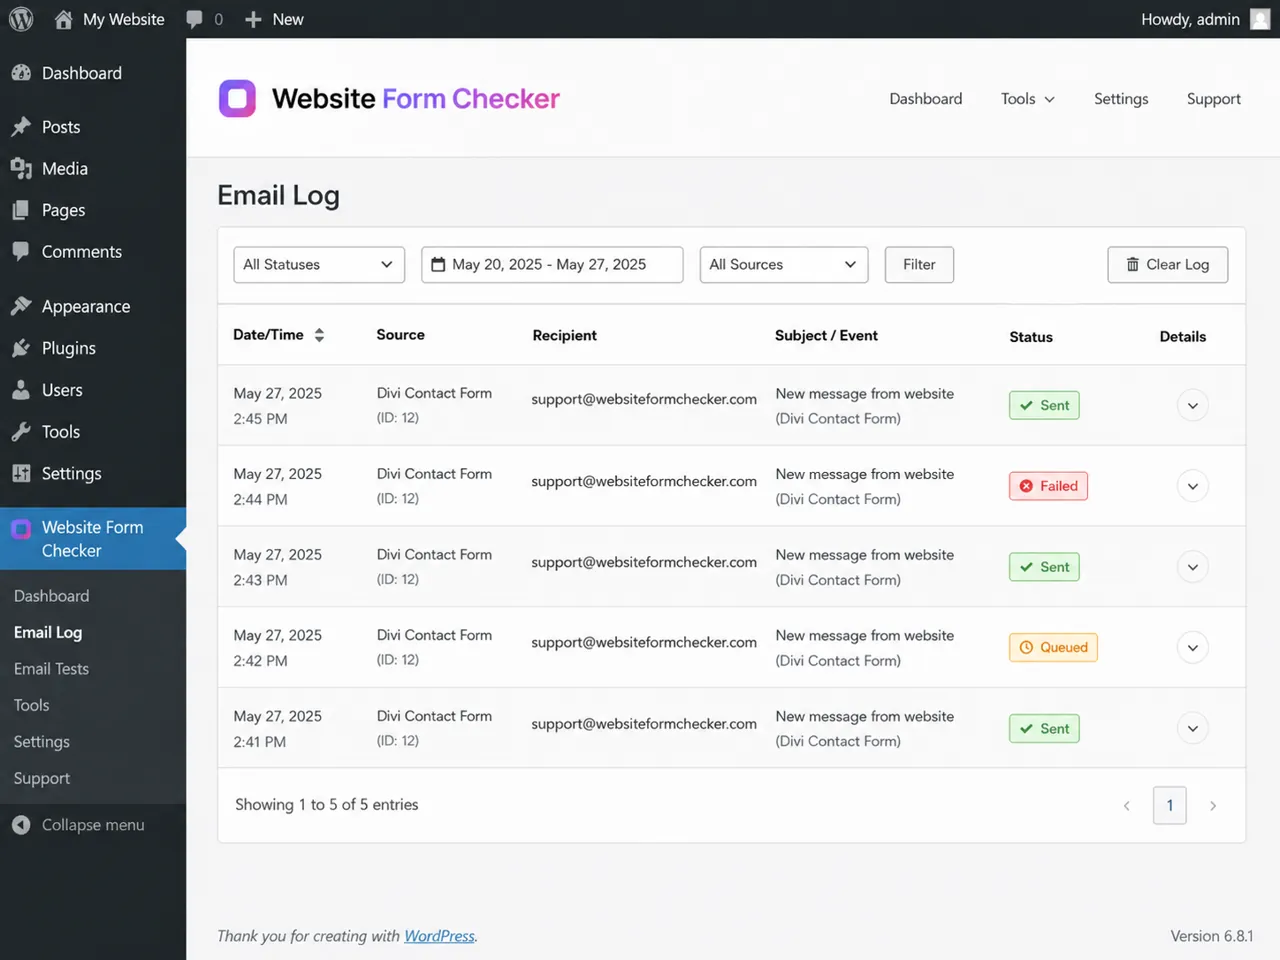
- No log entry: the form may not have completed, a conflict may have stopped it, or the live page may still be serving an old cached version.
- Failed status: open the error details and fix the mailer credentials, sender domain, connection, or recipient rejection.
- Sent status: WordPress handed the message to the mailer. The remaining problem is usually spam filtering, mailbox routing, quarantine, forwarding, or provider rejection.
Also send a test email from your SMTP or mailer plugin. If that test fails, stop changing Divi. Fix WordPress email delivery first. The Divi form depends on the same mail path.
Review spam protection and plugin conflicts
Open Content > Spam Protection. Divi can use its basic captcha or a supported spam protection service. Confirm that the selected account belongs to the current domain and that its keys are valid.
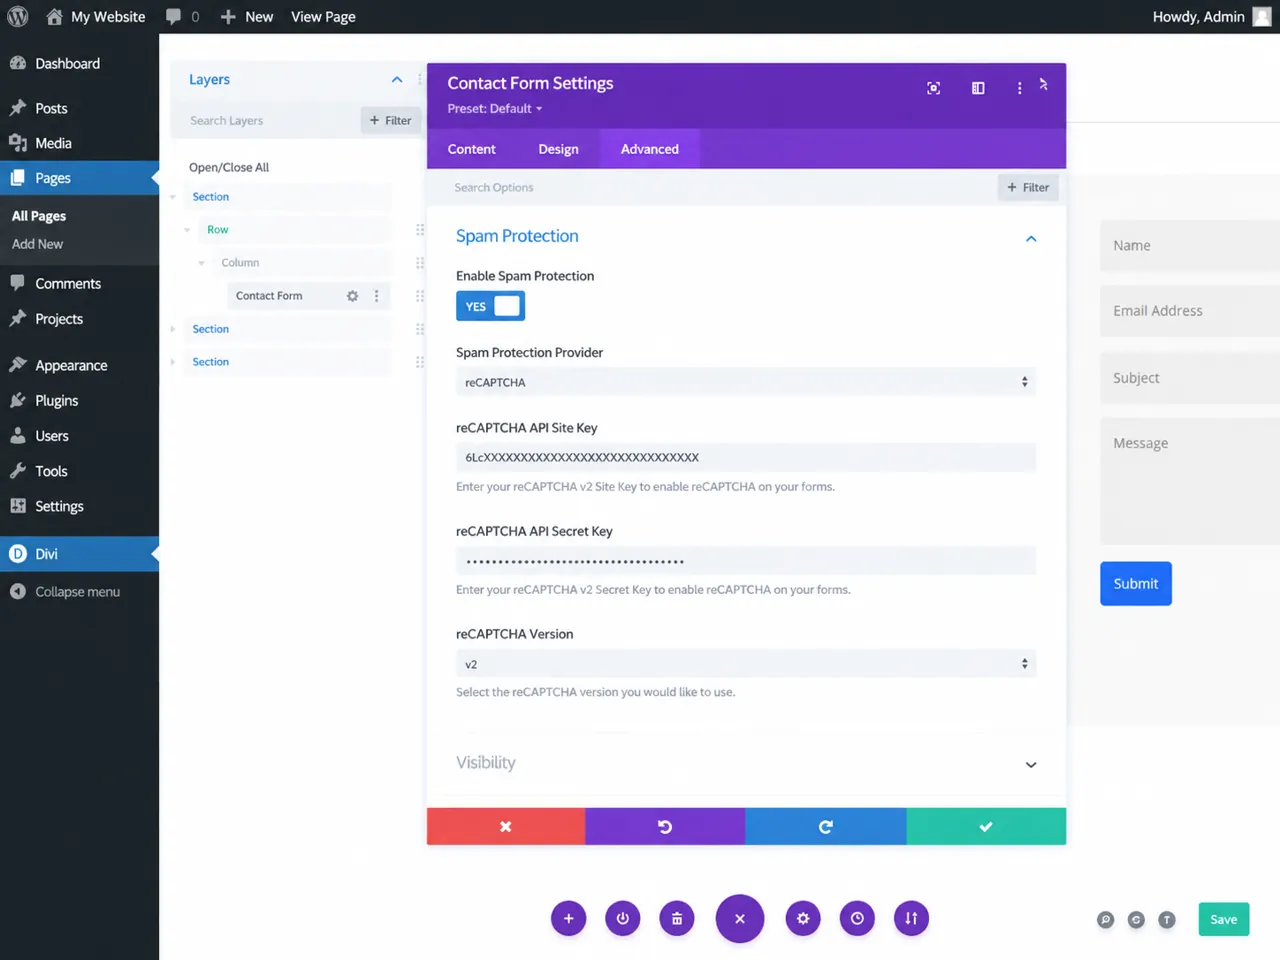
If legitimate submissions fail, temporarily test with the protection option simplified or disabled on a staging copy. Re-enable protection after the test. Also clear caching and optimization, then temporarily disable recently added security, anti-spam, consent, or script optimization plugins one at a time.
Do not leave the live form unprotected. The goal is to identify whether a rule is blocking real visitors, then correct that rule or reconnect the protection service.
Search the mailbox and test the reply path
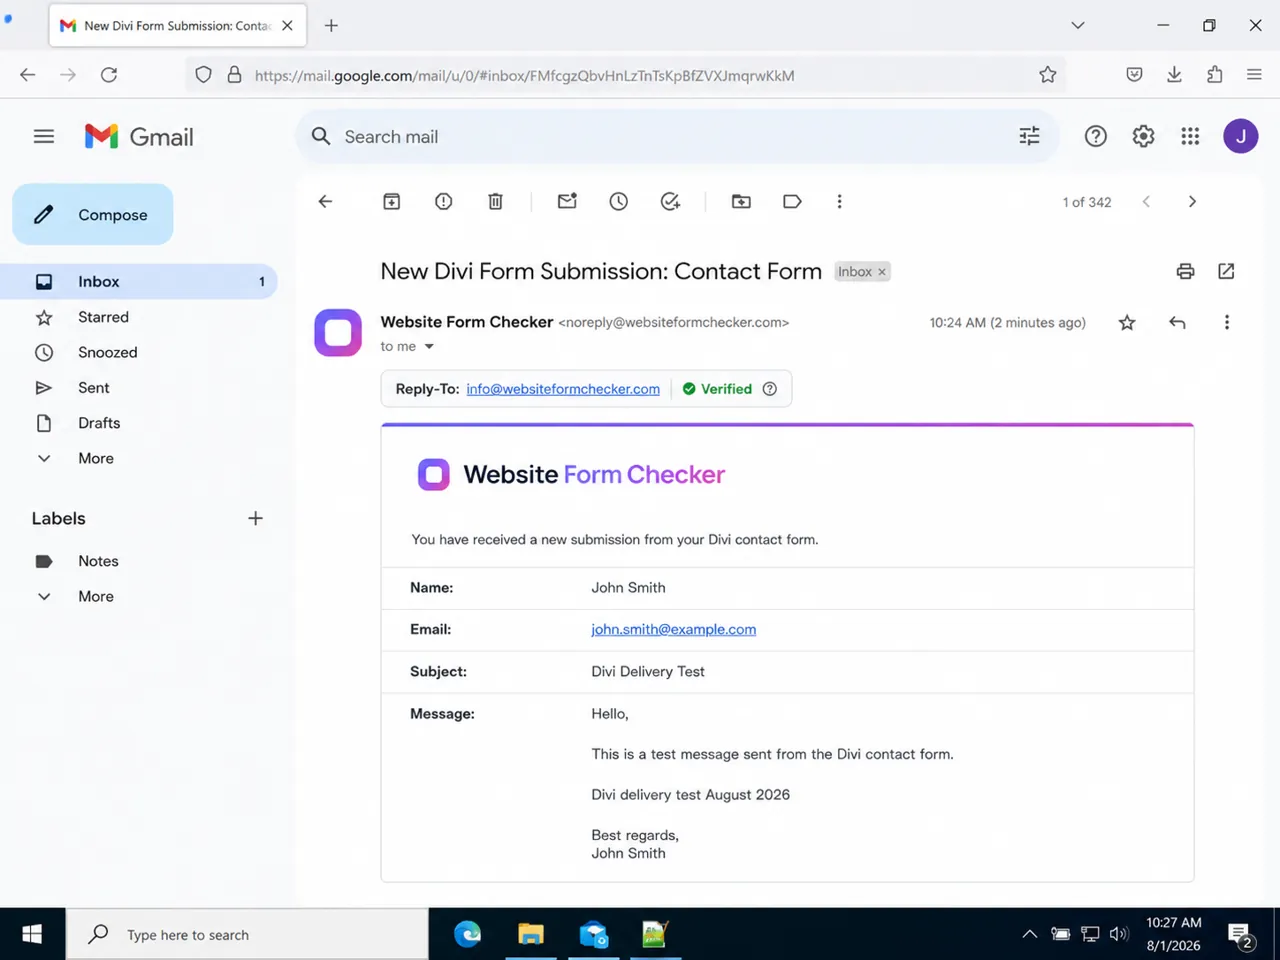
Search the receiving mailbox for the exact phrase from your test. Check the inbox, spam, junk, quarantine, deleted items, forwarding destination, and any rules that move automated messages. Search by the recipient address and submission time if the phrase is not indexed.
The standard Divi module does not expose the same separate From Email controls found in some form plugins. WordPress and your mailer generally control the sender address. The visitor's email field should be available as the reply address, so open the notification and click Reply to confirm it targets the visitor rather than your own site address.
Run one complete click-to-inbox test
After making changes, submit the live form again with a new phrase. A complete pass requires every step below to work:
- The live form accepts the submission without a validation or JavaScript error.
- The success message or redirect appears once.
- The mail log records the correct recipient and a successful handoff.
- The notification reaches the intended inbox with every required field.
- Reply opens a message addressed to the visitor's email.
Do not stop after the SMTP test email succeeds. That proves the mailer can send a basic message. The final proof is a real submission through the same Divi form a customer uses.
Keep the form from failing silently again
Once the Divi contact form is working, the next risk is not knowing when it breaks again. A Divi update, SMTP password change, DNS edit, spam rule, security plugin, or email provider change can interrupt delivery later without changing how the form looks on the page.
Website Form Checker can send real scheduled submissions through the live form and alert you if the messages stop arriving. That turns a hidden delivery failure into something you can investigate before more leads disappear.
Divi email delivery checklist
- Test the published form in a private browser window.
- Use a unique phrase and record the submission time.
- Confirm you are editing the same Contact Form module used on the live page.
- Check the email field type, required setting, and exact Field IDs.
- Verify the success message or redirect separately from email delivery.
- Enter the correct recipient in Content > Email.
- Use
%%field_id%%tokens in the Message Pattern. - Check the mail log or SMTP provider for the delivery status.
- Review spam protection, caching, security, and optimization conflicts.
- Search spam, quarantine, forwarding, and inbox rules.
- Submit one final live test and verify the Reply-To address.
Test your form right now, free
Paste your contact form URL. We'll open it in a real browser, find the form, detect spam protection, and tell you whether it's structured to actually deliver submissions. Takes about 20 seconds.
Run a free audit →